Download
1 / 33
330 likes | 458 Vues
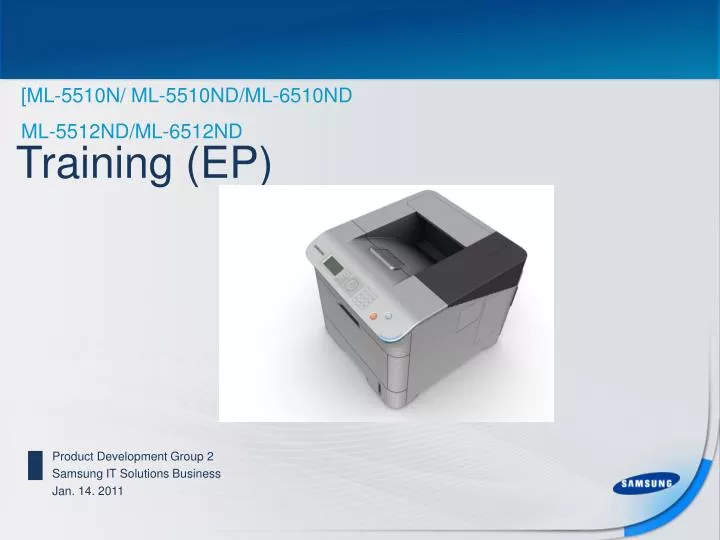
[ML-5510N/ ML-5510ND/ML-6510ND ML-5512ND/ML-6512ND. Training (EP). Product Development Group 2 Samsung IT Solutions Business Jan. 14. 2011. General Specification Process Troubleshooting. Contents. Ⅰ. General Specification. Objectives. Ⅰ. Understanding the general specifications of

E N D
[ML-5510N/ ML-5510ND/ML-6510ND ML-5512ND/ML-6512ND Training (EP) Product Development Group 2 Samsung IT Solutions Business Jan. 14. 2011
General Specification • Process • Troubleshooting Contents
Ⅰ. General Specification Objectives Ⅰ. Understanding the general specifications of CRU of SCX-5510/6510 Ⅱ. Comprehension of the feature of major elements
Ⅰ. General Specification Overall Spec. Feature Drum Cartridge Toner Cartridge Size(WxDxH) 340x86x165mm 356x145x125mm Weight(Net) 2.57 kg 1.22kg Capacity 80K 30K Amounit of Developer/Toner Developer 400g Toner 625g Development Method Non Magnetic Two Component type
Ⅰ. General Specification Drum Cartridge Φ 30 Organic Photo Conductor (OPC) Drum Type UCL(Under Coated Layer) Coated Type Developer Roller Φ 25Magnetic Roller Charge Roller Charger Type Charger Roller Cleaner Urethane Cleaning Roller OPC Cleaning type Double Blade Cleaning (Rubber Blade) (Main Counter Blade and Sub Trail Blade) Carrier + Toner (400 g) Developer CRUM N-CRUM Type
Ⅰ. General Specification Toner Cartridge Toner Supply Type Auger Feed Type Toner Type Non Magnetic Polymerization Toner Paddle One Paddles + Film Type Waste Toner Independent Waste Toner Bottle N-CRUM Type CRUM
Ⅰ. General Specification Review Ⅰ. What is the development method of CRU of SCX-5510/6510
Ⅱ. Process Objectives Ⅰ. Understanding the basic structures and operating principle of each parts Ⅱ. Studying the printing process and electro-photographic process Ⅲ. Comprehension of System Layout
Ⅱ. Process ORIGINAL DOCUMENT CONVERT TO THE PRINTER LANGUAGE ELECTRICAL SIGNAL DRIVER PC CONVERT TO THE BITMAP IMAGE RECOVERY TO THE ORIGINAL IMAGE CONNECTIVITY CONTROLLER LSU 2.EXPOSURE 3.DEVELOPMENT 1.CHARGING 5.FIXING 4.TRANSFER LSU
Ⅱ. Process System Layout
Ⅱ. Process Drum Cartridge Layout Cleaning Roller Charge Roller Sub Cleaning Blade Main Cleaning Blade Mixing Screw Auger OPC Mixer Magnetic Roller
Ⅱ. Process Toner Cartridge Layout Paddle A Film Toner Feed Auger
Ⅱ. Process Toner Cartridge, Drum Cartridge, WTB Imaging Unit WTB Toner Cartridge
Ⅱ. Process 1. Basic Electro-photographic Process
Ⅱ. Process 2. System Specification 2-1. OPC Section • OPC Type : UCL Type (Φ30) • Life : 80K Pages (in accordance with simplex mode) • V0 = -600 (V) • VL = -150 (V) • Process Speed : 381 mm/sec 2-2. Development Section • Development Roller : Magnetic Roller with Sleeve (Φ25) • Development Method : Non magnetic Two Component Type • Carrier(Ferrite Type) + Toner(Non magnetic Pulverized Toner) : 400 g • Vbias = -500 (V) • Speed (vs OPC) 1: 1.6
Ⅱ. Process 3. System Specification 3-3. Mixer Section • Type: Mixer + 2 Mixing Screw Type • High Speed Mixing type • Roll of Mixer : • 1) Circulation of Developer • 2) Supply Developer to Magnetic Roller 3-4. Charger Section • Type: Charge Roller Type (Φ18) • Cleaning Method : Urethane Cleaning Roller (Contact Type) • MHV : -1260 (V) • Pressure Type : Two Spring (End of Roller Shaft)
Ⅱ. Process 3. System Specification 3-5. Toner Cartridge Section • Toner Type : Non Magnetic Polymerization Toner (625 g) • Supply Type : Feed Auger • Supply Method : DC Motor by Pulse control 3-6. CRUM Section • Type: N-CRUM Type • Function : • 1) Interface with machine and cartridge • 2) Storage (Cartridge Information…etc)
Ⅱ. Process Review Ⅰ. What is the function of CRUM ? Ⅱ. Do you know life of OPC? Ⅲ. Do you know the toner supply method?
III. Troubleshooting Objectives Ⅰ. Building ability to deal with various problems raised in the field by reviewing troubleshooting Ⅱ. Check the solution of each problem.
III. Troubleshooting Periodic Defective Image
III. Troubleshooting Check and Cause Solution If causes 1 and 2 occur in the Imaging Unit, replace the Imaging Unit and try to print out. 1. Damaged develop roller or Cleaning Blade in the Imaging Unit. - Scratched surface 2. Scratched surface of the OPC in the imaging unit. 3. Partly depression or deformation on the surface of the transfer roller. Replace the transfer roller if occurred as No. 3. a. Vertical Black Line and Band ▪ Description 1. Straight thin black vertical line occurs during printing. 2. Dark black vertical band occurs during printing.
III. Troubleshooting b. Vertical White Line ▪ Description White vertical voids in the image. Check and Cause Solution Foreign matter stuck onto the window : Clean the LSU window with recommended cleaner (IPA) Clean the window with a clean cotton swab. Foreign matter stuck onto the window of internal lenses of LSU mirror or Light Path. Foreign matter between the magnetic roller and blade in the imaging unit. In Case the life of the imaging unit has been expired, white line or light image occurred Check the life of Imaging Unit replace the Imaging Unit and try to print out. It may occur when Burr and foreign substances are on the window of Imaging Unit frame. Remove the foreign matter and burr of the exposure window. If the fuser is defective, voids occur periodically at the top of a black image. Open the front cover and check ribs that corresponds to the position of the voids. Remove if found. If the problems are not solved, replace the Imaging Unit. If may occur when foreign substances are on the OPC Drum
III. Troubleshooting Check and Cause Solution Bad contacts of the voltage terminals Between Imaging Unit and Machine. Clean each voltage terminal of the Charge. Develop, OPC Gnd and Transfer roller. (remove the toner particles and paper particles) The rollers of Imaging unit may be stained. OPC Drum = 94.4 mm Charge Roller = 50 Mm Magnetic Roller = 49 mm Transfer Roller = 57.8 mm If the malfunction persists, replace the Imaging Unit or Transfer Roller. c. Horizontal Black Band ▪ Description Dark of blurry horizontal stripes occur in the printing periodically. (They may not occur periodically.)
III. Troubleshooting Check and Cause Solution If dark or blurry black spots occur periodically, the rollers in the Imaging Unit may be contaminated with foreign matter or paper particles. ( Charge roller : 50 mm interval, OPC Drum : 94 mm interval ) Clean each voltage terminal of the Charge. Supply, Develop and Transfer roller. (remove the toner particles and paper particles) If faded areas or voids occur in a black image at intervals of 94 mm, or black spots occur elsewhere , the OPC drum surface is damaged. In case of 94 mm interval, Cleanly remove foreign substances stuck on the OPC location equivalent to black spots and white spots with a dry duster. If a black image is partially broken, the transfer voltage is abnormal or the transfer roller’s life has expired. The transfer roller guarantees 100,000 sheets printing. the roller’s life is expired, replace it. In case of 50 mm interval, take measures as to replace the Imaging Unit cartridge and try to print out. Clean the inside of the set against the paper particles and foreign matter in order not to cause the trouble. d. Black and White Spot ▪ Description 1. Dark or blurry black spots occur periodically in the printing. 2. White spots occur periodically in the printing.
III. Troubleshooting Check and Cause Solution Image is looking like low resolution. Check if the Toner Save mode is off. Ambient temperature is below than 10℃. Replace the Imaging Unit and try to print out. Toner is not supplied form Toner Cartridge . Check if toner supply motor works normally or not. Replace Toner Cartridge and try to print out the sample page more then 20pages. Abnormal output from the HVPS. Clean up the contaminated area by the toner. Replace the HVPS if the problems are not solved by the above four directions. e. Light Image ▪ Description The printed image is light, with no ghost.
III. Troubleshooting f. Dark Image or a black ▪ Description The printed image is dark. Check and Cause Solution Check if the high voltage terminal is contaminated Remove the imaging unit and Clean the high voltage terminal The charging roller is defective. Replace the imaging unit Charge voltage is not turned on due to the bad contacts between power supply in the side of the imaging unit and charge terminal of HVPS. Check the state of the connector which connects the engine board and HVPS. Replace the HVPS if not solved by the above direction 1 and 2.
III. Troubleshooting g. Uneven Density ▪ Description Print density is uneven between left and right. Check and Cause Solution The pressure force on the left and right springs of the transfer roller is not even, the springs are damaged, the transfer roller is improperly installed, or the transfer roller bushing or holder is damaged. Replace both the left and right Spring Holder. The toner level is not even on the imaging unit roller due to the bad blade. Occur in the imaging unit, replace the imaging unit and try to print out 20 pages.
III. Troubleshooting Check and Cause Solution Does character exist less than 2% per a page, and hasn’t it been used long time? The toner cartridge is basically designed to print 10,000 sheets with about 5% image. Does recycle paper be used? if using recycle paper, try another paper. Has the life span of the imaging unit ended? Replace the imaging unit when the life span of it has been ended. Is the ambient humidity condition too high? Recommend temperature rage is between 15 and 25, Humidity is between 30%~60% Is the HVPS normal? Replace the HVPS. If the problem is still not solved, Replace the Imaging Unit h. Background ▪ Description Light dark background appears in whole area of the printing.
III. Troubleshooting i. Ghost ▪ Description Ghost occurs at 94.4 mm intervals of the OPC drum in the whole printing. Check and Cause Solution Bad contacts caused by contamination from toner particles between high voltage terminal in the main body and the electrode of the Imaging Unit. Clean the terminals when contaminated by toner particles. Bad contacts caused by contamination from toner particles between high voltage terminal in the main body and the one in the HVPS board. Check the Connection between main body and the HVPS board, Replace the engine board or HVPS if not solved The life of Imaging Unit is expired. Replace the Imaging Unit and try to print out. Transfer roller lifetime(100,000 sheets) has expired. Check the transfer roller lifetime and replace it. Abnormal low temperature (below 10℃). Wait about 1 hour after power on before using printer. Recommend temperature rage is between 15 and 25, Humidity is between 30%~60%
III. Troubleshooting j. Stains on the Face of Page ▪ Description The background on the face of the printed page is stained. Check and Cause Solution Toner leakage due to improperly sealed Imaging Unit. Replace the Imaging Unit. If the transfer roller is contaminated, stains on the face of page will occur. If the transfer roller is contaminated, Print the 2~3 blank pages. There is the developer leakage in the imaging unit Clean the transfer roller and paper path Print out the sample
III. Troubleshooting k. Stains on Back of Page ▪ Description The back of the page is stained at 47 mm intervals. Check and Cause Solution Transfer roller is contaminated. Print the 2~3 blank pages. Replace the transfer roller if contaminated severely. Disassemble the fuser and clean the Heat Roller and Pressure Roller And check the area between Heat Roll and themistor. If contaminated, clean the area not to be deformed. Pressure roller is contaminated.
III. Troubleshooting l. Blank Page Print out ▪ Description Blank page is printed. Check and Cause Solution Bad ground contacts in OPC and/or imaging unit. Remove contamination of the terminals of the imaging unit and machine. Check the ground path from OPC to machine OPC or Developer Motor is not working Check if the motor works normally or not Check the main Board