Download
1 / 38
480 likes | 1.14k Vues
Woodworking Joinery. by Scott Engelmann. Woodworking Joinery. Why are joints used? To produce more complex shapes and products When are joints used? when changing the direction of the grain or a member of the structure and to strengthen the part. What joints to use?

E N D
Woodworking Joinery by Scott Engelmann
Woodworking Joinery • Why are joints used? To produce more complex shapes and products • When are joints used? when changing the direction of the grain or a member of the structure and to strengthen the part. • What joints to use? • How to make the joint? • Advantages and disadvantages
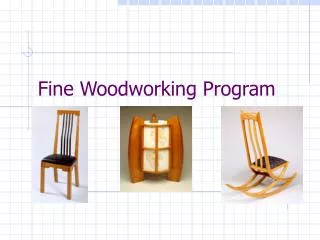
Further Information • Woodwork Joints by William Fairham-http://www.gutenberg.org/ebooks/21531 • Mario Rodriquez with Fine Woodworking Magazine
Basic Joints • Butt joints • Miter joints • Bridle joints • Dovetail joints • Dado joints • Rabbet joints • Mortise and Tenon • Splice joints • Lap joints • Finger/Box joints • Groove joints • Splines - Keys • Biscuits – Dowels • Pocket holes • Frame and Panel Construction • Cope and Stick joinery
Common Terminology: • Six sides of a board: Ends, Edges, & Faces • Long Grain ( Edges& Faces) • Short Grain/End Grain Considerations Material Tools/Equipment available Skill level/Personal preferences Time Amount of wood movement & Direction
Requirements for a well made joint • Snug, not so tight that too much pressure could cause the joint to fail. Not so loose that glue is being used as “filler”. Remember, wet glue will cause wood to swell so a tight joint may become unmanageable during final assembly.
End to face Butt Butt joints Edge to edge Butt Pocket hole Reinforced Butt joints Dowel Spline Biscuit
Butt joints • Most commonly used joint • Simplest joint to make • Strongest application is edge to edge( long grain) • the more area is joined, the better will be the strength of the joint.
Miter Joints • A miter consists of 2 matched angles usually 45⁰ or 22.5⁰ but could be any angle depending on the result wanted • Hides end grain
Dovetail joints Through Dovetail Sliding Dovetail Half blind Dovetail Keyed Dovetail half lap Dovetail half lap
Dovetail joints • Advantages - strong and interlocking joint- decorative • Disadvantages – time consuming make by hand or a jig is needed to machine cut • This joint requires precision cutting and can be difficult for a beginner to make well. • Uses- drawer and box corners
Dado joints Rabbet/Rebate joints Stopped Dado Through Dado Dado-rabbet
Dado joints • Advantages - strong joint as the materials interlock- glue provides added strength • Allows for easier assembly because the boards are aligned when they fit into the dado • Helps to straighten cupped boards • Disadvantages – ? • Uses- shelves or dividers in a box. • Rabbet/Rebate joints • Increases glue surface
Mortise & tenon joint • Advantages - A very strong and versatile joint • Disadvantages – somewhat time consuming to make depending on the equipment avaiable • Uses - strong corner joints for sturdy frames for windows, doors, beds and tables • Mortises can be cut with routers, drills, or by hand
Mortise and Tenon joints(cont.) Loose/Feather Tenon
Splice joints Scarf joint Finger splice
Lap joints Half lap Cross lap Mitered Half Lap
Lap joints • Advantages - quick and easy to cut with saw; fairly strong • Disadvantages - can be unsightly, best if reinforced with screws or dowels
Finger/Box joints • Advantages - very strong due to surface area being glued • Disadvantages - Needs a jig to be cut accurately
Groove joints Through groove Stopped groove Tongue and Groove Sliding Dovetail Rabbet-groove
Groove joints • Helps insure proper alignment of parts • Increases glue surface
Splines Keys Dovetail keys supporting a surface
More Keys & Splines Butterfly Keys Dovetail keys on a miter (Mock Dovetails) Splined Miter Keyed miter
Dowel joints • Advantages - quick to make and very strong • Disadvantages - Needs a jig or drill press to be used to drill parts accurately • Accuracy is paramount. The more dowels the greater the chance for misalignment making assembly harder or impossible • Biscuits have largely replaced dowels because thy are more forgiving
Pocket holes Without a jig Basic jig
Frame and Panel Construction • Allow 1/8” per foot across the grain for expansion and contraction • Try and keep your panels less than 12” wide • Use spacers on solid wood panels (space balls from Mcfeely) • Accepted practice and best appearance run the grain vertically
Glue up procedures and recommendations Always do a full trial assembly with clamps, squares, and any other equipment needed. No one needs surprises when the glue is setting up. Allow plenty of time. The time spent in a proper glue-up is minimal after investing the time, effort, & money in your project. Best practice for removing glue squeeze out is don’t use to much glue. Wait until the glue skims over and remove with a sharp chisel
Practice makes perfect • While cutting parts for your project save and set aside any scraps or unneeded short stock • Use the scrap and short stock for practice cuts before cutting into the project joints. The scraps and shorts should be the exact same thickness and will give you a realistic fit of the finished joint.