Download

1 / 2
20 likes | 27 Vues
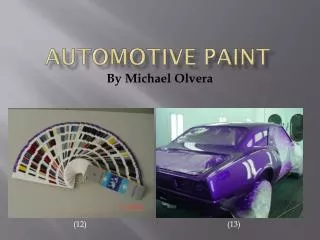
The automotive paint repair process typically involves the use of specialized masking tape. Removing the tape in a precise manner is just as critical as the paint job.

E N D
Removing Automotive Tape off Paint The automotive paint repair process typically involves the use of specialized masking tape. Removing the tape in a precise manner is just as critical as the paint job. While auto mechanic experts and do-it- yourself enthusiasts provide different techniques to ensure the best aesthetic finish, most offer the same basic strategies for removing tape and decals. Here is a breakdown of common tape removal tips and issues that may arise during the process. Standard Tape Removing Methods When preparing for the automotive tape removal process, it is essential to consult with the paint manufacturer, as different coatings and lacquers vary in thickness and drying time. Additionally, using a specialized tape (which can be found at auto body retailers) is also recommended, as not all tapes are compatible with automotive paints. To ensure the best results, these tapes should be acquired immediately before a painting job. Stored, older tapes may not have the same adhesive strength as fresh tape rolls. Some professionals may suggest applying an adhesive remover to the tape and rubbing it with a microfiber cloth in a circular motion to soften the tape. Other experts recommend using a high- wattage dryer or a heat gun to ease the removal process. Surface Tape Removal Most experts recommend slowly peeling the tape back away from the paint job and over itself, rather than upwards, making sure that the surface is dry. Lifting the tape at a 45 degree angle permits clean lines and cutting through thin films. Typically, the angle method is a good way to avoid the unsightly flaking or peeling that occurs when a tape is lifted straight off the surface. Another practiced method includes using a removal wheel and eraser, which should be completed at a slow speed, to avoid burning the paint. One major component of automotive tape removal is timing. Tape that is left on a surface for too long can be difficult to remove and may leave behind a sticky residue. In contrast, tape that is removed too quickly will damage and peel the paint job. Therefore, it is advised to wait 6-8 hours for one part enamels and one hour for two-part enamels and basic lacquers. If a newly painted vehicle is left outside, wind and sun will accelerate the drying process; sun exposure causes brittle tape. Common Tape Removal Issues It may take some practice to achieve a flawless tape removal system. Here are some common issues and suggested solutions: Paint left behind may occur if the tape is not fastened tightly enough or if multiple colors are used in the painting process. Extra paint can be eliminated by using the tip or edge of a utility knife or razor blade.
Wet tipe may harden and become difficult to remove.If tape gets damp or wet, it is advised toremove it as soon as possible instead of letting it air dry. Peeling and chipping paint results from any number of factors, like removing tape too quickly or at a wrong (upright) angle. For paint that begins to lift, use a single edge razor blade or specialized cutting knife to cut the paint away from the tape. If the damage is too extensive, it is recommended that the damaged area is sanded and repainted.