Download
1 / 32
320 likes | 430 Vues
New Users to the. Login Screen. All users must register for a NCID account. Finding Your Designated Administrator. https://www.ncid.its.state.nc.us/. Local/State Govt Users. User or Clinician?.

E N D
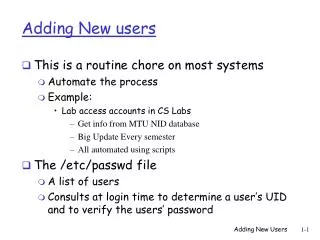
Login Screen All users must register for a NCID account
Finding Your Designated Administrator https://www.ncid.its.state.nc.us/ Local/State Govt Users
User or Clinician? • Everyone that uses the NCIR is assigned a user role which allows access to certain features on the site based on their role (ie. Administrator, typical user, inventory control) • Clinicians are the individuals within the organization who administer and/or approve the administration of vaccines
Ordering authority/clinicians will populate the Administered by and the Ordering Authority drop down box under entering live immunizations.
As you choose your Role as a Clinician, Ordering Authority or Ordering Authority/Clinician the Credentials drop down box will populate with different titles. ClinicianOrdering Authority
Enter the Clinician’s name in the corresponding boxes Start by Choosing the Role Enter the correct credentials by clicking on the drop down arrow. • When you choose a Role the Credentials box will populate itself with the appropriate choices. You also have the option to enter additional Address Information if you would like to. Choose your site by either (1) double clicking on the name or (2) clicking on the name one time and then clicking Add. After you do this your site will appear in the adjacent box-Selected Sites. Once you have entered all the necessary information, Click Save and then you will be redirected back to the Clinician List screen.
After you click Save you will be sent back to the Clinician list screen where you can edit a Clinician by clicking on their Last Name in blue. This will bring up the Edit Clinician screen • From this screen you can edit any of the Clinician information. • If you make any changes click Save to save those changes and you will be sent back to the Clinician Listscreen.
Manage Client This Client ID number is a universal ID number for your client in the NCIR
Historical or New Immunization? • Doses given today • Doses given at another practice • Doses given today but not recorded until the next day
Entering tradename details on historical doses To document a historical dose click Historical Immunization
This screen will show you the basic functions of entering historical doses. However, there are several helpful time saving shortcuts that are built into this screen to help enter multiple historical doses that were given at the same provider’s office or on the same date. Those shortcuts appear on the next slide. Shortcut Rows Click Tradename Details. Enter the date the shot was given in the small box next to the calendar. Type the name of the Provider that administered the historical dose of vaccine in the open box next to the vaccine name, under the Provider Organization column. Once you click the Tradename Details button you will be taken to this screen where you can choose your Trade Name by clicking on the drop down box. You can also enter lot number. When you are done click Save
When you click Save and Submit(or Save from the Tradename Details screen) you will be sent back to the main History/ Recommend screen. From here you can see the historical shot was loaded into the history.
By typing in the name of the provider that administered the historical immunization in the open box under the Provider Organization column, you can copy and paste that name into subsequent boxes. SHORTCUTS: If there is more than one historical dose of vaccine that was given by the same provider’s office Type in the Provider’s name that gave the historical dose, in the top left box under Provider Organization Fake Pediatrics Click in the box to paste Fake Pediatrics Now locate each vaccine that was administered by that provider and left click once in the open box under the Provider Organization column but next to the vaccine name- this will paste the text. Click in the box to paste Fake Pediatrics You can use this feature for every vaccine given by the same provider…
Shortcuts Save Save and Submit vs. Save:This feature allows you to save the historical information that you have entered, by loading it into the History portion of the screen above the entry grid, but not taking you away from the historical entry screen. **This feature can be used when entering historical information from different provider’s offices. For example if multiple providers gave a client their series of 5 DtaP shots then you could only enter those provider name’s one at a time under the Provider Organization column, so you would want to use Save so that you would remain on this same screen after entering each provider and the corresponding shot. The same is true for the dates. Save and Submit:This feature uploads all the historical information and returns you to the main History/Recommend screen. ** This feature can be used when you have either the same provider for all historical shots or you have completed entering the client’s history.
Shortcuts Open Drop Down Box The open drop down box at the bottom of the screen is for other immunizations that could have been given historically but are not seen on the screen. When you select a vaccine from here it will load into the entry grid in alphabetical order. Choose the immunization The immunization will appear in the grid Click on the drop down arrow
Vaccine Order Status • Backorder - order was received and reviewed by the State. The requested order items are temporarily not available to fill and are on backorder. • Denied - order was denied by the State and will not be filled. • In Progress - order has been received and reviewed by the State. This type of order can no longer be modified. • Pending - order that has been placed, but not viewed by the State. This type of order can still be modified. • Partial Ship - part of the order was filled and shipped with some of the order still waiting to be filled. • Shipped - order has been filled, shipped and ready for the provider to accept
From Vaccine Order to a Transfer Order Transfer Click the CREATE DATE to accept the transfer
Accepting your Order Click here • Verify that the packing list matches the inventory in the box • Verify the NCIR matches the packing list • Call the NCIR Help Desk if the order does not match
Adding Inventory from Manufacturers(and Private Vaccine) Add Varicella here Note: For Prevnar expiration date – enter as last day of the month
Adding Private Inventory Choose Trade Name – Mfg will automatically populate Enter Lot Number from Packing List Choose dose size (found on the vial) Choose units (most are mL) Enter the Expiration Date State-supplied or Private Must be ACTIVE in order to save Enter the Quantity on Hand Enter Cost Per Dose
Expired Vaccine Pop-up You must create a new transfer in NCIR to transfer expired state-supplied vaccine to Vaccine Distribution
Manage Inventory - Show Transactions Only Choose One Date Range Default Options = Most Results Increase the number of Records