1 / 0

Project Based Learning: How to actively engage students in learning.

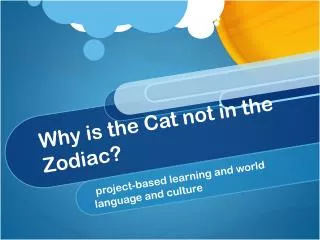
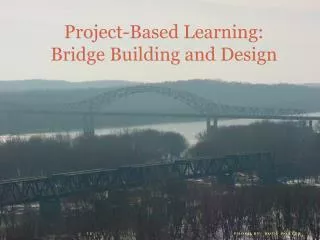
Project Based Learning: How to actively engage students in learning. . Jeannie Reynolds Project Lead the Way/ Agriscience Instructor Farmerville High School. What is Project Based Learning?.

rafi
Télécharger la présentation

Project Based Learning: How to actively engage students in learning.

An Image/Link below is provided (as is) to download presentation Download Policy: Content on the Website is provided to you AS IS for your information and personal use and may not be sold / licensed / shared on other websites without getting consent from its author. Content is provided to you AS IS for your information and personal use only. Download presentation by click this link. While downloading, if for some reason you are not able to download a presentation, the publisher may have deleted the file from their server. During download, if you can't get a presentation, the file might be deleted by the publisher.

E N D

Presentation Transcript


  1. Project Based Learning: How to actively engage students in learning.

    Jeannie Reynolds Project Lead the Way/Agriscience Instructor Farmerville High School
  2. What is Project Based Learning? Project-based learning is an instructional method that provides students with complex tasks based on challenging questions or problems that involve the students' problem solving, decision making, investigative skills, and reflection that includes teacher facilitation, but not direction. (Wikipedia) Project-based learning is a comprehensive instructional approach to engage students in sustained, cooperative investigation (Bransford & Stein, 1993
  3. Steps for designing the project Know the end or goal of the project Develop the question or problem Plan the assessment Develop a path for the project Manage the process
  4. Know the end or goal of the project What is the desired outcome of the project? What will students learn? What skills will students develop?
  5. Develop the question or problem A good question or problem will require many different activities and the synthesis of different types of information in order for it to be answered. A good question will require students to complete multiple steps to answer the question or solve the problem.
  6. Plan the assessment What will be graded? How will it be graded? Are you grading the process or just the output alone? Students must know what will be grade at he beginning of the project. A good tool to use for grading is a rubric.
  7. Develop a path for the project Organize the activities Prepare the resources Establish a timeline
  8. Manage the process Act as a guide Keep students focused on tasks Monitor Have student self-assess project as they work
  9. A successful project: Allows for a variety of learning styles "Real" world oriented Risk-free environment - provides positive feedback and allows choice Encourages the use of higher order thinking skills and learning concepts as well as basic facts Utilizes hands-on approaches
  10. Continued Provides for in-depth understanding Accessible for all learners Utilizes various modes of communication Students have ownership of their learning within the curriculum
  11. A successful project: continued The learning process is valued as well as the learning project Learning is cross curricular Teacher is a facilitator of learning Student self-assessment of learning is encouraged
  12. Examples: Beef Breeds project Old way Project Based Way Students choose a state and region in which they are going to establish a beef herd. They have to choose a beef breed they will produce. They must use breed characteristics to support their decision. Students will have to marry the information they know about beef production, the regional agricultural, and the beef breed. Students create a PowerPoint presentation about an assigned beef breed.
  13. Example: PLTW IED Design Challenge This project will provide you with the opportunity to work together in teams of two. The team will need to come up with a solution to a stated problem. The design process introduced and used in Unit 1 will be applied to this project. Requirements 1.    Study the five design briefs located on the following page. 2.    Come to a consensus with your team on a design brief that you wish to work on. 3.    Using the steps in the design process, your team will come up with a solution to a problem. 4.    Use isometric grid paper provided for your team to sketch ideas and possible solutions. 5.    Create three possible solutions. Remember, the final solution will be determined from your decision making matrix which your teacher will provide. 6.    Create a complete set of working drawings (Check with your teacher on the deliverables needed). 7.    Create with your team a three-fold brochure marketing your solution to the design problem.  
  14. Example: PLTW IED Design Challenge
  15. Example: PLTW Puzzle Cube This project will provide you the opportunity to exercise your creativity and develop your sketching and modeling skills, as well as your ability to use the computer as an efficient communication tool. What you have learned throughout Unit 1 – Design Process will be applied to this project. The activities that you have completed throughout the lessons of Unit One will provide you with the information, components, and requirements needed to complete this project. Requirements 1.    Study the Puzzle Cube Design Brief located on the following page. 2.    Brainstorm and sketch on isometric grid paper possible puzzle part combinations for your cube using Activity 1.4.2 Brainstorming Possible Combinations. 3.    Neatly sketch and color code your five parts used in the cube solution and show how they fit in the isometric view of the cube on isometric grid paper. 4.    Choose your best option from the two solutions. 5.    Create the five parts to your cube using 3-D modeling software. Color the parts the same color combination used in the sketching phase of your project. 6.    Create multiview drawings for each of the five parts using 3-D modeling software and print out using a drawing sheet. 7.    Fabricate your five parts using the 27 cubes and glue. Color using markers or colored pencils and assemble your cube. 8.    Assemble your cube using 3-D modeling software and print out the completed cube on a drawing sheet.
  16. Example: PLTW Puzzle Cube
  17. Example: Simple Machines Old Way Project Based Way Students create a complex machine made of 3 different types of simple machines used to complete a simple task. Students must be able to calculate the Mechanical Advantage of each simple machine component and the total Mechanical Advantage of the complex machine. Students create simple machine It is fun and takes up time
  18. Let’s Talk - Any questions? Jeannie Reynolds Farmerville High reynoldsj@unionpsd.org 318-368-2661
More Related