Download
1 / 74
740 likes | 768 Vues
Living the Ready Lifestyle! Volume 1

E N D
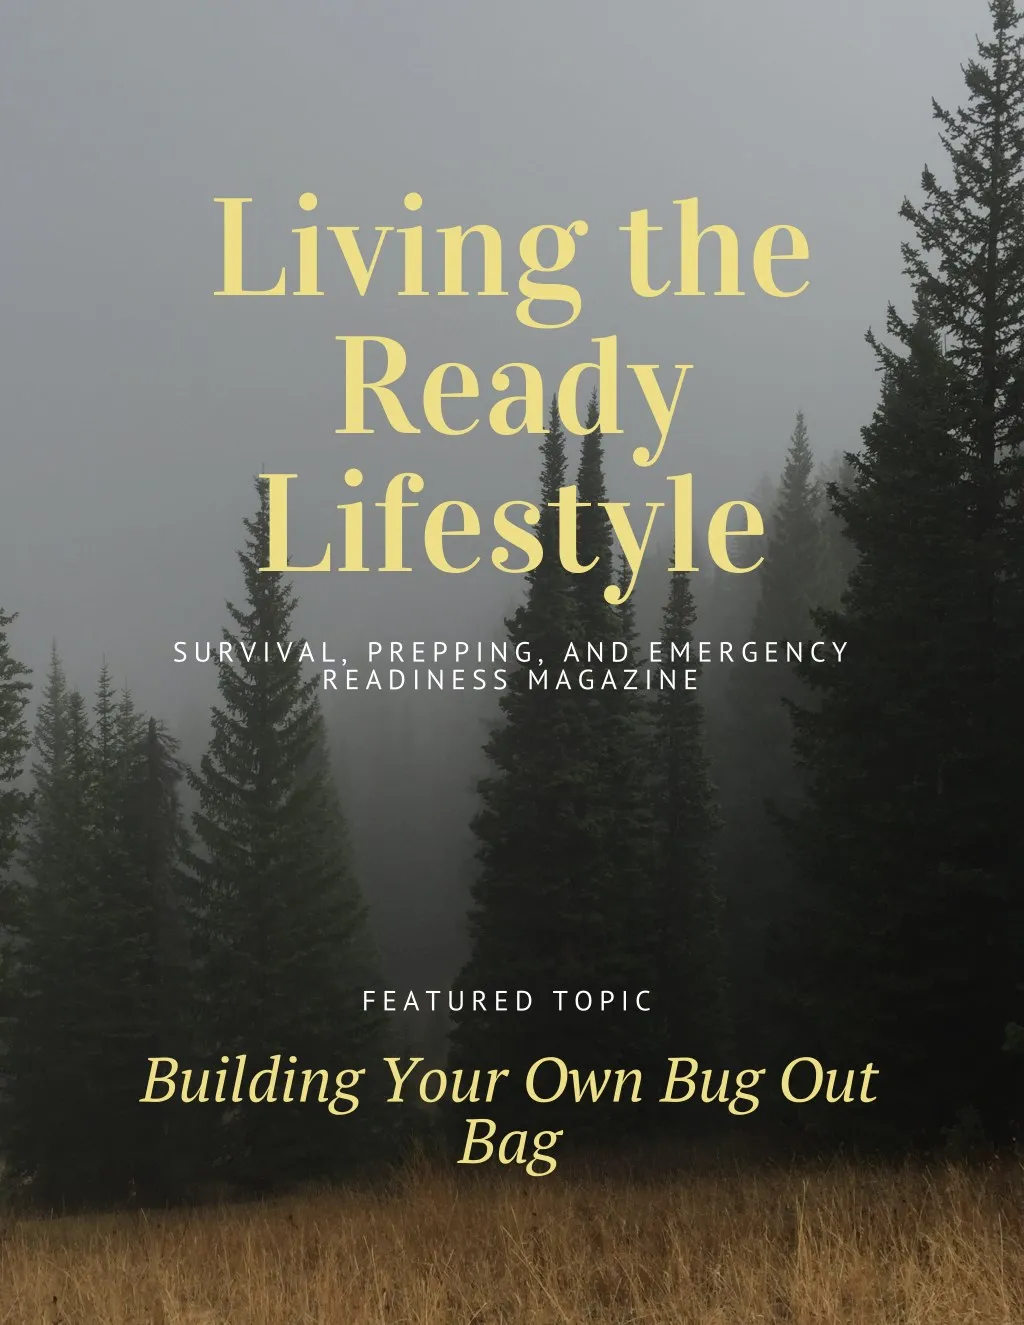
Living the Ready Lifestyle S U R V I V A L , P R E P P I N G , A N D E M E R G E N C Y R E A D I N E S S M A G A Z I N E F E A T U R E D T O P I C Building Your Own Bug Out Bag
9 Survival Myths That Could Get You Killed medium.com/living-the-ready-lifestyle/9-survival-myths-that-could-get-you-killed-6ca2b4fa33ad March 13, 2018 Ready Lifestyle Ready Lifestyle aims to provide its readers with information and thought provoking articles about all things prepping, and readiness. http://readylifestyle.com Mar 13 We’ve all seen those people that make suggestions that couldn’t possibly be farther from the truth. They’re easy to find all over the internet, from blogs to youtube you don’t have to look all that long before you find one. Survival myths are still around for a number of reasons, wives tales, lack of research and, simple ignorance are all possible reasons. This article covers some pretty common myths that could end up being more harmful than helpful. 1/3
Image courtesy of The Clymb Everyone is an expert these days. Unfortunately, in certain situations, faux-expertise can get you killed. Erroneous survival myths usually aren’t malicious, just misinformed. Still, the wrong information can be deadly. The following list identifies and corrects nine common survival myths: Myth: You Must Find Food First There are a lot of things that can kill you in the wilderness, and starvation is certainly one of those things, but it is unlikely to be the first or fastest thing to bring you down. Humans can live for up to six weeks without food. That’s plenty of time for someone to figure out that you’re missing and come find you. In all likelihood, you will be rescued before you starve unless something else gets you first. Water, warmth, and protection should always be your top priorities. Myth: Shelter Means Coverage When most people think of shelter, they think of four walls and a roof. In the wilderness, this myopic view can kill you. Adequate shelter has little to do with coverage and everything to do with protection. You need shelter to protect you from the elements. In a hot sunny climate, this likely means shade. In a temperate or cold climate, it means warmth. Poorly built shacks with roofs and walls are a poor way to protect yourself from the cold. The best way to make a quick shelter is to find a dry place and insulate the ground using dry vegetation. Making a small nest that insulates the ground and provides a bit of wind protection and camouflage is vastly superior to a roofed shelter without insulation. 2/3
Myth: You Can Drink Water From a Cactus So your car broke down in the desert. It’s miles to the nearest gas station. Your cell phone doesn’t have reception. You don’t have any water in your car. There’s no one around, and you are very, very thirsty. Now you chance upon a cactus. I’m saved, you think. I’ll just lop the top off this here prickly pear and go to town. Not so fast, partner. The liquid inside a cactus isn’t pure water and is actually a highly alkaline, noxious fluid. Chances are, if you drink from a cactus you will get very sick, and vomiting is one way to ensure you dehydrate faster. You can drink from a barrel cactus, but only one specific type, and unless you’re extremely into cacti botany, you’re better off conserving your energy or seeking out a purer water source. Source: http://blog.theclymb.com/tips/9-survival-myths-kill/ Can you think of any other survival myths that you’ve heard or read recently? Add them to the comments below! Be sure to check out our other preparedness articles. Additional Reading: The Prepping Benefits of Starting Your Own Homestead 3/3
Are these 5 Pieces of Prepper Advice Overrated? You decide. medium.com/living-the-ready-lifestyle/are-these-5-pieces-of-prepper-advice-overrated-you-decide-bc6b31cf5bfd February 12, 2018 Overrated Prepper Advice? I recently read an article discussing what the writer believed were the 5 most overrated pieces of prepper advice. Some of their suggestions made sense, but there were some things in there that just don’t sit well with me. This isn’t me bashing another prepping site. I’ve read several articles on the same site and found them to be very interesting. This is more me just thinking out loud. Are these pieces of advice overrated? The five pieces of advice they recommend ignoring are stockpiling wheat, focusing on the worst-case scenarios, stocking up on freeze-dried foods, having a bug out location and reading prepper fiction to get good ideas for prepping. The main problem with the article is the fact that each piece of advice is taken in the most literal way. Being a prepper means that you have to THINK! You need to look below the surface and read between the lines. 1/4
Above all else, prepping means preparing. Read prepper fiction to get good prepping ideas. The assumption here is that people will take prepper fiction as truth and try to imitate it. I’m personally not a very big fan of prepper fiction. I don’t often find it compelling and a lot of what I’ve read hasn’t been all that well written. That being said, I have read several prepper fiction novels. Hopefully, no one is reading these books and taking them as “the way” to become prepared. They are fiction, but some of the ideas should trigger you to think deeper about potential disasters. In the end, I don’t think anyone should feel left out if they haven’t read any prepper fiction. You must have a bug out location. Do you need to buy a new home or a piece of property in order to have a bug out location? Absolutely not. Should you at least consider where you would go if you did have to bug out? Absolutely. The assumption they made is that having a bug out location is expensive and not something 2/4
that most people are able to do. Having a relative’s house that you plan on going to if the need arises is having a bug out location. At a minimum, everyone should at least have an idea of where they would go in a bug out situation. I see bugging out as a last resort, but I’m at least prepared to leave my home if I need to. Related reading: The Prepping Benefits of Starting Your Own Homestead You should stockpile “prepper foods”. The assumption here is that prepper food companies try to scam customers and con you into purchasing their products. Additionally, freeze dried foods are limited in their menu selections. I was a little confused by this one. You’re really only limited in menu types if you limit yourself to one manufacturer, and if a company is using hard-sell tactics then you shouldn’t be doing business with them. I recommend that people not only have freeze-dried “prepper” food as their only food storage all the time. It’s just for completely different reasons. Freeze-dried food is expensive compared to other food storage items and it needs water to rehydrate and cook. That’s why I tell people not to solely rely upon it. It should still make up a part of your food storage in my opinion. Freeze-dried food provides diversity and flavor. Two things that can keep you going in an otherwise horrible situation. It also lasts for a long time. This means you have food that you don’t need to worry about. Focus on the worst case scenario. I come from a background where you always assume the worst. That way you’re prepared for anything. Telling people to ignore the worst case scenario is completely counterintuitive to me. The assumption they made here is that if you’re preparing for an EMP then you’ll ignore electronics since they could be destroyed in an EMP attack. When you’re first starting to prep, you should get the most important things first. Then prepare for the most likely disasters as you continue to make progress for what you believe is the worst case scenario. 3/4
Just because you assume the worst doesn’t mean that you’re ignoring everything else. You should stockpile wheat. The assumption here is you or a family may become gluten intolerant or develop Celiac disease so stockpiling wheat isn’t a good idea. While it may be true that someone would eventually become unable to eat wheat, it makes no sense to ignore wheat as a whole because of what may happen in the future. Wheat is a great source of cheap calories that lasts for a very long time. To discount that fact makes no sense to me. Conclusion It’s not always easy to read an article and know what the writer is actually thinking. As I was reading the article in question, I thought to myself several times that these assumptions were more for the sake of the article than any other reason. Sometimes it’s difficult to come up with unique ideas for articles. Sometimes something you write just misses the mark and comes off as something other than what you really meant. I understand that. I really just want to urge people that have taken it upon themselves to try to help out the prepper community to fully think through what they’re suggesting. (This goes well beyond the article in question.) Again, I’m not slamming anyone with this article. I just wanted to address something I read over the weekend. What do you guys think? Am I way off the mark here? You can find more prepping related articles here. New to prepping and not sure where to start? Read through our suggestions about how to get started. 4/4
medium.com/living-the-ready-lifestyle/the-best-bug-out-bag-list-2018-what-you-need-and-why-you-need-it-befa95ea2d63medium.com/living-the-ready-lifestyle/the-best-bug-out-bag-list-2018-what-you-need-and-why-you-need-it-befa95ea2d63 March 9, 2018 Contents 1 Who Needs a Bug Out Bag? 2 Guidelines for Selecting Items to Put on Your List 2.1 Additional Considerations 3 The Ready Lifestyle Bug Out Bag 3.1 The Backpack (Grey Man or Tactical) 3.1.1 How to Pack Your Bug Out Bag 3.2 Shelter (Tarp / Tent / Emergency Blanket / Sleeping Bag / Blankets) 3.3 Water (Filtration / Purification / Collection) 3.4 Food (Freeze Dried Food / MREs / Ration Bars / Mess Kit / Utensils / Stove) 3.5 Clothing (Rain Gear / Hat / Socks / Underwear / Footwear) 3.6 Light (Flashlight / Headlamp) 3.7 Hygiene (Soap / Toothbrush / Toothpaste / Toilet Paper / Baby Wipes) 3.8 Defense (Pistol / Rifle) 3.9 Fire Making (Disposable Lighter / Ferrocerium Rod / Waterproof Matches) 3.10 First Aid Kit 3.11 Cordage (Paracord (550 Cord) / Rope) 3.12 Knife / Axe 3.13 Navigation (Compass / Maps / GPS) 3.14 Gloves 3.15 Money 1/15
3.16 Identification 3.17 Electronics (Solar Panel / Rechargeable Batteries / Cell Phone) 3.18 Other Items for Your Bug Out Bag 4 Complete Emergency Kits 4.1 Mini Survival Kits 4.2 Complete Bug Out Bags 5 Wrapping up Your Bug Out Bag List The Best Bug Out Bag List It seems like putting together the best bug out bag (or B.O.B.) checklist is one of those things that every preparedness website has to do. The thing that other sites often ignore is the fact that everyone has different needs and lives in different environments. This bug out bag is for you and your family! This article is going to cover everything that we at Ready Lifestyle believe are bug out bag essentials. Then we’re going to give you a range of options to fill those needs. By examining each section, you’ll be able to tailor a kit to meet your needs, no matter what they are, so you have the best bug out bag list that you can put together. We’ve decided to focus on developing a set of tool to help you put together the best bug out bag for you instead of just giving you a list of what makes the best bug out bag for us. Who Needs a Bug Out Bag? I always recommend bugging out only as a last resort, but that doesn’t mean that we shouldn’t be prepared to bug out. With our current political situation, both at home and worldwide, there are any number of possible scenarios that could cause us to have to bug out. If you live in an urban environment the need for you to have a well thought-out and prepared bug out bag list is even more important. Everyone living in a city or a suburban environment is at an increased risk to experience political and civil unrest, riots and will likely feel the effects of a man-made disaster before those in less populated areas. This doesn’t mean that those in a rural environment would never have to bug out. Many natural disasters, such as wildfires and hurricanes, could cause those in rural areas to have to bug out. Some people believe that after a disaster, those within the cities will migrate out to the rural areas. If this migration does take place, it’s one more reason for those in rural areas to be able to vacate quickly. If you aren’t properly prepared and haven’t taken the time to put together a bug out bag, you could possibly find yourself having to evacuate your home at a moment’s notice with no food, no water, and no equipment. By having a go bag ready you ensure that you and your family will always have the minimum gear needed to survive. We aim to provide you with a sampling of items that we feel would make a good addition to your bug out bag. As with all preparedness topics, you are the only one who knows your 2/15
situation. You will have to modify the items in each category to best meet the needs of you and your family. Guidelines for Selecting Items to Put on Your List When putting items on this list it’s best to include items that have multiple uses. This cuts down on weight and the number of items that you have to buy and carry. Don’t blindly select the least expensive gear out there. If you see two items that look very similar but have a large price difference, it’s probably because the less expensive item is made with lower quality materials. Of course, this isn’t always the case. Sometimes there are just items that present a very good value to the consumer. The items on your list should be able to get you through the first 72 hours of an emergency. Some people even go so far as to call this a 72-hour bag. Try to include items that will allow you to survive past the 72-hour mark. Sustainability and reusability are important if we need to bug out. As an example, putting 72 hours of water in your bag may seem like a good idea, but putting just two or three liters of water in your bag and adding a portable water filter will last you much longer. Full-size image: Create Your Perfect Bug Out Bag List Additional Considerations The climate, season, number of people in your family, etc. will all have an impact on what type of items we need in our bug-out bags. Make sure you take these into consideration when building your go bag. Military surplus stores make a great place to get a lot of these items. I’d suggest swinging by one in your area and checking it out. They sometimes have great deals on gear that’s hardly been used. The Ready Lifestyle Bug Out Bag The Backpack (Grey Man or Tactical) The base of any good bug out bag is the bag itself. When choosing a bag there are several things to take into consideration. If you live in an urban environment, choosing a backpack that does not appear tactical can be an advantage. Being able to look like any other person on the street will make you less of a target if you are trying to evacuate a city (or other populated area) on foot. This grey man approach is often the preferred theory for people in cities and those that may be caught in a 3/15
populated area. For those of you that live in a rural environment, a tactical pack may serve you better. These backpacks or often designed to effectively carry large amounts of equipment in a compact package. Camouflage patterns will also allow you to blend into your surroundings better. Regardless of the style of pack you choose, a subdued color is probably the way to go. Osprey Aether AG 60 Osprey makes great packs in all colors, shapes, and sizes. This Aether AG 60 is designed for a week on the trail and comes with a removable top lid that can be used as a daypack. The adjustments available with the pack make it suitable as a bug out bag for almost all adults. Kelty Redwing 44 Kelty is another well-known manufacturer of backpacks. The Kelty Redwing 44 is on what we would call the small side for a full on bug out bag, but it would certainly work. It’s size also makes it less conspicuous compared to other hiking packs that are much larger. A bag like this could be a great bug out bag for an older child. TETON Sports Scout 3400 This Teton pack is 55 liters and is the most affordable pack we’re looking at in this article at right around $60. The Teton Scout 3400 represents a sweet spot for cost, durability, and size. It’s fully adjustable and pretty close in size to the Osprey. Something like this is what I’d recommend to anyone putting together a new bug out bag. 5.11 Tactical RUSH72 About the same size as the Kelty, the 5.11 Tactical RUSH72 has a ton of MOLLE webbing on the outside which allows for expansion if you really need it. Being on the tactical side of backpacks, it’s made of stronger, heavier material than the other packs and comes in several different subdued colors and camo patterns. If you’re looking to build a more tactical bug out bag, this could be just what you’re looking for. A lot of people swear by 5.11 products, but I tend to prefer a pack designed for comfort when I intend to wear a pack for days on end. There’s nothing wrong with a pack like this, in fact, this pack has rave reviews on every site I can find. It’s just been my experience that, after a couple days with a pack like this, I’m much more tired than I am with other backpacks. How to Pack Your Bug Out Bag 4/15
To keep your pack as stable as possible, load the heaviest gear next to your back and centered in the middle of the pack like the drawing above shows. Pack your lightest equipment in the bottom of your pack with the medium weight loaded at the top and outer parts of the bag. To maximize the amount of gear that you can pack in your bag, fill up items that have empty spaces with other items. As an example, you could put some items in your mess kit and pack your sleeping bag into any open areas around other light gear in the bottom of your pack. Fill in all empty space and use any internal tie downs to secure your items in place. This prevents the load from shifting in your pack and it will allow you to fit more items into it. Women and shorter men often find that carrying heavier weight slightly lower in the pack is more comfortable. Heavy items should still be high in the pack, but feel free to adjust your load for your comfort. This is just a general guide, not a hard and fast requirement. Shelter (Tarp / Tent / Emergency Blanket / Sleeping Bag / Blankets) Shelter can come in many forms. A lightweight backpacking tent may be the best option for some, for others, a tarp makes more sense as it can be a shelter and has other uses. Chill Gorilla 10′ Rain Fly A purpose made tarp, like this Chill Gorilla 10′ Rain Fly, makes a great shelter. You can also use it to waterproof your pack, collect rainwater, etc. They’re extremely versatile on top of being light and not taking up much space. A lot of people would argue that a sleeping bag or blankets don’t constitute a shelter. I totally disagree. This list is completely modular. Just because a sleeping bag or blanket roll wouldn’t work for one situation, doesn’t mean that it wouldn’t be great for someone else. Blankets are also easy to come by and make a really cheap alternative that someone can start with an upgrade from later on. An old military poncho makes a great makeshift tent and can be used to keep you dry in the event of inclement weather. If you add a poncho liner you have both a blanket and an extra layer that can keep you warm when it gets cold. For those that are likely to spend any length of time in an urban or suburban area, I recommend picking up Tom Brown’s Field Guide to City and Suburban Survival. The section on shelter building makes it a worthwhile purchase all by itself. Water (Filtration / Purification / Collection) Having a steady supply of water will be one of the things that you battle with first. The problem with water is that it’s heavy and takes up a lot of room. 5/15
With that in mind, we always recommend having some form of portable water filtration system as well as several collapsible water containers on your bug out bag list. Keep these containers full of water so you have something to drink when you first bug out. Then, as you empty the water containers you can refill them with water that you gather along the way. Katadyn Hiker Microfilter The Katadyn Hiker Microfilter is one of the best handheld water filters available. It’s a little on the expensive side, but you get what you pay for. Something along these lines is important for any survival situation. Nalgene Collapsible Wide Mouth Cantene Collapsible canteens are nice because you can roll them up when they’re empty to save space. I like these Nalgene Canteens because you can stand them up when they have water in them. Not all of the collapsible canteens I’ve used will do that. You can also add water purification tablets, or chemical disinfection kits since they take up very little room. Aquamira Water Purification Tablets Aquamira makes several types of water purification chemicals. These water purification tablets would be a good addition to any go bag as a backup to other water collection tools. Aquamira Water Treatment Kit This Aquamira Water Treatment kit can treat up to 60 gallons of water. That’s far more water than you could ever carry in a bug out bag! You’re going to want to filter the water through a cloth (or a similar item) to remove any large particulates before you treat it. If you’ve included a mess kit or metal container of some kind, you can use that to boil water for an additional means of getting clean drinking water. Food (Freeze Dried Food / MREs / Ration Bars / Mess Kit / Utensils / Stove) The type of food that you bring will depend upon your environment. Freeze dried food weighs very little but takes a lot of water to rehydrate and cook. It probably makes sense for you to include freeze dried food if you live in an area that has a lot of natural bodies of water. 6/15
Mountain House PRO-PAK The Mountain House Pro Pak is designed with backpackers in mind. Each pack is one meal and comes vacuum packed to be as light and compact as possible. They come in a wide variety of flavors, so anyone should be able to find something they would enjoy. If you live in a very arid environment or an area that doesn’t have a lot of natural water, such as a city, then packing food that doesn’t need to be rehydrated in your bug out bag makes sense. You just need to be aware that it’s going to weigh more and plan accordingly. MREs and canned food could be options as well as food ration bars and things like tuna and chicken packets. If you choose to put canned food in your bug out bag (which I don’t recommend) make sure you have a lightweight can opener like a P-51 or a multi-tool. Military MREs MREs are a great choice for an all in one meal that can be prepared with no outside equipment. If you decide to go with MREs you can strip them down and take out anything that you will not need. Take the food out of the boxes, remove the heaters (you could reuse them as a makeshift warmer if you live in a cold environment), get rid of the extra spoons, etc. When you’re done, reseal the plastic bag with a piece of duct tape. You’ll basically cut their bulk in half! Once an MRE is broken down like that, it makes more sense to include them anywhere that long shelf life, quickly prepared food is needed. Datrex Emergency Food Bars Datrex Emergency Food Bars are another option. They aren’t great, but they’re calories, take up very little space in a bug out bag, last for a long time and don’t need to be prepared. Etekcity Ultralight Backpacking Stove A lightweight stove like this Etekcity Ultralight Backpacking Stove takes up almost no space. They’re actually smaller and lighter than the fuel. You may also want to pack a mess kit and some eating utensils in your bug out bag. Clothing (Rain Gear / Hat / Socks / Underwear / Footwear) The amount of clothing that you need to put in your bug out bag is minimal. When you’re determining what to pack, try to keep it light and non-bulky. In the end, you just need something to protect you from the environment that you’re likely to encounter. 7/15
Packing light rain gear is always a good idea. Heavy-duty trash bags can be used as makeshift rain gear and have many other uses. If you used a poncho as your shelter, you’re already good to go with rain gear. You should have several changes of socks and underwear. This will let you change out the articles of clothing that come in direct contact with your body preventing chafing and blistering which can lead to discomfort and eventual infection when walking long distances. Keeping your feet dry on a long trek is one of the things that you should prioritize if you have to bug out. If you live in a cold environment or an environment that has multiple seasons you will need to pack clothing accordingly. If your area has multiple seasons, I would suggest changing your loadout based on the season. If you don’t want to be bothered with changing the clothing in your go bag every few months then you should pack warm clothing that is both light and non-bulky. Modern synthetic materials make this very possible. Carrying too much is better than freezing to death when you have to bug out with your summer clothing in the middle of winter. Packing your clothes in one or more Ziploc bags will help keep them dry and give you another bag that you could use later on. Make sure you keep a pair of broken-in hiking boots or sneakers on or close by, your bug out bag. This will allow you to just grab your bag and change out your shoes. If something happens on your way home from work, you don’t want to be stuck walking around in dress shoes. Merrell Men’s Moab Ventilator Mid Hiking Boot The original Merrell Moab Mids are still among my favorite hiking boot. Making sure your footwear is broken in is key. I can’t tell you how many times I’ve seen people put brand new boots on prior to heading out on a patrol and return back to the FOB with bloody, blistered feet. In a bug out scenario, blisters will slow you down considerably and possibly even leave you unable to walk. This will be even more apparent when you have the weight of your bug out bag on your shoulders. Gear Aid Tenacious Tape Gear Aid Tenacious Tape is an interesting product that could come in handy in a pinch. It’s specifically designed to seal leaks, rips, and tears in rubber, nylon, canvas and synthetic materials. This could easily find itself on almost everyone’s bug out bag list. Light (Flashlight / Headlamp) A flashlight or headlamp is a necessity. A headlamp allows you to use your light source with both hands-free and is always a great option for any bug out bag. 8/15
Petzl Tactikka Headlamp The Petzl Tactikka Headlamp has white light, strobe, and red light options. The strobe isn’t important but if you need to be tactical the red light will be. You also may want to consider something like a small LED Lantern or glow sticks to act as an area light at night. Goal Zero Torch 250 Flashlight with Integrated Solar Panel I’m a big Goal Zero fan. The Torch 250 is a great little area light that has a solar charger on one side and lantern on the other side. It also has a USB port that you can use to charge electronics and it can be charged from a USB port or a hand crank on the side. Hygiene (Soap / Toothbrush / Toothpaste / Toilet Paper / Baby Wipes) Make sure you don’t overlook personal hygiene items. You need to be able to keep yourself clean especially if you end up living out of your bug out bag for more than a couple days. Normally a toothbrush, toothpaste, baby wipes, and a bar of soap will be enough to keep you clean. If you won’t have access to an outdoor water supply then you should consider packing more baby wipes and leaving the bar of soap at home. A roll of toilet paper doesn’t weigh much, but it can take up a lot of space. If you run into this situation you can remove a portion of the toilet paper from the roll and put it in a Ziplock bag to save space or just smash the whole roll flat and put it in a Ziplock bag. Toilet paper isn’t a necessity, but it certainly makes things a lot nicer if you have some! Make sure you pack feminine hygiene products if you or a family member need them. Defense (Pistol / Rifle) Being able to defend yourself is extremely important in a bug out situation. What you decide to bring with you to defend yourself is going to depend upon where you live. If you live in a rural environment then some form of light semi-automatic rifle is going to suit you best. I personally prefer an AR-15 but an AK-74 or 47 would be a good option as well. Having a rifle will also allow you to take game if it presents itself while you’re moving from point A to point B. In my mind, a rifle should be the first weapon you reach for in any bug out situation. Even if you’re in the city, a short barreled AR-15 pistol is a much better choice than a pistol in all ways other than concealability. 9/15
A pistol can be your best bet if you’re bugging out from a city or suburban environment. This allows you to conceal your firearm, drawing less attention to yourself. If you’re not concerned with drawing attention to yourself then a rifle is a better all-around choice. My preferred pistol is a compact 9mm like the Glock 19 or M&P 9C. For me, they’re the best compromise between capacity, caliber, and concealability. Two extra magazines are probably enough, but that is up to you to decide for yourself. Adding more ammo to your bug out bag will allow you to protect yourself for a longer period of time, but the weight of ammo adds up fast so keep it to the minimum you think will get you by. Fire Making (Disposable Lighter / Ferrocerium Rod / Waterproof Matches) Being able to make a fire is important for a number of reasons. It allows you to cook, sterilize water and can keep you warm at night. A good fire can also provide a great motivation boost when you’re cold and wet. One of the best fire making devices available to anyone is a simple Bic disposable lighter. They’re inexpensive, light and readily available almost everywhere. Any bug out bag list should have a few. Extra lighters would also make a good barter item. Other than several disposable lighters you should consider packing a windproof lighter, ferrocerium rod, or waterproof matches. First Aid Kit A good first aid kit is an absolute necessity. Make sure you don’t skimp in this area. You can stop by our article on how to stop bleeding if you need a refresher on how to use these items. The list below is what I consider a minimum for a bug out bag first aid kit: Adventure Medical .7 First Aid Kit For normal cuts and scrapes, the Adventure Medical .7 First Aid Kit is great for its small size and the quality of the materials they pack in it. This kit will provide the base for the first aid kit on your bug out bag list. Adventure Medical Kits Professional Trauma Pak with QuikClot The Adventure Medical Trauma Pak comes packed in a single compact bag and covers most of what you need to stop a heavily bleeding wound. It’s only missing a tourniquet and a pressure dressing. 10/15
Ever Ready Battle Dressing Adding an Ever Ready Battle Dressing (AKA Israeli Bandage) to your go-bag fills one of the gaps in the Adventure Medical Kit. Israeli Bandages are a great dressing, just make sure you understand how it works. If your first time seeing it when you need to use it, then it can be a little confusing. Watching this quick YouTube video on the subject and you’ll be up to speed without having to open yours. North American Combat Application Tourniquet The Combat Application Tourniquet is a standard when it comes to tourniquets. Tourniquets are a bad word in a lot of communities. DO NOT BE AFRAID TO USE ONE! I say that all the time and I’m going to keep saying it until everyone understands that putting a tourniquet on someone doesn’t mean they’re going to lose a limb. For severe bleeding that you cannot stop, or you can tell from the outset that you will not be able to stop, this is a lifesaver. I don’t consider a first aid kit complete unless it has at least one tourniquet in it, preferably more. I suggest putting more in your bug out bag if you believe you could sustain injuries on multiple limbs at once. Cordage (Paracord (550 Cord) / Rope) Some form of cordage should be included on your bug out bag list. Normally the go-to item for this is paracord. It’s light, doesn’t take up a lot of room and the inner threads can be removed from the outer sheath making, even more, cordage if needed. 25–50 feet should be good enough. Make sure you spool it around something so it doesn’t get tangled in your bug out bag. Knife / Axe A quality fixed blade survival knife should also be part of your bug out bag. Fixed blade knives are normally stronger and have better handles than folding knives. They tend to be better suited all around for survival situations. Light My Fire Swedish FireKnife The Light My Fire Swedish FireKnife is a normal Mora knife with a ferrocerium rod in the handle. This is my go-to for bug out bag loadouts. One thing that many people often overlook is the advantage that a small lightweight survival axe provides. A hatchet is great for all kinds of things from making and pounding in tent stakes to processing firewood. In many situations, a quality hatchet can be substituted for a survival knife. There is little that a hatchet can’t do that a knife can and there are tons of things that a knife can’t do at all that is easy for an axe. 11/15
Gransfor Bruk Wildlife Hatchet A lot of people think the idea of a survival axe is crazy, or inefficient. This is the Gransfor Bruk Wildlife Hatchet. It’s just over a foot long at 13″ and has a 1 lb. 3″ blade. The entire thing is under 1.5 lbs! Gransfor Bruk is my go-to company for all axes now. They’re beautiful, handmade tools that have a 20-year warranty. When I have this hatchet with me I almost never reach for a knife! I’ll stop geeking out over a hatchet now, but before I go on I just want to say they’re worth every penny and make a great addition to any survival kit. Be sure check out our article on the importance of including a survival axe in your bug out bag. Navigation (Compass / Maps / GPS) Laminated maps of your local area, as well as a compass and a GPS, will allow you to find your way. Make sure you practice with the compass and understand how to use it! When you’re trying to navigate during a bug out situation it’s not the time that you should be first pulling out your compass. A2S Paracord Bracelet K2-Peak A normal lensatic compass is going to be the best for true navigation. These survival bracelets would be a good backup for that compass and they have a fire starter and 550 cord. Most of the time I look at survival bracelets as more of a novelty item. They’re really one of those things that you don’t appreciate until you need them. Garmin eTrex 10 Worldwide Handheld GPS Navigator The Garmin eTrex 10 is pretty bare bones when it comes to a modern GPS, but it has all the features you would need in a bug out situation. Gloves A pair of light durable leather or mechanics gloves make a great addition to a bug out bag. Mechanix Mpact Gloves Mechanix Mpact Gloves are pretty nice. They’re light enough to give you a lot of dexterity and sturdy enough to stand up to pretty rigorous activity. The rubber coating on the knuckles and fingers really does help. I strongly recommend them. 12/15
Money In a bug out situation, it’s a good bet that society probably has not completely collapsed. This means that your money will still have value and you can potentially use it to buy items that you need along the way. Bills in small denominations make the most sense so you don’t have to overpay for an otherwise inexpensive item. Identification Having identification along with you will most likely make any encounters with the police or government go more smoothly. Some form of identification could also be required if you decided to utilize emergency resources provided by a government agency like FEMA. Electronics (Solar Panel / Rechargeable Batteries / Cell Phone) We have quite a few things that need batteries on our list and so far we don’t really have anything to recharge them with. That’s about to change. Goal Zero Venture 30 Solar Recharging Kit with Nomad 7 Solar Panel The Goal Zero Venture 30 Solar Recharging Kit with Nomad 7 Solar Panel is a solar panel and battery pack. The battery pack gives you the ability to store the power that you gather during the day in order to charge electronics at night. You can also hang it off your bug out bag to charge the battery pack as you walk during the day. Goal Zero Guide 10 Plus Recharger To charge AA and AAA batteries the Goal Zero Guide 10 is great. Just make sure that you have non-lithium rechargeable batteries. It won’t charge lithium batteries, even if they’re supposedly rechargeable. A cell phone goes without saying. As long as the grid is up, your cell phone will continue to be an incredible asset to have. Don’t forget to add one to your bug out bag. Other Items for Your Bug Out Bag Multi-Tool — This is really a must-have for any survival kit. A good old fashioned Leatherman could be worth its weight in gold in a survival situation. Sewing Kit — A small sewing kit is good for repairing rips and tears in clothing or equipment. I prefer to use steri-strips for wound closure and I don’t recommend just going to town sewing a wound closed unless you know what you’re doing. 13/15
Fishing Kit — Adding a small fishing kit and a collapsible fishing pole to your bug out bag is a great idea if you’re near natural bodies of water. Waterproof Bag — Waterproof bags are great. Some are so good that you can completely submerge them in water and still keep everything dry inside. Remember, anything that keeps water out can also keep water in. An empty waterproof bag makes an awesome way to collect water and should be a strong contender for a spot in your pack. Emergency Radio — Staying up to date on whatever event forced you out of your home is extremely important. Most emergency radios allow you to listen to NOAA and AM/FM channels. E-Tool — They’re often heavy, but they’re also a lifesaver if you need to do some digging. Prybar — This could be a lifesaver for anyone bugging out from the city. Being able to gain access to a secured area could mean the difference between finding food and going hungry. Lock Picks — Along the same lines as the pry bar. Signal Mirror — They’re really light and are one of the best ways to signal to another person during the daytime. Survival Whistle — Another good signaling device. Duct Tape — Who doesn’t love this multi-use wonder? You can carefully unroll the duct tape and then re-roll it back onto itself to get it down to a manageable size. Complete Emergency Kits Mini Survival Kits Mini survival kits can make a great addition to your bug out bag list. They make a great fall back in case you break something or forgot to add anything to your bug out bag. ESEE Mini Survival Kit The ESEE Mini Survival Kit is one of the better kits of this type that I’ve seen. It covers almost everything you need in an Altoid sized tin. This kit could certainly fill in some gaps that you may have in your bug out bag. Revival Gear Survival Tool Card This emergency survival card from Revival Gear looks like it could be useful as well. As a last resort, it’s definitely better than nothing. You can also make your own mini-survival kit like this one. 14/15
Complete Bug Out Bags Complete bug out bags are pre-made and can be purchased from some resellers. However, not all of them are created equal. The ones listed below provide a good value and come with almost everything you need. This 4 Person Premium Family Emergency Survival Bag would be good for 1 or 2 people and this Wise Company 5 Day Emergency Bug Out Backpack should have everything you need for several days. Wrapping up Your Bug Out Bag List Ultimately it’s up to each of us to come up with what the best tools are for us and our families. By reading through this article, and tailoring your bug out bag list to your needs, you’ll be ready if you ever need to bug out. Keep this in mind when making your bug out bag, everything that goes into it should help us get from point A to point B, gain food, water and shelter. If something doesn’t do one of those things then it doesn’t deserve a place with you when you bug-out. Once you’ve completed a bug out bag list that makes sense for you, start by buying the most essential items…food, water, and shelter. Then branch out from there. You can probably fill most of the missing items with things that you have lying around the house! Make sure you like us on Facebook if you found this helpful. Head over to our preparedness page for more informative prepping and preparedness articles. 15/15
Cape Town is Bracing for the Day it Turns off Running Water to 4 Million People medium.com/living-the-ready-lifestyle/cape-town-is-bracing-for-the-day-it-turns-off-running-water-to-4-million-people- bbba4b6764b8 February 10, 2018 Ready Lifestyle Ready Lifestyle aims to provide its readers with information and thought provoking articles about all things prepping, and readiness. http://readylifestyle.com Feb 10 The water shortage in Cape Town is getting more and more coverage by global news outlets. After their “Day Zero” (when they limit people to 6.5 gals of water a day) we should really start to see the effects of a city without water. Keep a close eye on what happens as it could get really bad for Cape Town residents. Keep in mind, just a couple years ago, Cape Town’s dams were full and they were being heralded as an example of how to conserve water. A combination of an epic drought and partisan politics brought them to where they are now. (Sound familiar Los Angeles?) While we all wish Cape Town the best, this could be a good learning point for preppers around the world. 1/2
Cape Town, South Africa, a city roughly the size of Los Angeles, is about to run out of water — completely. Authorities are warning that as soon as May 11 — which they’ve ominously dubbed “Day Zero” — the drought-stricken city will have to cut off taps to all homes and most businesses, leaving nearly all of the city’s 4 million residents without access to running water. Residents will then have to go to roughly 200 collection points scattered across the city to collect strictly rationed water. People will be allowed just 25 liters — about 6.5 gallons — of water a day. That’s all the water they’ll have for drinking, bathing, flushing toilets, and washing their hands. Some services like hospitals, clinics, and schools will be exempt from the cutoff and will continue to have access to running water. Source: Cape Town is bracing for “Day Zero” — the day it cuts off running water for 4 million people thumbnail courtesy of vox.com Head over to our news page for more prepping news and current events. Additional reading: Prepping 101: 12 Tips to Help People Start Prepping 2/2
FEMA Contractor Fails to Deliver 29,950,000 Meals to Puerto Rico — Still Seeks $70 Million Payment medium.com/living-the-ready-lifestyle/fema-contractor-fails-to-deliver-29-950-000-meals-to-puerto-rico-still-seeks-70-million- payment-445b018b0090 February 13, 2018 Ready Lifestyle Ready Lifestyle aims to provide its readers with information and thought provoking articles about all things prepping, and readiness. http://readylifestyle.com Feb 13 I have a little experience (on a much smaller scale) with government contracting. It’s a mess! It really doesn’t surprise me at all that FEMA contractors are failing to live up to their end of the bargain, but that’s not really what I’m looking at here. This entire story just exposes another weakness inherent to FEMA and other government agencies. They’re totally reliant upon contractors to complete their mission. If there is any kind of large-scale catastrophe in the United States, it will affect the contractors as well as you and me. If they can’t do their job when they’re at 100% do you think they’ll be able to do it when they’re struggling to recover their own homes and protect their own families? 1/3
The answer is no. This isn’t news to most of us but hopefully, it opens someone’s eyes who is on the fence or new to prepping. A contractor facing acrid backlash over a scathing report detailing the delivery of just 50,000 of a promised 30 million self-heating meals to desperate Puerto Ricans recovering from Hurricane Maria has now come forward to defend her actions. One look at the contractual obligation versus what actually made it to hungry, struggling Puerto Ricans, however, speaks far more to a lack of business acumen — or even gross incompetence — rather than defeating circumstances beyond Brown’s control. In fact, as the New York Times disclosed, Brown and Tribute Contracting LLC had no prior experience managing large-scale disasters — a mitigating detail apparently insufficient to cause the Federal Emergency Management Agency to question whether or not the business could handle the colossal task of delivering millions of meals rapidly to Maria victims — landing the $156 million contract for 30 million ready-to-eat meals at $5.10 each, to be delivered by October 23, in spite of that and other conspicuous matters. 2/3
According to the Times, Brown, who indeed had experience navigating labyrinthian government bureaucracy, approached an Atlanta wedding caterer with an eleven-member staff to “freeze-dry wild mushrooms and rice, chicken and rice, and vegetable soup. She found a nonprofit in Texas that had shipped food aid overseas and domestically, including to a Houston food bank after Hurricane Harvey. “By the time 18.5 million meals were due, Tribute had delivered only 50,000. And FEMA inspectors discovered a problem: The food had been packaged separately from the pouches used to heat them. FEMA’s solicitation required ‘self-heating meals.’” Stunned FEMA official in charge of contracting, Carolyn Ward, penned an email to Brown dated October 19 — which she shared with the Times — admonishing in no uncertain terms, “Do not ship another meal. Your contract is terminated. This is a logistical nightmare.” Source: FEMA Contractor Seeks $70 Million After Failing to Deliver 29,950,000 Hot Meals to Puerto Rico thumbnail courtesy of themindunleashed.com Looking for more prepping news? You can find it here. Additional reading: The Emotional Effects of a Collapse: How It Feels to be a Survivor 3/3
Fiskars X7 Hatchet Review — An Affordable Axe for Everyone medium.com/living-the-ready-lifestyle/fiskars-x7-hatchet-review-an-affordable-axe-for-everyone-fcdae9c1c10d February 12, 2018 Applause from SC Privateer Ready Lifestyle Ready Lifestyle aims to provide its readers with information and thought provoking articles about all things prepping, and readiness. http://readylifestyle.com Feb 12 Fiskars X7 Hatchet Review The traditional design of the Fiskars X7 and it’s small size make it suitable for carrying inside or outside of a backpack. The Fiskars X7 is a great hatchet for anyone looking for an inexpensive, yet capable hatchet for camping, hiking or any other outdoor activity. Fiskars X7 Hatchet 1/4
8.3 Head 8.5/10 Handle 8.0/10 Overall Feel 8.5/10 Pros Strong synthetic handle Small and lightweight Comes with a decent edge from the factory Cost! Cons No way to replace the handle Inferior steel to more expensive axes Check the Price on Amazon Who Should be Interested in the Fiskars X7? Anyone in need of an inexpensive hatchet that functions well should be interested in the Fiskars X7. It’s capable of filling any role that you need a hatchet to fill but it excels in processing small logs and limbs. Features The Fiskars X7 Hatchet comes in at 1.41 pounds overall. The total length is 14" and the cutting edge is 2.75". The head of the hatchet is made of a high carbon steel that is easy to sharpen. The synthetic handle wraps around the head holding it in place securely. It is not a full tang but the head does extend slightly into it the handle. 2/4
The handle ends with a rubberized, non-slip coating, a flared front side to help stop slipping and a lanyard hole. Finally, the plastic cover provided with the X7 does its job well fitting securely and protecting the blade without adding much weight. (There are several versions of this cover. All of the ones that I’ve seen look like they would work well. Some have belt loops, some have no handle or loops at all.) Pros The Fiskars X7 is really inexpensive but it still functions great! This makes it easy to recommend to almost anyone. If you look around a little, you’ll notice that it’s pretty hard to find anyone recommending any axes besides the Fiskars X7 Hatchet at this price point. That’s because you can’t really get a better hatchet for less than $100 more than this little guy. In testing, it made short work of smaller logs and trees. Even cutting through a 7" log only took me a few mins. The synthetic handle is supposedly stronger than steel, I don’t know that I believe that but it feels very strong and didn’t seem like it would break. Cons When you’re dealing with inexpensive tools, there’s normally some cost-cutting that has to be done. With the Fiskars X-7, this comes in the steel used in the axe head. It’s a little softer than more expensive hatchets so it doesn’t hold an edge as long as blades made of harder steel. This didn’t really bother me too much in testing as it’s still very easy to bring the edge back. The biggest con for me is the molded handle around the head of the hatchet. I like a traditional wooden handle so you can replace the handle if it breaks out in the middle of nowhere. With this handle, the hatchet is basically trash if it breaks. Fiskars claims a “Lifetime Warranty”. Further research says this warranty “does not cover sharpening, normal wear, and tear, environmental factors, accidental damage, misuse, industrial/commercial use.” So they will replace any product with manufacturing defects, but if you break it, you’re buying a new one. Conclusion The Fiskars X7 Hatchet is a great piece of gear for the price. (You can but 5 or 6 of these for the price of a Gränsfors Bruk Wildlife Hatchet.) 3/4
With that in mind, I highly recommend the Fiskars X7 if you’re just going to use it a couple times a year or if you have a bunch of kits that you want to put a hatchet in. Buy 4 or 5 and put one in with your camping gear, one in a bug out bag, one in the trunk, etc. Check out our article The Survival Axe — The Piece of Gear You May Have Overlooked for our ideas on the survival axe. For more gear reviews, check out our gear review page. 4/4
Goal Zero Torch 250 Flashlight Review medium.com/living-the-ready-lifestyle/goal-zero-torch-250-flashlight-review-8f2f2c456fea February 24, 2018 Goal Zero Torch 250 Flashlight Review The Goal Zero Torch 250 Flashlight is one of the most popular products from Goal Zero’s extensive line of rechargeable and solar-powered electronics aimed at people interested in camping, emergency, and preparedness. This product functions as a battery pack, flashlight, and solar panel all in one. Goal Zero Torch 250 8.4 Battery Size 1/4
8.5 /10 Versatility 10.0 /10 Durability 8.0 /10 Recharge Time 7.0 /10 Pros Capable of filling many roles Two integrated charging methods so you don’t need external power Pairs easily with other Goal Zero products Cons Takes a long time to recharge with its integrated solar panel Slightly more expensive than similar products Not as resistant to the elements as we’d like Check the Price on Amazon Who Should be Interested in the Goal Zero Torch 250 This is a versatile, multi-function light that deserves a place in any emergency kit. Anyone interested in a battery pack that can recharge itself, recharge USB products, and function as a light should seriously consider picking up this product. Features The Goal Zero Torch 250 has an internal 4400mAh battery that can be charged with the integrated solar panel, USB cable, or hand crank. It has a USB port that can be used to charge other electronic items such as a cell phone or tablet. The battery can recharge an average cell phone 1–2 times depending on the size of the phone’s battery. 2/4
The Torch 250 also has a 250-lumen flashlight, a floodlight on the opposite side of the solar panel and a red light for use when you need to save your night vision. The red light also has a strobe setting for emergency signaling. All of these options have 2 power settings in order to let you choose the lowest amount of light that you need to preserve battery power. On the lowest setting, which is still pretty bright, the floodlight can run for 48 hours. It’s perfect for lighting an area when the power goes out or just doesn’t exist. The body has a slightly rubberized coating that makes it feel very secure in the hand. It also has an angled design to allow the solar panel to be aimed at a 45-degree angle for maximum charging and a 2 piece hook system to allow the entire light to hang from nearly anything. Fully charging the battery requires 7 hours if it’s plugged into a USB port, 7 hours from an external solar panel (like the Goal Zero Nomad 7), and 24 hours from the integral solar panel. The hand crank provides around 2 minutes of run time for every minute of cranking. Pros The biggest advantage that the Goal Zero Torch 250 has is its versatility. Being able to charge other electronic items, recharge itself with no external power sources, and the addition of an emergency hand crank means that this single flashlight can get you out of a lot of bad situations. It can also be kept in an always ready status by keeping it in a window or other area that gets a lot of sunlight. Adding an external solar panel is really easy. This cuts the charging time down to about a 1/3 compared to the internal solar panel. Cons Charging the battery with the integrated solar panel takes at least 24 hours of direct sunlight. This means that it would take about three days to charge the battery to full with just the solar panel. 3/4
The hand crank is plastic and the internal gears are plastic too. This means that you’re going to want to be kind of gentle with it if you plan on using it a lot. I would only use it as an emergency since it takes a ton of work to get any meaningful amount of power by cranking it. Conclusion I keep a Goal Zero Torch 250 sitting in my kitchen window so it’s always charged and ready to go in case of a power outage or other emergency. It mainly stays around my house for that use but I have taken it camping and had good results with it. The floodlight is a nice feature to light up an area the size of a four-man tent up to a small room. I’ve actually given these out as presents to 7 different family members and each one has made it a point to tell me how great it is. Several people use it like I do, as a light that’s always there in an emergency. My sister in law keeps it with her to top off her cell phone during the day when she’s out and about and my brother in law takes it on every camping trip he goes on. As an all in one battery, light, and solar charger it’s really hard to beat the Goal Zero Torch 250. Interested in putting together a bug out bag? Make sure you read our article The Best Bug Out Bag List — What You Need and Why You Need It! You can find more gear reviews on our gear review page. 4/4
How to Keep Your Chickens Legal and Safe in the City medium.com/living-the-ready-lifestyle/how-to-keep-your-chickens-legal-and-safe-in-the-city-f945661ac098 February 15, 2018 Ready Lifestyle Ready Lifestyle aims to provide its readers with information and thought provoking articles about all things prepping, and readiness. http://readylifestyle.com Feb 15 Keeping Chickens in the City Keeping chickens is now becoming more and more popular among individuals and families looking to become more self-sufficient. In fact, they’re becoming so popular that it’s now common to have people raising chickens in areas that no one ever really expected them. From suburbs to cities, raising chickens is making a big comeback. 1/3
The big question is how do you keep chickens within the city? Offthegridnews.com wrote a great article on this very subject and I wanted to share it. 1. Zoning laws Despite the growing popularity of backyard flocks, many cities haven’t kept pace and have zoning laws that prohibit the keeping of chickens within city limits. 2. Neighborhood predators You’d expect there to be a danger to a flock of chickens out on a farm. Suburbia, however, has perils of its own that can be deadly for your brood. 3. Free-range dangers You may not have acres of land to allow your chickens to free-range. Even with an average-sized yard, however, your small flock can happily spend days rooting through the grass and bushes in search of snacks, a warm dirt spot to burrow down in, or a shady area to rest. 4. Poisonous plants Many decorative plants that look beautiful in landscaping beds are poisonous to chickens. Source: How To Keep Your Chickens Legal (And Safe) In The Big City 2/3
Do you have any experience with raising chickens within city limits? Let us know how it went in the comments section below. Interested in raising chickens? Be sure to check out Building a Backyard Chicken Coop — Cheap and Sustainable Prepping for ideas on building your own chicken coop. You can always find more preparedness articles in our preparedness section! 3/3
medium.com/living-the-ready-lifestyle/how-to-regrow-food-from-scraps-39-easily-sustainable-foods-for-long-term-disasters-medium.com/living-the-ready-lifestyle/how-to-regrow-food-from-scraps-39-easily-sustainable-foods-for-long-term-disasters- 1194702bacf0 March 9, 2018 Contents 1 Why is it important to know how to know how to regrow food from scraps? 2 What foods can you regrow? 2.1 Trees 2.1.1 Apples 2.1.2 Avocados 2.1.3 Citrus Fruit 2.1.4 Pomegranates 2.1.5 Chestnuts 2.1.6 Cherries 2.1.7 Dates 2.1.8 Peaches 2.1.9 Hazelnuts 2.2 Plants 2.2.1 Pineapple 2.2.2 Yams 2.2.3 Carrot Greens 2.2.4 Leeks, Scallions, Spring Onions, and Fennel 2.2.5 Celery, Bok Choy, Romaine Lettuce, and Cabbage 2.2.6 Ginger, and Turmeric 2.2.7 Lemongrass 1/9
2.2.8 Potatoes 2.2.9 Garlic 2.2.10 Onions 2.2.11 Sweet Potatoes 2.2.12 Mushrooms 2.2.13 Basil, Cilantro, Mint, Lemon Balm, and Rosemary 2.2.14 Beets, Parsnips, and Turnips 2.2.15 Peppers 2.2.16 Pumpkins 2.2.17 Tomatoes 3 Conclusion Why is it important to know how to know how to regrow food from scraps? Understanding which plants you can regrow from scraps can be extremely helpful when planning a garden for a long-term collapse or SHTF event. Having a nearly endless supply of sustainable foods really doesn’t have any downsides. Even if you aren’t into prepping, there is plenty of useful information in this article for you. What foods can you regrow? Trees When planting a tree, you should understand that it will be several years before they will produce any food for you and your family. These are long-term sources of food. Apples To grow an apple tree you should rinse the seeds and allow them to dry for a few days. You can start an apple tree indoors then transplant it outside or simply start it outside. Place 2 or 3 seeds about an inch below the ground. Planting indoors first allows for a better chance of the tree taking root. Apple trees are best suited for places with fertile soil. If you begin the tree inside, be sure to soak the roots for about two hours before transplanting it outside. Avocados Begin your avocado tree by rinsing an avocado pit and sticking 4 toothpicks in it at even intervals. Then place it in a glass of water with the bottom side of the pit water with the pointed side up. Place the glass in a sunny area and change the water daily. 2/9
After 3–6 weeks you should start seeing a split in the bottom of the pit. After several more weeks, a stem and roots will begin to grow. When a couple more weeks have passed you should start seeing leaves. Once the tree reaches a height of 8 inches, it’s time to plant it into a pot. When transplanting the sapling into the pot, make sure the top half of the pit remains above the soil. Citrus Fruit If you live in a warm climate, then citrus fruit trees are a good option for you. You can begin the seeds by rinsing them off, allowing them to dry, and planting them about 1/2 an inch below the surface of the potting soil. Cover the top of the pot with plastic wrap and keep the water moist. Place the pot in a sunny area for several weeks until your tree begins to grow. You should keep the plants above 60 degrees and make sure the soil doesn’t dry out while the seeds are germinating. If the soil dries out it will stunt the growth of the seedling or kill it completely. Pomegranates Growing pomegranate from seeds are relatively easy to grow. Strip the flesh off the outside of the seeds and plant them about a half inch below the surface. You can do this inside or outside. If you grow them inside you can decrease the time needed for germination by keeping the soil slightly above room temperature. Pomegranate trees usually begin producing fruit in 1–3 years. Chestnuts Chestnuts are another food source that can be grown indefinitely. I don’t recommend trying them as they have a low rate of germination, low success when being transplanted and don’t consistently produce from year to year. If you’re interested in learning how to grow chestnuts then check out this article from the Washington Chestnut Company. Cherries 3/9
Growing cherries from pits requires a little bit of work. First, soak the pits for 5 minutes in water, remove any remaining fruit and then dry them in a warm area for about 5 days. Then place them in a sealed plastic container in the refrigerator for 10 weeks. This simulates the normal passing of winter and will trigger the pits to begin growing. Plant 2–3 pits in a container water regularly until they are about 2 inches tall. At this point, you can remove the strongest seedling and plant it outside once there is no longer a danger of a frost. Plant multiple trees at least 20 feet apart. You can also do this naturally by planting several pits in a hole in the fall. Once the spring begins, they will begin to grow. Dates Peaches Growing peaches from pits is similar to growing cherries. They can either be grown in the ground by placing 2–3 pits in a hole 3–4 inches below the ground in the fall or you can simulate this by placing the pits in soil inside a plastic container and keeping it refrigerated for several weeks to months. Once they begin to germinate, you can plant them outside after the last frost. Hazelnuts Hazelnut trees are the easiest nuts to grow. They prefer low nutrient areas but can be grown in higher nutrient soil at the cost of lower nut production. Starting a tree indoors will give you the best results but you can also simply plant the nuts straight into the soil outside. You can aid the germination process by using a file to gently pierce the outer husk of the nut. This can give more consistent results during germination. If you start a tree inside, you should let it grow until it’s about 12 inches tall before transplanting it. Plants Plants have several advantages over trees. They normally take up less room, and produce food faster than trees. This makes them ideal for food production if a SHTF event happens to strike. 4/9
Pineapple Growing pineapples from the gree tops of a pineapple fruit is one of the best ways to begin a new pineapple plant. Let the top dry for about 7 days before planting it. Then, plant it in soil with the green leafy portion sticking out. This can be done inside or outside. Plants should be 4 to 5 feet away from each other to allow them room to grow. One of the best ways to grow pineapple plants is to keep them potted and leave them outside while the weather is warm. After it gets cold you can move them inside or into your greenhouse. It takes several years for the plants to fully mature and begin producing fruit. Yams Yams can be planted after they are allowed to rest for 3–4 months. Any yams that don’t show any signs of disease can then be planted. This has to happen before they begin to sprout. Cut each yam into three pieces and allow them to lay out for one week. They can then be planted. Yams prefer a loose clay soil with good drainage. A month after the vines emerge you should place a stake at an angle to meet the stake from the next plant. This should form a basic “A” shape allowing for the highest yields. Carrot Greens A lot of people believe that they can regrow carrots from the tops. Unfortunately, this isn’t true. Carrots need to be planted from seeds in order to grow. The good thing is that carrot tops don’t need to go to waste. You can regrow the greens by placing the carrot tops on a plate with a little water. After a few days, the carrot will grow roots. These can be planted outside. If you’re interested in growing carrots, there’s a lot of good information here. Leeks, Scallions, Spring Onions, and Fennel 5/9
Leeks, scallions, spring onions, and fennel are really easy to regrow. Simply put the bulbs in a glass and fill it with enough water to cover the bulb. Place the glass in a window that has plenty of sunlight and they’ll start growing in a few days. Make sure that you change the water every few days. Celery, Bok Choy, Romaine Lettuce, and Cabbage Celery, bok choy, romaine lettuce, and cabbage can all be regrown from the root end of the plant. Place the root end into 1/2 inch of water and then put it in the sun. Make sure you mist the top in order to keep it moist. After a week or so you can plant it into a pot or directly into the ground. Make sure the soil stays moist until the plant fully takes root. After several weeks, the plant will be ready to harvest. Ginger, and Turmeric Ginger and turmeric can be regrown as long as the rhizomes have living “eyes” on them. These eyes are the growth buds that will become new green shoots. Place the ginger or turmeric on top of the soil then lightly cover it with more soil. Water and place in a sunny window. Once it begins to take root, you can plant it outside. Lemongrass Place the roots of the lemongrass in a little water and then put them in a sunny place. After a few days, the roots will start growing. You can then put them in a pot with some soil. Once the lemongrass is about a foot tall, it’s ready to be harvested. Leave the roots planted since they’ll keep growing. Potatoes 6/9
Potatoes can be regrown by using seed potatoes (pieces of potatoes with 2 or more eyes each) or small whole potatoes. Cut seed potatoes about 2 days before you plan on planting them. This allows them to form a protective layer on the cut area. Plant them about 4 inches in the ground and a foot apart. They will do the best in loose soil and in cooler environments. 60–70 degree soil is the best. Once the soil reaches temperatures of 80 degrees or more they will stop growing completely. Garlic Garlic can be regrown from individual cloves. Bury them about 2 inches in the ground and 4 to 6 inches apart with the pointed side up. Keep the soil moist. Onions Regrowing onions is easier than most other vegetables. Cut the root end of the onion off, leaving 1–2 inches of onion. Plant the onion with the root end down and cover it in soil. Be sure to keep the soil moist. You can continue to replant the onion this way over and over. Sweet Potatoes To regrow sweet potatoes, you will need sweet potatoes with well-formed eyes. You can prepare your sweet potatoes for planting in the same way that you would normal potatoes. Bury the entire potato or seed potatoes under a thin layer of topsoil. Keep the soil moist and in an area that has a lot of sunlight. When the shoots begin to reach a height of four inches replant the sweet potatoes outside. Plant them 4 inches in the ground with about a foot in between one another. Expect it to take 4–6 months for your potatoes to grow. Mushrooms Mushrooms can also be regrown. Remove the cap, bury it in moist soil all the way to the top 7/9
leaving the very top exposed. Basil, Cilantro, Mint, Lemon Balm, and Rosemary Basil, cilantro, lemon balm, and rosemary can all be regrown by placing clippings in a glass of water until they grow roots. Once they’ve regrown roots, you can transplant them into a pot or outside. Beets, Parsnips, and Turnips Beets, parsnips, and turnips are very much like carrots when it comes to regrowing them. Placing the top of the beet, parsnip, or turnip on a plate or in a glass with the cut greens pointed up. These will end up growing more greens for several weeks. Peppers Pepper Jo does a great job of explaining how to regrow peppers. Her site is a wealth of knowledge about peppers if it’s something that you’re interested in! Pumpkins To regrow pumpkins, first, soak the seeds for 2 hours. Plant the seeds in raised beds or mounds about 10 feet apart. The soil should be at least 70 degrees in order for the pumpkins to properly germinate. Vine type pumpkins need a lot of room so be sure they’re separated well. Tomatoes Rinse the seed then allow them to completely dry. Plant them in a pot inside until they begin to sprout. Once the sprouts are a few inches tall, you can transplant them outside. Be sure to plant the tomatoes in a sunny area and water a few times a week. When the plants get taller, be sure to use stakes to help support them. 8/9
Conclusion If you haven’t already started a garden, I would highly suggest that you at least keep looking into it! A solid knowledge of gardening is something that we all should have for a long-term SHTF event. Be sure to check out our other preparedness articles. Do you know of any other food items that you can regrow from their scraps? Please share them in the comment section below! 9/9
Smith & Wesson SW671 Extraction and Evasion Tomahawk Review medium.com/living-the-ready-lifestyle/smith-wesson-sw671-extraction-and-evasion-tomahawk-review-e5df56bcc090 February 20, 2018 Ready Lifestyle Ready Lifestyle aims to provide its readers with information and thought provoking articles about all things prepping, and readiness. http://readylifestyle.com Feb 20 Smith & Wesson SW671 Tomahawk Review The Smith & Wesson SW671 Tomahawk is a solid, single piece of steel produced with extraction and evasion in mind. The SW671 Tomahawk is a prime candidate for those looking for a hatchet or tomahawk to put in an urban bug out bag. Smith & Wesson SW671 Tomahawk 1/3
8 Head 8.5/10 Handle 7.5/10 Overall Feel 8.0/10 Pros Solid full tang construction Capable of prying without fear of breakage Demo spike can break cinder blocks and windows with ease Cons Heavy Not great for processing wood Check the Price on Amazon Who Should be Interested in the Smith & Wesson SW671 Tomahawk? Anyone looking for a tomahawk or hatchet for an urban bug out bag should be interested in the SW671 Tomahawk. It’s ability to pry, break and smash could be invaluable in an urban environment. Features The Smith & Wesson SW671 Tomahawk weights 2.69 lbs, and has an overall length of 15.9". The cutting edge is 3.9" long and it has a demolition spike on the opposite side. The entire tomahawk is constructed of a single piece of 3/8" thick 1070 steel with black synthetic covers on the handle. It comes with a nylon sheath that covers both the blade and the spike. The sheath has a basic belt loop on one side. 2/3