Download

1 / 22
220 likes | 290 Vues
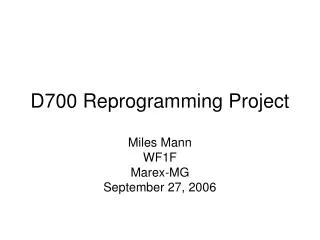
iPC1550KP Keypad and Reprogramming Overview. iPC1550KP Keypad and Reprogramming Overview. iPC1550KP(T) Background.

E N D
iPC1550KP(T) Background • In response to numerous requests for an Industrial Computer with a keypad front panel for use in more traditional applications, Nematron has developed the iPC1550KP(T). Although touchscreens are now well accepted and by far represent the majority of modern industrial computer sales, there still are some accounts that desire and prefer a keypad type unit. If a customer desires to use a keypad with Windows 7 or Windows XP, we have developed a solution that utilizes a USB controller for the keypad connection. We have extensively analyzed previous Nematron, Xycom, Siemens, Pro-face, and several other keypad units in combination with the standard PC keyboard on your desk. Through the use of “Mode” keys we have been able to develop a 15” LED backlit industrial computer with 81 keys and superior functionality, we believe, with more keypad features than • any previous Industrial Computer. In fact this • computer matches the cutout of several of • these older units and is also rack mountable. • We are proud to present the iPC1550KP(T), • with or without an optional touch screen. • This presentation provides a quick overview of • the keypad functionality, reprogrammability, • and even relegendability.
Function Keys • The default key returns for F1 – F10 are F1 – F10 respectively • The default key returns for F11 – F20 are [SHIFT+(F1 – F10 respectively)]
System Keys • The default key returns for S1 – S6 are [ALT+SHIFT+(F1 – F6 respectively)]
ATM Style Screen Keys • Left Keys are defined as SC1 through SC8 (top to bottom) • - the default key returns for SC1 – SC8 are [CTRL+(F1 – F8 respectively)] • Right Keys are defined as SC9 through SC16 (top to bottom) • - the default key returns for SC9 – SC16 are [ALT+(F1 – F8 respectively)] • Can be tied to Application Screens, similar to ATM functionality
Numeric & Cursor Control Keys • Not Reprogrammable or Relegendable • Standard PC keyboard functionality • Not Reprogrammable or Relegendable • Standard PC keyboard functionality
Mode Keys • Not Reprogrammable or Relegendable • “Alpha” and “Symbol” are mutually exclusive • Both LEDs off; unit is in “Function Key” mode • First press turns LED on and appropriate mode is selected • Press same key again turns LED off and returns to “Function Key” mode • Press the other Key and the other mode is selected (that LED turns on and the other LED turns off • “Caps Lock” • When in “Alpha Mode” and the “Caps Lock” LED is on, letters will return upper case, otherwise return lower case (like std. keyboard) • “Shift” • While holding “Shift Key” in “Alpha” mode and “Caps Lock” LED is off, upper case letters will be returned • With “Caps Lock” LED on and holding “Shift”, lower case will be returned
Alpha and Symbol Modes Symbol Characters Function Key Characters Alpha Characters • “Alpha” mode on, returns Alpha characters on upper Left side of lower 26 keys • “Symbol” mode on, returns Symbol characters on upper Right side of lower 26 keys • “Alpha” and “Symbol” modes both off, returns F1 – F20 and S1 – S6
Nematron Reprogramming Software • SC1 – SC16, F1 – F20, and S1 – S6 are the only keys that are Reprogrammable • F1 – F20 and S1 – S6 can also be relegendedvia a custom made insert (see later slide) • MicroSoft DOT NET 4.0 required to reprogram keys • DOT NET 4.0 supplied with Software • May not be installed on unit as part of current Windows XP or Windows 7 Service Packs • Two Nematron Programs Required • Nematron iPC15X0KP Editor (FlexMatrixEditorforNematron) • Nematron iPC15X0KP Programmer (FlexProgrammerforNematron) • Default iPC15X0KP Keys (read Only file) • Nematron_iPC15X0KP_Keys_Default.bin
Nematron Reprogramming Software Notes • This software needs to run on the iPC1550KP unit in order to reprogram the USB keypad controller contained within the iPC1550KP • Software can be run from removable media (i.e. USB memory stick or CD) or installed directly on the computer • The Nematron Editor can be run on a different computer to create and save a custom key definition file, which then is needed on the iPC1550KP for the Nematron Programmer to run (DOT NET 4.0 will be required on both computers) • Once Programmed the iPC1550KP must be power cycled for the custom key definitions to take effect • It is recommended that the software NOT be operator accessible due to the possibility of the keypad functioning improperly if tampered with • The default key file can be utilized to return the keypad to factory shipped functionality • A “Read Only” version of the custom definition file should be stored on the computer with a reprogrammed keypad in case it may be needed in the future • Notes: • 1. Nematron does not take responsibility for any reprogrammed keypad. The proper functionality of such reprogrammed keypad is the sole responsibility of the customer. • 2. Nematron will not have the customer’s reprogrammed keypad definitions on file, and as such, can only restore units to factory defaults during any application or service assistance.
Keypad Reprogramming Procedure • Step 1: Install DOT.NET 4.0 • Open the DOT NET 4.0 Folder and Click on file to install • If already installed this step can be skipped • Reboot the PC when completed • Step 2: Run Flex Matrix Editor for Nematron • Open Nematron iPC15X0KP Editor folder • Click on the program to run • Do not remove or change the “.bin” file, this file contains the factory defaults and is required to open the editor correctly
Keypad Reprogramming Procedure • Step 3: Select the Tab and Key to Reprogram • Tab: “MatrixFuncKey 0” • Keys SC5 - SC16 • Tab: “MatrixFuncKey 1” • Keys SC1 - SC4 & S2 - S6 • Tab: “MatrixFuncKey 2” • Keys S1 & UF1 - UF20 • Tab: “MatrixFuncKey 3 “ • Keys UF1 - UF9 • Step 4: Once the key to be reprogrammed is found click on “ExtMacro” button on right side of screen to create an Extended Macro for this key press Note: UF1 – UF20 are labeled F1 - F20 on the keypad, default returns for these keys are F1 – F20 respectively, once redefined it is considered a “User Function Key” (i.e. UF1 - UF20)
Keypad Reprogramming Procedure • Step 5: Select the Type of Functionality desired for this key press. • Selections are as follows: • Make All Break All (all programmed ‘Keys” returned at same time) • Sequential at Press • Sequential at Release • Step 6: Select the key strokes required in sequential order from “Key 0” through “Key 10” • 11 sequential Keystrokes Maximum (“No Key” selected ends the string) • Drop down selections are for the keys on a standard keyboard • Note: “Caps Lock” functionality will affect characters chosen when the reprogrammed key is pressed • Hit the “OK” button on right side of window when done with your selections Note: “Edit an Extended Macro Key” window may need to be stretched and/or moved to see the right most portion of the window. This depends on the screen resolution of the computer and monitor being utilized.
Keypad Reprogramming Procedure • Step 7: Once all desired keys are programmed the file must be saved • “Save” or “Save As” will open a dialog box that requests a file name to be entered. It is highly recommended not to choose the default .BIN file shown. Enter your own custom file name and save it to your desired location. If the default .Bin is chosen the Editor will not open with the default key codes any longer, it will open with your key definition file. In the future you can open your file by selecting “Open” in the editor and browsing for your file to open. • Step 8: Close the Editor when completed, and your file has been successfully saved. • Note: Remember your file name and location where you stored it.
Keypad Reprogramming Procedure • Step 9: Return to the main menu and open the folder “Nematron iPC15X0KP Programmer” and click on the file to run the program
Keypad Reprogramming Procedure • Step 10: Click on the “Load” button, browse and select your saved definition file (.BIN) file • Step 11: Verify the selected file loaded successfully and then click on the • “Program & Verify” button to program the keypad with your key definitions
Keypad Reprogramming Procedure • Step 12: After the file has been written and verified as “Passed”, close the program and the iPC1550KP unit must be restarted for the program to take effect. • Step 13: Once the computer has been restarted, verify the functionality of the reprogrammed keypad. If not satisfied with the functionality repeat the procedure. If needed, the defaults can be reprogrammed by opening the Programmer and selecting the “Nematron_iPC15X0KP_Keys_Default.bin” file from the main menu.
iPC1550KP Legend Strips • The iPC1550KP unit has two legend strips that can be found underneath the bottom cover plate of the unit • Bottom Cover Plate • Remove Three #4-40 Screws • One is under strain relief bar, held in place with two #6-32 screws w/ Bottom Cover Plate Removed Insert Strips (2)
Legend Strip Specifications • Recommended Material: Autotex XE Polyester • Ideally characters (or graphic symbols) to be printed on back side of legend strip with the background color flood coated over the top of them (i.e. all printing on back side)