Download
1 / 28
300 likes | 572 Vues
LEGO NXT Robot Programming. Introduction to Programming a Lego NXT robot in C#. Objectives. Introduction to the NXT Robot Hardware/Software Requirements Setting up a Bluetooth connection Connecting to a robot from a C# application Getting the robot to move

E N D
LEGO NXT Robot Programming Introduction to Programming a Lego NXT robot in C#
Objectives • Introduction to the NXT Robot • Hardware/Software Requirements • Setting up a Bluetooth connection • Connecting to a robot from a C# application • Getting the robot to move • Obtaining information from sensors • Touch • Ultrasonic • Light
The NXT Tribot Robot Sound Ultrasonic Touch Wheels (x 2) Grabber Light
Software/Hardware Requirements • Hardware • NXT Mindstorms Lego robot • Bluetooth adapter (USB) • Software • Lego NXT Driver software (CD provided with robot) • Visual Studio (C#) • MindSqualls API http://www.mindsqualls.net/
Setting up a Bluetooth connection • On the NXT robot • Ensure bluetooth is switched on • Ensure it is “visible” • On the PC • Add a “new” bluetooth device • Attach it to your NXT (should be discovered automatically) • Passcode will be required on both the NXT and the PC • Need to record which COM port is being used • For detailed instructions see the document Connecting NXT via Bluetooth.docx
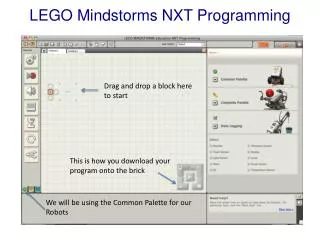
Preparing a C# project • Create a new forms project • Add the MindSqualls library to the project • Right click the project (in the solution explorer) and select “Add” • Choose “Existing item” • Browse for NKH.MindSqualls.dll and press “Add” • Add a reference to this library • Right click references (in the solution explorer) and select “Add Reference” • Select the “Browse” tab • Select the file NKH.MindSqualls.dll and press “OK” • Add the following line to the top of the form code using NKH.MindSqualls;
Connecting to the robot • The robot is controlled via an object of the class NxtBrick • When a brick object is created it needs to be passed a string parameter containing the COM port for the bluetooth connection • The brick object must then be connected: NxtBrick brick = new NxtBrick(sComPort); brick.Connect();
Disconnecting the robot • Before closing the application the brick should be disconnected • The brick object should also be deleted brick.Disconnect(); brick = null; • To check if a robot is connected or not if (brick != null && brick.IsConnected)
“Talking” to the NxtBrick • Status and other information can be obtained from the NxtBrick via properties brick.Name brick.BatteryLevel • Sounds can be sent to the NxtBrick (1stparam is frequency, 2ndparam is time in milliseconds) brick.PlayTone(500, 250); Thread.Sleep(250); // pause to allow tone to play brick.PlayTone(1000, 500); • Note that if you are using the Thread.Sleep method you need to add the following at the top of your code: using System.Threading;
Demonstration HelloNXT.sln
NXT Tribot Ports • 3 Motors • MotorA: Right wheel • MotorB: Grabber • MotorC: Left wheel • 4 Sensor Ports • Sensor1: Touch sensor • Sensor2: Light sensor • Sensor3: Sound sensor • Sensor4: Ultrasonic sensor
Getting the robot to move • Create Motor objects and attach to motor ports brick.MotorA = new NxtMotor(); brick.MotorC = new NxtMotor(); • Motors can be set to run at a power level (speed) for a particular number of degrees rotation brick.MotorA.Run(20, 360); brick.MotorC.Run(20, 360); • Power values range from 0-100 (% power of motor) • Rotation values range from 0-unlimited (0 runs continuously) • To turn run one motor only (or both at different speeds) • To reverse set use a negative power value
Stopping the robot • If the motors are set to run continuously then your code must provide the instruction to stop • The robot can be stopped by setting the motors into “idle” mode brick.MotorA.Idle(); brick.MotorC.Idle(); • Another option is to “brake” the motors but in this case power is still used to hold the motor in position (e.g. On a hill)
Sequencing issues • The C# code runs sequentially, issuing instructions to the robot as specified • If an instruction tells the robot to do something which will take some time then the code does not wait for that operation to complete • What will happen if the following code is used? brick.MotorA.Run(20, 3600); brick.MotorC.Run(20, 3600); brick.MotorA.Run(-20, 3600); brick.MotorC.Run(-20, 3600);
Solving the problem • There are a number of ways to solve sequencing problems • Ideally you would obtain information from the robot to indicate when it is finished • This can be quite complicated • A crude but simple approach is to add code to make the program “sleep” for enough seconds to let the robot complete its operation brick.MotorA.Run(20, 3600); brick.MotorC.Run(20, 3600); Thread.Sleep(5000); //sleep for 5 seconds brick.MotorA.Run(-20, 3600); brick.MotorC.Run(-20, 3600);
Synchronising the motors • Setting both motors to run separately will inevitably affect the straightness of motion • One motor will start fractionally before the other (depending on the order of code statements) • This will cause the robot to start with a slight turn (and finish with a turn in the opposite direction) • This can be avoided by creating a synchronised pair of motors and controlling them as a pair
Controlling synchronised motors • Create an NXTSyncMotor object from the required motors NxtMotorSyncmotorPair; motorPair = new NxtMotorSync(brick.MotorA, brick.MotorC); • To run the motors as a pair use: motorPair.Run(20, 180, 0); • This time a third parameter is required to control turning. It ranges from -100 to 100 (0 moves straight) • As before an angle of 0 moves the robot continuously • To stop both motors use motorPair.Idle();
Controlling the Tribot grabber • The grabber on the Tribot robot is controlled by a motor • Running the motor in the forward direction opens the grabber brick.MotorB.Run(5, 45); • Running the motor in the backward direction closes the grabber brick.MotorB.Run((sbyte)(-5), 45); • A cast is required here to ensure the correct data type is used • Note that only small angles of rotation are required. Turn too far and your grabbers will fall off the robot!!
Demonstration NXTMove.sln
Interacting with sensors • Objects can be created for each sensor type and attached to the appropriate port • A poll command is issued to the sensor and this enables data recorded by the sensor to be returned • Appropriate methods exist (depending on the sensor type) to retrieve this data • A timer control on your form can be used to repeatedly poll and retrieve data • The timer tick event can then be used to perform necessary actions depending on the data retrieved
The touch sensor • Creating and attaching a touch sensor (should be done before connecting the brick): touchSensor = new NxtTouchSensor(); brick.Sensor1 = touchSensor; • Determining whether the touch sensor is pressed or not: touchSensor.Poll(); if (touchSensor.IsPressed == true) { // code to excecute if sensor is pressed }
Demonstration TouchTest.sln
The light sensor (not NXT2) • Creating and attaching a light sensor (should be done before connecting the brick): lightSensor = new NxtLightSensor(); brick.Sensor2 = lightSensor; • Determining the intensity of light recorded by the sensor: lightSensor.Poll(); intiIntensity = (int)lightSensor.Intensity; • The light sensor can generate a light of its own which reflects objects and makes recording more accurate: lightSensor.GenerateLight = true;
Demonstration LightTest.sln
The sound sensor (not NXT2) • Creating and attaching a sound sensor (should be done before connecting the brick): soundSensor = new NxtSoundSensor(); brick.Sensor3 = soundSensor; • Determining the level of sound recorded by the sensor: soundSensor.Poll(); intiSound = (int)soundSensor.SoundLevel; • Note that this sensor records only sound levels, it cannot be used to determine the frequency of the sound (i.e. It cannot be used for sound recognition)
Demonstration SoundTest.sln
The ultrasonic sensor • Sends out an ultrasonic wave which is deflected by an object in front of the sensor • The time to return enables the distance to be calculated • Creating and attaching an ultrasonic sensor (should be done before connecting the brick): ultrasonicSensor = new NxtUltrasonicSensor(); brick.Sensor4 = ultrasonicSensor; • Determining the distance (in cm) recorded by the sensor: ultrasonicSensor.Poll(); intiDist = (int) ultrasonicSensor.DistanceCm; • If there is no object in range a distance value of 255 is returned
Demonstration UltrasonicTest.sln