Download
1 / 40
400 likes | 590 Vues
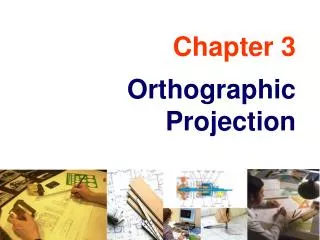
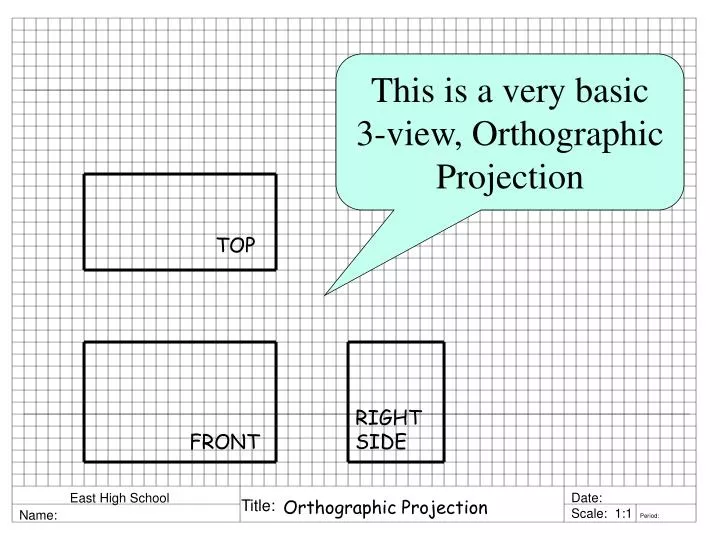
This is a very basic 3-view, Orthographic Projection. TOP. RIGHT SIDE. FRONT. Orthographic Projection. The top view is directly above the front view. TOP. RIGHT SIDE. FRONT. East High School Name:. Orthographic Projection. The right side view, is directly right

E N D
This is a very basic 3-view, Orthographic Projection TOP RIGHT SIDE FRONT Title: Orthographic Projection
The top view is directly above the front view TOP RIGHT SIDE FRONT East High School Name: Title: Orthographic Projection
The right side view, is directly right of the front view TOP RIGHT SIDE FRONT East High School Name: Title: Orthographic Projection
3-view drawings line-up just like this TOP RIGHT SIDE FRONT East High School Name: Title: Orthographic Projection
First we will draw the front view. FRONT East High School Name: Title: Orthographic Projection
Then we will draw the top view TOP FRONT East High School Name: Title: Orthographic Projection
Then we will draw the Right Side View TOP RIGHT SIDE FRONT East High School Name: Title: Orthographic Projection
Start the lower left corner of the front view here, up 2 and over 6 lines East High School Name: Title:
Each grid line is one quarter of an inch. So, you need to count over 4-inches and draw the line East High School Name: Title:
Since each grid line is one quarter of an inch, you need to count up 2 1/2-inches and draw the line. East High School Name: Title:
Since the left side is 2 1/2 tall, count up 2 1/2-inches and draw the line for the right side of the rectangle. East High School Name: Title:
Now draw the final edge of the rectangle. East High School Name: Title:
We want to start to draw the top view up, 1 1/2 inch from the top edge of the front view East High School Name: Title:
Draw this line of the top view up, 1 1/2 inch from the top edge of the front view East High School Name: Title:
For this edge of the top view draw a 2-inch line. East High School Name: Title:
This edge of the top view is also a 2-inch line. East High School Name: Title:
Now finish the top view and draw the final edge East High School Name: Title:
Also we begin the Right Side View 1 1/2-inch from the front view East High School Name: Title:
Now, begin to draw the Right Side View 1 1/2-inch from the front view East High School Name: Title:
Now, begin to draw this edge of the Right Side View 1 1/2-inch from the front view. It is 2-inches long. East High School Name: Title:
This edge of the Right Side View is also 2-inches. East High School Name: Title:
Finish the right side view and draw the final edge. East High School Name: Title:
Now, If we want a hole in the front, we need to draw the hole, 3/4–inch in from each edge East High School Name: Title:
And we need to draw hidden lines to show the hole goes all the way through in the top view East High School Name: Title:
And we want to draw hidden lines to show the hole goes all the way through in the right side view East High School Name: Title:
Notice that the ends of the hidden lines need to touch the edge of the object East High School Name: Title:
Label the Front View. Use ¼-inch CAPITAL Letters and stay ¼-inch Away from the edges FRONT East High School Name: Title:
Label the Top View. TOP FRONT East High School Name: Title:
And, label the Right Side View. Keep ¼-inch spacing between the two words. TOP RIGHT SIDE FRONT East High School Name: Title:
Write the title on your finished drawing TOP RIGHT SIDE FRONT East High School Name: Title: Orthographic Projection Block 2
Write your name On your finished drawing TOP RIGHT SIDE FRONT East High School Name: Title: Orthographic Projection Block 2
Write the date and class number on your finished drawing TOP RIGHT SIDE FRONT East High School Name: Title: Orthographic Projection Block 2
Your finished drawing should look like this. TOP RIGHT SIDE FRONT East High School Name: Title: Orthographic Projection Block 2
For the final step, we need to show dimensions on the drawing so the machinist can build it. TOP RIGHT SIDE FRONT East High School Name: Title: Orthographic Projection Block 2
First we need extension lines. Draw them at the corners of the object with a 1/8-inch gap. TOP RIGHT SIDE FRONT East High School Name: Title: Orthographic Projection Block 2
Next write the distances next to each edge, in the center, ¼ -inch tall numbers 2” TOP 4” ¾” 2½” RIGHT SIDE FRONT East High School Name: Title: Orthographic Projection Block 2
Next we need dimension lines with nice, neat arrows. The arrowheads are long and skinny 2” TOP 4” ¾” 2½” RIGHT SIDE FRONT East High School Name: Title: Orthographic Projection Block 2
Notice that the arrowhead tips all touch the extension lines. 2” TOP 4” ¾” 2½” RIGHT SIDE FRONT East High School Name: Title: Orthographic Projection Block 2
And, the dimension is centered in the line gap, with a 1/8–inch gap. 2” TOP 4” ¾” 2½” RIGHT SIDE FRONT East High School Name: Title: Orthographic Projection Block 2
Your finished drawing should look like this. 2” TOP 4” ¾” 2½” RIGHT SIDE FRONT East High School Name: Title: Orthographic Projection Block 2