Download
1 / 45
460 likes | 604 Vues
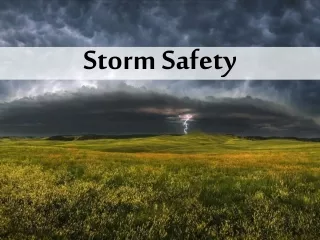
Post Storm Safety Evaluation. ATC-45 Based Assessments. William L. Coulbourne, P.E. bill_coulbourne@urscorp.com. Objectives. Establish drivers for post storm assessments Review assessment procedures outlined in ATC-45 Examine practical concerns for inspectors including safety

E N D
Post Storm Safety Evaluation ATC-45 Based Assessments William L. Coulbourne, P.E. bill_coulbourne@urscorp.com
Objectives • Establish drivers for post storm assessments • Review assessment procedures outlined in ATC-45 • Examine practical concerns for inspectors including safety • Look at examples of recent storm damage
Unique Environment • After the storm and immediate search/rescue activities, next focus will be on re-establishing services and determining when it is safe for evacuees to return • The task of doing building assessments can overwhelm pre-existing building official staff
Qualified Personnel • Rapid Evaluation • Building Design Professionals • Building Inspectors • Disaster workers and Technical Staff familiar with building construction • Detailed Evaluation • Building Design Professionals • Building Inspectors
ATC-45 • Applied Technology Council – ATC-45 Field Manual: safety evaluation of buildings after wind-storms and floods • Audience – building officials, volunteer design professionals, and other emergency response personnel • Modeled after ATC-20 for post earthquake evaluations
ATC-45 • Evaluation procedures • Rapid and Detailed evaluation procedures • Posting criteria and forms • Evaluation of non-structural hazards • Field safety for inspectors • Human factors discussion • Examples
Rapid Evaluation • 10 to 30 minutes • Used to quickly post unsafe and apparently safe structures • Identify need for further action • Table 3-1 provides criteria
Rapid Evaluation • Links to further action including need for a detailed evaluation
Detailed Evaluation • 30 min. to 4 hours • Careful visual examination • Used to identify necessary restrictions on building use or need for engineering evaluation • Table 4-4 provides criteria
Detailed Inspection Process • Step 1 – Survey Building from Outside • Look for signs of roof uplift • Look for signs of foundation movement • Look for visible signs of connection failure (gaps, cracks, vertical discontinuities) • Look at non-structural elements • Look for signs of water level at flooding events
Detailed Inspection Process • Step 2 – Examine site for geotechnical hazards • Slope failure • Sink holes • Risk may extend outside of a single building
Detailed Inspection Process • Step 3 – Inspect Structural System from Inside • Before entering, look for falling hazards and risk of collapse – Don’t enter obviously unsafe areas • Look above ceiling panels, expose as much as you can • Examine vertical and lateral load carrying system • Examine every floor
Detailed Inspection Process • Step 4 – Inspect for Non-structural Hazards • Look for signs of damage to partitions, finishes, utilities • Look for spills or leaks of chemicals • Don’t restart electrical system, elevators, etc. • If building was inundated, make sure power is secured, and building marked unsafe until electrical system can be inspected
Detailed Inspection Process • Step 5 – Complete checklist and post building • Mark estimated damage • Ballpark , not precise • Not meant to require significant extra work • Complete checklist • Post structure • Make sure any restrictions are clear • Communicate to occupants if present
Engineering Evaluation • When visual inspection is not sufficient • May require removing finishes to access structure • Normally supported by building owner as part of repair process • Highest level of detail of three levels of evaluation
Inspected • No apparent hazard found • Repairs may be required • Original lateral- and vertical-load capacity not significantly decreased • No evidence of significant foundation damage • No falling or other life safety risks • If localized issues are addressed, okay to post inspected • No restriction on use or occupancy
Restricted Use • Safety is questionable or hazardous conditions exist that require restrictions on occupancy or use of structure • Doubts only resolved by removal of elements or engineering evaluation • Interior finishes or ceilings are water saturated – falling hazards or air quality issues • Potentially only portion of building impacted • Indicate restrictions on placard
Restricted Use • Examples of restriction statements • “Brief entry allowed to retrieve possessions only” • “Do not enter or use the following areas:” • “Entry permitted to secure and repair structure” • Need to make sure approach to mold issues is well planned
Unsafe • Extreme hazard or unsafe situation present • Significant risk of further damage or collapse for static conditions, subsequent winds or other events, or addition of occupant load • Another unsafe condition Hazmat • Unsafe for occupancy or entry, except as authorized by the local building official • Not a demolition order!
Posting and Barricading • Only one posting type per building • Post all entrances for “Restricted Use” and “Unsafe” • Use barricades to mark unsafe areas • Prompt barricading can prevent further injury or death • Yellow caution tape, cones, fencing, etc.
How can the information be leveraged? • Although life safety is priority, don’t underestimate importance of assessing magnitude of damage • Estimating the “percent damage” on the form • Requires prior planning and development • Requires training for personnel to ensure sufficient consistency in application
Safety for Inspectors • Your safety is first priority • Many potential field safety risks • If in doubt, avoid the potential hazard • Let trained rescue and emergency response personnel handle hazardous situations • Maintain effective communication
Field Safety Risks • Downed power lines • Leaning, broken, or uprooted trees • Breached gas lines • Debris • Scour holes, unstable soil • Displaced animals • Snakes, scorpions, escaped zoo animals
Always travel in teams of at least two Always wear hard hat and boots Always survey the entirebuilding exterior prior to entering Enter building only if deemed safe to do so Avoid all areas of potential hazmat release Be alert for falling hazards Avoid downed power lines and buildings under them In case of gas leak, shut off if possible and alert authorities Safety Tips
Supporting Inspection Personnel • Due to difficult conditions, team has to be supported with logistics • Inspectors don’t want to become burden on already overburdened emergency response system • Timing critical • Need organized effort to task inspectors, collect data, and process data
Supporting Inspection Personnel • Frequently provided resources for inspectors • Official Ids • Inspection forms and placards • Caution Tape • Office goods • Food/Water ** • Communication Equipment • Berthing
What Should the Inspector Bring? • Personal Items • Personal ID / Driver’s License • Cash! / Credit Cards • Backpack • Eye Protection, Gloves, Boots, Hardhat • Sunscreen, Hat • Rain Gear/Extra Clothing • Dust Mask • Personal Hygiene Supplies (Two weeks of any prescription meds)
What Should the Inspector Bring? • Field Equipment • Cell Phone or radio • Maps • Data Recording gear – clipboard • Camera • Tape measure, laser measurer • Battery powered radio • Flashlight(s) / Lantern (extra batteries) • Compass / Multi-Tool
Human Factors - Inspectors • Weather conditions harsh • Physically difficult • Long hours • Must watch for “burnout” and overstress • Need to plan cycling of personnel if expected work time passes one week • Eat well, get plenty of rest
Human Factors - Residents • Residents will have a range of emotions • Inspector may be first person representing authorities the person sees • No where to send people for aid • Answer what you are confident in, provide facts • Clearly explain reasons for actions • Beware of potential hostility
Rescue Engineering? • The intent of this material is not emergency search and rescue response • The inspections should occur after rescue activities, but before return of evacuees • Search and rescue requires specialized training and accepts different level of risk
Where to get Publications • Get ATC-45 from Applied Technology Council • http://www.atcouncil.org/ATC45.shtml • ($27 per copy), free download of forms • Some organizations such as Navy have developed custom variants of ATC-45 approach for use on their facilities • Can also get ATC-20 for post earthquake evaluations including PDA system for data entry
How to get involved in this type of work • In Virginia, one method is Professional Engineers Emergency Response Team • VSPE, VDEM, and VA DPOR working together to identify and inventory engineers/firms available on volunteer or contract basis • VSPE/VDEM plans to provide training • http://www.vaemergency.com/programs/engineers/index.cfm