Download
1 / 18
180 likes | 198 Vues
Microscope Basics. Parts and focusing. Label the Compound Light Microscope. Ocular lens Body Tube Coarse Adjustment Knob Fine adjustment Knob Revolving nosepiece Objective lenses (4x, 10x, 40x) Arm Stage Stage Clips Diaphram Light source Base. Focusing with a Microscope.

E N D
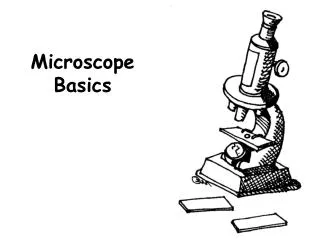
Microscope Basics Parts and focusing
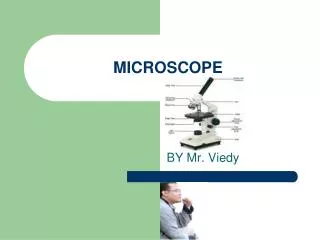
Label the Compound Light Microscope Ocular lens Body Tube Coarse Adjustment Knob Fine adjustment Knob Revolving nosepiece Objective lenses (4x, 10x, 40x) Arm Stage Stage Clips Diaphram Light source Base
Focusing with a Microscope • Plug in and turn on. • Lower stage completely. • Turn nosepiece to low objective. • Raise stage with coarse objective until specimen is seen. (Big knob) • Fine focus the specimen. • Centre specimen in the field of view. • Rotate nosepiece to medium power objective. • Refocus with fine adjustment. • Re-centre the specimen. • Refocus with fine adjustment (be careful not to break the slide) • Adjust the condenser(Light) • Start over to look at another specimen. • Carrying and storage instructions.
Robert Hooke • In 1665, the English physicist Robert Hooke looked at a sliver of cork through a microscope lens and noticed some "pores" or "cells" in it. • Hooke was the first person to use the word "cell" to identify microscopic structures when he was describing cork. • What he actually observed was the cell walls of the once living plant cell.
Early Microscopes - Anton Van Leeuwenhoek • The father of microscopy, Anton Van Leeuwenhoek of Holland (1632-1723). • Anton Van Leeuwenhoek was the first to see and describe living blood cells, bacteria (1674), yeast plants and single-celled organisms.
Robert Brown • In 1820, scientist Robert Brown observed and recorded the first instance of a tiny sphere inside a plant cell called the nucleus. • Shortly after the nucleus was found inside animal cells as well. • The discovery of these cells and their nucleus provided the foundation of cell theory: all living things are composed of one or more cells and the cell is the most basic unit of life.
Big and Small • Link – Scale of the Universe
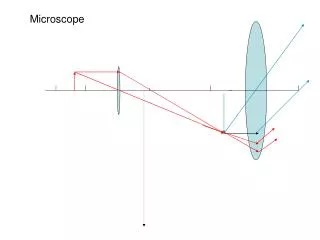
Compound Light Microscopes • Uses light to illuminate objects • Has two lenses • Magnification limited to 2000x (400x at LHHS)
Transmission Electron Microscope(TEM) • Uses beams of electrons and can magnify subjects up to 2 000 000X • Has two limitations: • Good only for thin specimens • Only dead cells can be observed
Scanning Electron Microscope • Electrons are reflected from the surface of the specimen • Produces a 3-D image • Good for the thicker specimens • Lacks the magnification and resolution of the transmission electron microscope
Magnification • Magnification = Objective lens X Ocular lens (4x, 10x, 40x) (10x)
Calculating the size of a specimen – ex. Med view Object size = Size of field of View Number of objects across field of view Object size = 1.72 mm 14 Object size = 0.1 mm