Download
1 / 43
490 likes | 1.26k Vues
Evaluation of the Shoulder. Shoulder Injury Evaluation Overview. Anatomy History Observation Palpation Neurological exam Circulatory exam. Shoulder Anatomy. Clavicle Scapula Humerus Articulations: Sternoclavicular joint Acromioclavicular joint Glenohumeral joint. Scapula Winging.

E N D
Shoulder Injury Evaluation Overview • Anatomy • History • Observation • Palpation • Neurological exam • Circulatory exam
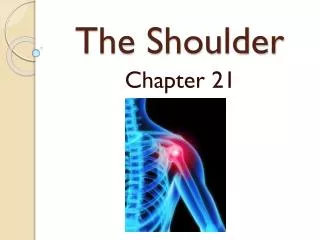
Shoulder Anatomy • Clavicle • Scapula • Humerus • Articulations: • Sternoclavicular joint • Acromioclavicular joint • Glenohumeral joint
Shoulder Anatomy • Ligaments • AC • Coracoclavicular ligaments • Glenohumeral ligaments/joint capsule • Labrum
Shoulder Anatomy • Musculature • “Rotator cuff” • Subscapularis • Supraspinatus • Infraspinatus • Teres Minor
Shoulder Anatomy • Musculature • Pectoralis major • Deltoid • Trapezius
Shoulder Anatomy • Subacromial bursa
History Mechanism of injury: Describe the mechanism of injury What was the position of the arm at impact? Did you hear or feel anything at the time of injury? Was the arm forced beyond normal limits? Previous Injury? P.Q.R.S.T.
Observation Swelling Skin color Signs of trauma Skin temperature Atrophy – Muscle shrinking Abnormal position
Observation Arm hanging limp Appear to be in pain Compare Symmetry Deformities Muscle spasm Holding or supporting arm Moving or using involved extremity Overall position, posture, and alignment
Palpation: Bone Acromion process Clavicle Acromio-Clavicular (AC) joint Sterno-Clavicular (SC) joint Coraco-Clavicular (CC) joint Coracoid process Axilla
Palpation: Bone Head of humerus Greater tuberosity Lesser tuberosity Bicepital groove Deltoid tuberosity Humerus Scapula
Special Tests (31) • Fracture/sprain test (1) • Rotator cuff tests (6) • Glenohumeral instability tests (11) • Biceps tendon tests (6) • Impingement tests (3) • Thoracic outlet tests (4)
Apprehension Test (GH instability): • Pt. begins in seated or supine w/ shoulder relaxed, elbow flexed to 90 degrees, and arm abducted to 90 degrees • Examiner then passively externally rotates pt’s arm, looking for resistance, slipping, or obvious signs of apprehension • If pt demonstrates or exhibits any of the preceding signs, test is positive for anterior glenohumeral capsule laxity
Cross Arm Test (GH instability): • Examiner begins by facing the standing pt • Examiner passively crosses the pt’s arms and simultaneously pulls both of the pt’s arms across the body • Examiner then changes the directions and repeats the test • For example, if the left arm was initially on top, the arms should be positioned so that the right arm is on top for the second portion of the test • If pt experiences pain, the test is positive for glenohumeral capsule (most likely posterior) sprain
Sulcus Sign (GH instability): • Pt either seated or standing with the arms relaxed at the sides • Examiner palpates the humeral head with one hand and grasps the pt’s distal arm at the wrist with the other hand • Examiner then pulls inferiorly on the pt’s arm, looking for inferior movement • A positive sulcus will typically demonstrate a “dimple” where the humeral head should be when it is pulled inferiorly • The dimple will disappear when the arm is released • If inferior translation is apparent, the test is positive for inferior glenohumeral capsule laxity.
Anterior-Posterior (A-P) Drawer Test (GH instability): • Pt begins from the supine position with the arm abducted to 90 degrees and the shoulder unsupported and off of the table • Examiner then uses both hands (interlocked) to grasp the pt near the tricep • Examiner then slowly moves the pt’s arm so as to translate the humeral head anteriorly and posteriorly • This is performed simply by pulling up on the proximal arm and then releasing • Test is positive for anterior and/or posterior glenohumeral instability if the examiner observes noticeable excessive movement or laxity
Clunk Test (GH instability): • Examiner begins by placing one hand over the anterior and posterior aspects of the pt’s shoulder (the humeral head is palpated) while the other hand is used to grasp the pt’s distal humerus just above the elbow • Examiner then passively internally and externally rotates the pt’s arm in varying degrees of abduction and flexion • A palpable “clunking” or grinding sensation indicates a positive test and is indicative of a possible glenoid labrum tear • Obvious apprehension may indicate anterior glenohumeral instability
Relocation (Fowler’s) Test (GH instability): • Pt begins from the supine position with the shoulder supported by the examination table and abducted to 90 degrees • Pt’s elbow is also flexed to 90 degrees. The examiner then exerts a downward pressure to the humeral head (at the anterior shoulder) • Pain on reduction (after pressure is removed) indicates a positive test for glenohumeral instability.
Special Tests (13) • Biceps tendon tests (6) • Impingement tests (3) • Thoracic outlet tests (4)
Yeargason Test (LH biceps): • Examiner begins by positioning the standing pt into 90 degrees of elbow flexion with the arm at the side • Examiner uses one hand to palpate the long head of the biceps and the other at the distal arm to provide resistance • Examiner then instructs pt to attempt to first externally then internally rotate the shoulder as the examiner resists the movement • Test is positive for biceps tendon subluxation (and subsequent tenosynovitis) if pt experiences pain or the examiner notes palpable crepitus.
Speed’s Sign (LH biceps): • Examiner first palpates the tendon of the long head of the biceps (deep in the anterior deltoid) • Examiner then instructs pt to flex the elbow as the examiner resists • Pain indicates a positive sign for bicepital tenosynovitis
Lippman’s Test (LH biceps): • Pt begins with the elbow flexed to 90 degrees and the humerus resting at the side • Examiner palpates the long head of the biceps and moves 3 inches distally • Examiner then rolls the biceps tendon against the humerus • Pain indicates a positive test for long head biceps tendon subluxation
Hawkins-Kennedy Test (impingement): • Examiner passively positions pt’s shoulder in 90 degrees of flexion, 90 degrees of elbow flexion, and end-range shoulder internal rotation • Apprehension or sensations of pain are considered a positive test for subacromial impingement syndrome
Adson Test (thoracic outlet syndrome): • Examiner begins by palpating pt’s radial pulse • Pt’s arm is then abducted, extended, and externally rotated while the examiner continues to palpate the pulse • Pt is then instructed to take a deep breath and turn the head toward the arm being tested • A disappearance of the radial pulse is a positive test that indicates a compression of the subclavian artery by the medial scalene muscle
Allen Test (thoracic outlet syndrome): • Pt begins from a standing position • Examiner passively flexes pt’s elbow to 90 degrees, then abducts and externally rotates pt’s shoulder • Examiner then palpates pt’s radial pulse and instructs pt to look away from the side being tested • A disappearance of the radial pulse indicates a positive test for thoracic outlet syndrome
Shoulder Injuries • Clavicle Fracture: • Fall On Out-Stretched Hand (FOOSH) or direct blow • Athlete will usually support arm w/ non-injured arm • Gross deformity • Immobilize & treat for shock. Refer for X-rays/consult • Splint in figure 8 brace for 6-8 weeks • Humeral Fracture: • Direct blow, dislocation, or FOOSH • Need X-ray…usually hard to recognize • Splint & refer • Out 2-6 months :(
Shoulder Injuries • Anterior Glenohumeral Dislocation • Usually posterior force w/ forced external rotation (arm tackle) • Obvious deformity • Flattened deltoid contour • Humerus comes to rest in axilla • Immobilize immediately • RICE
Shoulder Injuries • Sternoclavicular sprain • Relatively common in sports; FOOSH of direct blow • Usually clavicle will be upward & forward • RICE, immobilization 3-5 weeks • Acromioclavicular sprain • “Separated shoulder” • Direct blow to tip of shoulder or FOOSH • “Piano-key” sign • RICE, immobilize, & refer
Shoulder Injuries • Shoulder impingement syndrome • Compression of supraspinatus, subacromial bursa, and/or LHBB • Pain, numbness, and tingling • Restore normal biomechanics to shoulder (ther. ex) • Cease causative activity • Rotator cuff tears • Rare in people under 40, but do happen in sports • Usually @ humeral insertion • Pain & weakness • RICE, exercises to restore function • Low weights!!!!!! High reps okay, though
Shoulder Injuries • Thoracic Outlet Compression Syndrome • Overuse disorder • Numbness, burning & tingling in arms & hands • Caused by compression of brachial plexus between upper ribs and clavicle • Treat with therapeutic exercise • Retraction exercises • Upper rib mobilizations
Rehabilitation of The Shoulder Complex • Immobilization after injury • General body conditioning • Shoulder joint mobilization • Flexibility • Muscular strength • Regaining neuromuscular control • Functional progression • Return to activity