Download

1 / 85
850 likes | 1.57k Vues
IHE Pre-Connectathon PIX and PDQ Test Tool Tutorial and Guide (2011 Cycle). Robert Snelick National Institute of Standards and Technology Version 1.4 November 3rd 2010 Contact: rsnelick@nist.gov. Table of Contents. Overview Test Case Walkthrough Registration and Login Tool Demonstration

E N D
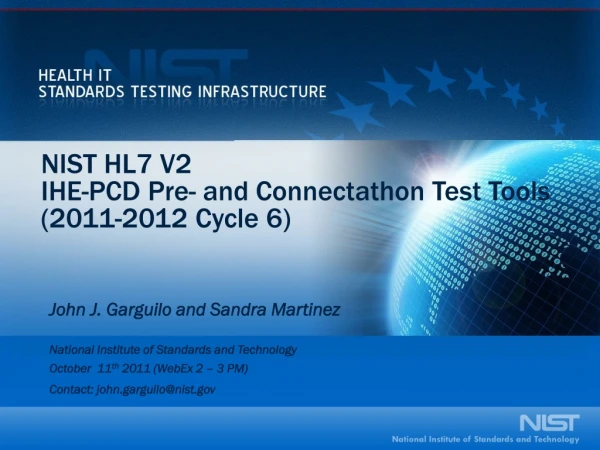
IHE Pre-Connectathon PIX and PDQ Test Tool Tutorial and Guide (2011 Cycle) Robert Snelick National Institute of Standards and Technology Version 1.4 November 3rd 2010 Contact: rsnelick@nist.gov
Table of Contents • Overview • Test Case Walkthrough • Registration and Login • Tool Demonstration • Configuration, Preparing to Run Tests, and Troubleshooting • Validating the v3 SOAP Message Wrapper • Validation Overview (HL7 v2) • Validation Overview (HL7 v3) • Summary
NIST PIX/PDQ Test Tool: Process Overview • The Test Tool cam be used to fulfill 2011 V2 and V3 PIX/PDQ Pre-Connectathon testing requirements • Supports Pre-Connectathon testing for: • Covers the PIX/PDQ Integration Profile • Version 7.0 August 10, 2010 • http://www.ihe.net/Technical_Framework/index.cfm#IT • V2: ITI-8, ITI-9, ITI-21, ITI-22 • V3: ITI-44, ITI-45, ITI-47 • Results are stored in the NIST PIX/PDQ tool • The IHE project manager will review the results
NIST PIX/PDQ Test Tool: Access • Web-based application (no downloads or installations needed) • Site:http://pixpdqtests.nist.gov:8080/ • Tool may be used in Anonymous Mode or Registered Mode • Anonymous Mode (“Guest” Users) • Does not require user registration and may be used to conduct ad-hoc system testing • Registered Mode • Required for completing the Pre-Connectathon and participating in the Connectathon • Required to save pre-connectathon test results • Test reports are made available to the IHE project manager • User’s Guide is available on the site under “Documentation”
NIST PIX/PDQ Test Tool: Support • IHE PIX/PDQ Google Group • http://groups.google.com/group/ihe_pix_pdq_testing • Preferred method of communication for discussing common issues • Go to the site and request membership • Administrative (only) issues can be sent directly to rsnelick@nist.gov • Issues Tracker • http://code.google.com/p/pixpdqtool/issues/list • Google utility to report issues, bugs, and enhancement suggestions
Testing Environments • Instance Testing • Conformance (e.g., against HL7 2.x or CDA) • Test object conforms to specification on which it is based • IHE Model: ~Virtual and Pre-Connectathon • NIST IHE PCD v2 Message Validation Test Tool • Isolated System Testing • Includes Instance Testing Activities • Protocol Conformance • Functional Behavior Conformance • Features and operational behavior correspond to specifications • IHE Model: ~Virtual and Pre-Connectathon • NIST IHE PIX/PDQ v2/v3 Test Tool • Peer-to-Peer System Testing • Includes Isolated System Testing Activities • Interoperability Testing • Testing complete application environment • May include interacting with Database, using Network Communications, or interacting with other hardware, applications, or systems if appropriate • IHE Model: ~Connectathon
END-USER (VENDOR) NIST PIX/PDQ HL7 v2/v3 TEST TOOL SYSTEM UNDER TEST (SUT) SPECIFICATIONS (test material that defines test assertions) NIST PIX/PDQ Test Tool: Operational Process INTERACTION/REPORTS MANUAL OR AUTOMATED SUT Web Application Interface MESSAGES (TEST OBJECTS) STIMULUS OR RESPONSE (MESSAGES) (via the communication protocol)
NIST PIX/PDQ Test Tool: PIX Test Coverage PIX HL7 v3 PIX HL7 v2
NIST PIX/PDQ Test Tool: PDQ Test Coverage PDQ HL7 v3 PDQ HL7 v2
Test Case WalkthroughPIX Manager Test Case: ITI-9-Query-Case1-Data-Found
Test Case ITI-9-Query-Case1-Data-Found – HL7 Version 2 Case 1: The Patient Identifier Cross-reference Manager Actor recognizes the specified Patient Identification Domain and Patient ID sent by the Patient Identifier Cross-reference Consumer in QPD-3, and corresponding identifiers exist for the specified patient in at least one of the domains requested in QPD-4 (one identifier per domain). (See Case 6 below for the required behavior if there are multiple identifiers recognized within a given Identifier Domain by the Patient Identifier Cross-reference Manager Actor.) AA (application accept) is returned in MSA-1. OK (data found, no errors) is returned in QAK-2. A single PID segment is returned in which one repetition of PID-3 Patient Identifier List is populated for each of the domains, if any, that the Patient Identifier Cross-reference Manager Actor did recognize in which a single identifier exists for the requested patient, not including the queried-for patient identifier that is returned in QPD-3. IHE ITI Technical Framework Volume 2a(ITI TF-2a) 3.9 PIX Query
STEPS DESCRIPTION SOURCE DESTINATION Test Case ITI-9-Query-Case1-Data-Found: Test Steps
End User (Vendor) Test Case ITI-9-Query-Case1-Data-Found PIX/PDQ Test Tool ADTA04 – Register patient “ALAN ALPHA” (ID = PIX10501) in domain “NIST2010” System Under Test 1 NIST PIX Source Test Agent Vendor PIX Manager Application 1a ACKA04 – Send acknowledgement ADTA04 – Register patient “ALAN ALPHA” (ID = XYZ10501) in domain “NIST2010-2” 2 2a ACKA04 – Send acknowledgement ADTA04 – Register patient “ALAN ALPHA” (ID = ABC10501) in domain “NIST2010-3” 3 3a ACKA04 – Send acknowledgement QBPQ23 – Send query message for patient “ALAN ALPHA” in domain “NIST2010-2” using the patient ID in domain “NIST2010” 4 Web Application Interface NIST PIX Consumer Test Agent RSPK23– Send response that the identifier “XYZ10501” for patient “ALPHA” was found in domain “NIST2010-2” 4a QBPQ23 – Send query message for patient “ALAN ALPHA” in domain “NIST2010-2” and “NIST2010-3” using the patient ID in domain “NIST2010” 5 RSPK23 – Send response that the identifiers “XYZ10501” and “ABC10501” for patient “ALPHA” were found in domains “NIST2010-2” and “NIST2010-3” 5a QBPQ23 – Send query message for patient “ALAN ALPHA” in all domains using the patient ID in domain “NIST2010” 6 RSPK23 – Send response that the identifiers “XYZ10501” and “ABC10501” for patient “ALPHA” were found in domains “NIST2010-2” and “NIST2010-3” 6a
Steps for Completing Test Cases • Register/log-in • Select HL7 Version (v2 or v3) and Actor • Select Test Case • Client Type (PIX Source and PIX Consumer, PDQ Consumer) • Server Type (PIX Manager, PDQ Supplier) • Set Configuration Information • Run Test • View/Save/Submit Reports
Registration/Log-in • To register, click-on Register in the upper-right corner of the tool’s home page • Name • Organization Name • Email Address • Login Information • Application Name (MSH 3.1) • Facility Name (MSH 4.1) • IP Address(es) and Port Number(s) • NIST Administrator will confirm log-in credentials • Log-in is required to save test results, submit results to the IHE project manager, and gain credit for test completion NIST PIX/PDQ Test Tool IHE Gazelle *Push/Pull to Gazelle IHE Project Manager can view database of results * not yet implemented
Registration/Log-in Fill out the User Information section completely. Users unable to be verified by the NIST administrators will have accounts deleted. Document v2 and/or v3 actor information as appropriate for your case studies. Fields exist for multiple IP Addresses and Port Numbers if needed, based on your system configuration.
Viewing Account Information To view information about the currently logged in user, go to the User Account page. The Actor Information section will display the server configuration fields documented during registration. The Responder Information section will display as a reference the unique client configuration information, which the test tool dynamically generates.
Tool DemonstrationPIX Manager Test Case: ITI-9-Query-Case1-Data-Found
Overview and Home Page After registration, users can log-in using the ‘Log-in’ tab to submit test results to the IHE Project Manager Click to register Click to run test cases Go to the PIX/PDQ Test Tool User Guide for step-by-step instructions Discuss PIX/PDQ Profile and Tests on the Google Discussion Group
Select Test Case – Client (PIX Consumer, PIX Source, PDQ Consumer) Select an ‘HL7 Version’ and ‘Actor’ to view a list of available test cases Select a test case by selecting the corresponding radio button Select the ‘Display Configuration Information’ button to view the test configuration details. The ‘Start Test’ button will become enabled once the configuration information dialog has been closed
Configure – v2 User Client (for Registered Users) View the ‘Application Name’, ‘Facility Name’, ‘IP Address’, ‘Port Number(s)’ needed to configure your client application to send messages. Please note that each NIST PIX Manager instance is unique for each user. The name of the NIST PIX server for a registered user is created based on your user account (login) name. The NIST server name (receiving application name ) is “NIST_PIX_PDQ_Manager_” + “Login Name”. Therefore, if your login name is Vendor then you send messages to NIST_PIX_PDQ_Manager_VENDOR. If your system is not configured accordingly you will receive an acknowledge error message over the network and nothing will appear in the console. Important!
Configure – v2 User Client (for Guest Users) View the ‘Application Name’, ‘Facility Name’, ‘IP Address’, ‘Port Number(s)’ needed to configure your client application to send messages. Please note that each NIST PIX Manager instance is unique for that run, if not logged in as a registered user. The name of the NIST PIX server is temporary and will changed for every test that is run. You must review the configuration information each time and change the receiving application name accordingly. Using an old name will result in failure; you will receive an acknowledge error message over the network and nothing will appear in the console. Important!
Configure – v3 User Client As with v2 client configuration, the application name will be the same for all tests performed when logged in as this user. Guest users, however, will receive a new application name each time a test is run. Registered User Guest User Unlike v2, which generates an application name based on the registered user’s login, v3 client configuration will generate an application name with a unique ID appended to the end (in this example, 56).
Select Test Case – Server (PIX Manager, PDQ Supplier) Select an ‘HL7 Version’ and ‘Actor’ to view a list of available test cases Select a test case by selecting the corresponding radio button to view a description, references, and list of transactions Select the ‘Configure’ button to enter the test configuration details – the ‘Start Test’ button will become enabled once the configuration information has been entered
Configure – v2 Test Cases - User Server (Single IP/Port) Single IP/Port Enter the ‘Application Name’ and ‘Facility Name’ for the System Under Test – these fields are associated with MSH.3.1 and MSH.4.1 in the HL7 v2 message and match exactly. Select ‘Single IP/Port’ or ‘Multi IP/Port’ and enter the information accordingly – ‘Multi IP/Port’ may be used to handle ADT and PDQ messages separately. Select the “With user interaction” execution type to stop the test after each transaction and manually tell the tool to begin the next step. Choosing “Without user interaction” will run all of the transactions within the test case without pausing. Use this PIX Manager from Open Health Tools (OHT) to try the tool if you don’t have an application to test Example PIX Manager V2 Application Name: PAT_IDENTITY_X_REF_MGR_MISYS V2 Facility Name: MISYS IP Address: 198.160.211.53 Port: 3600 (PDQ Port: 3601)
Configure – v2 Test Cases - User Server (Multi IP/Port) Multi IP/Port Select ‘Multi IP/Port’ and enter the information accordingly
Configure – v3 Test Cases - User Server Single IP/Port Multi IP/Port Note: the configuration information in this example is fictitious.
Run Test Test cases are executed one transaction at a time and real-time results can be tracked in the ‘Console Log’ Individual validation reports can be viewed by selecting the ‘Magnifying Glass’ icon at the end of each transaction Results, Messages Sent/Received, and Detailed Results (XML/HTML) can be viewed in between each transaction Select ‘Next Step’ at the conclusion of each transaction to initiate the next one
View/Save/Submit Report Select the ‘Submit Results and Finish’ button to submit test results to the IHE Project Manager for review A summary-level report will also be available – reports may be printed or saved to the user’s local file system
Validation and Summary Reports Individual validation reports are available at the end of each transaction and again at the conclusion of a test case A summary-level report that compiles individual validations reports will also be available – reports may be printed or saved to the user’s local file system It is always a good idea to download your results to your local system for backup!
View Past Results Registered users can view their test history on the ‘Reports’ tab – this tab provides access to saved transaction and summary-level reports Users may select the ‘Actor Tested’ and ‘HL7 Version’ to view their list of previously run test cases. Users may then select the corresponding radio button to view the results for a particular test case Users can download and save the ‘Result Summary’ in both HTML and PDF formats
Configuration Information • v2 Applications sending ER7 • IP Address: 129.6.24.143 • Port Number: 9080 • v2 Applications sending XML • IP Address: 129.6.24.143 • Port Number: 9070 • v3 Applications • IP Address: 129.6.24.143 • Port Number: 9090 • v3 SOAP end point • http:// 129.6.24.143:9090
Example v2 PIX Source Vendor Configuration Information • Configuration Information for sending v2 messages For Registered User: Application Name: NIST_PIX_PDQ_Manager_BobVendor* For Guest User: Application Name: NIST_PIX_PDQ_Manager_78 (varies each time) Same for Registered and Guest User: Facility Name: NIST IP Address: 129.6.24.143 Port Number: 9080 (ER7 Messages) Port Number: 9070 (XML Messages) * The application name is derived from the log-in name. Registered users can view this under the “User Account” tab. It will remain the same for every client test.
Example v3 PIX Source Vendor Configuration Information • Configuration Information for sending v3 messages For Registered User: Application Name: 2.16.840.1.113883.3.72.6.5_13* For Guest User: Application Name: 2.16.840.1.113883.3.72.6.5.92 (varies for each test case run) Same for Registered and Guest User: Facility Name: 2.16.840.1.113883.3.72.6.1 (Optional) IP Address: 129.6.24.143 Port Number: 9090 (v3 Messages) *The application name is derived from the log-in name. Registered users are assigned a number and this can be viewed this under the “User Account” tab. It will remain the same for every client test.
PIX/PDQ Server Application Name Allocation (for Registered Users) • For each user the name of the PIX Manager or PDQ Supplier is uniquely assigned • Is based on the user login name • This ensures that each vendor test is isolated • In order to interact with the NIST PIX Manager or the NIST PDQ Supplier Test Agent you will need to use the information provided in “Configuration Information” dialog • For example (V2): • Application Name: NIST_PIX_PDQ_Manager_BobVendor • Facility Name: NIST • For example (V3): • Application Name: 2.16.840.1.113883.3.72.6.5.17 • Facility Name: 2.16.840.1.113883.3.72.6.1 (Optional) • If you send to an application name that doesn’t exists you will get the following response from our system: • Nothing from the user console (it’s still listening for messages) • An acknowledge message with error is sent back to you over the network
Dynamic PIX/PDQ Server Application Name Allocation (for Guest Users) • For each test case instance the name of the PIX Manager or PDQ Supplier is created dynamically • The life of this test agent exists only for the duration of the test • This ensures that each vendor test is isolated • In order to interact with the NIST PIX Manager or the NIST PDQ Supplier Test Agent you will need to use the information provided in “Configuration Information” dialog • For example (V2): • Application Name: NIST_PIX_PDQ_Manager_150 • Facility Name: NIST • For example (V3): • Application Name: 2.16.840.1.113883.3.72.6.5.98 • Facility Name: 2.16.840.1.113883.3.72.6.1 (Optional) • If you send to an application name that no longer exists you will get the following response from our system: • Nothing from the user console (it’s still listening for messages) • An acknowledge message with error is sent back to you over the network
Test Case Preparation • Before testing a PIX/PDQ server, users need to: 1. Clean your database of patients used in the test cases to avoid mixing tests with residual data. This is particularly important for test cases such as Merge since the merge patient will already exist if the test had been run previously. 2. Configure the PIX/PDQ Server to handle the following patient identifier assigning authority domains: NIST2010&2.16.840.1.113883.3.72.5.9.1&ISO NIST2010-2&2.16.840.1.113883.3.72.5.9.2&ISO NIST2010-3&2.16.840.1.113883.3.72.5.9.3&ISO IHE2010&1.3.6.1.4.1.21367.2010.1.1&ISO
Troubleshooting • Site is unavailable • Typically means we are redeploying the application to make updates and the tool • We will announce redeployments • The downtime will be in the neighborhood of 10-15 minutes • Please refresh the browser following the redeployment • Server is controlled by central computing facility and may be unavailable • Site appears to be down • Restart in a new browser window • Site has timed out • This will happen if the tool is open in an inactive browser window • To correct, refresh the browser
Troubleshooting (continued) • No response from console log • You may have sent to a destination that we could not process (i.e., an incorrect receiving name) • We will send back an acknowledge/error over the network • On the console log nothing will happen • You need to check the destination on your end • If you determined that this was the problem you can resend a properly addressed message; we’ll still be listening up to the session timeout • Completed report is missing • When we discover an error in the test case (i.e., the test case is wrong) we fix it • Tests that passed using an incorrect test are no longer valid • This should not occur often
Validating the v3 SOAP Message WrapperPrior to using the PIX/PDQ Tool
Introduction • The NIST PIX/PDQ test tool is primarily concerned with the PIX/PDQ payload. • However, since the tool is interactive, messages are exchanged using transport layer protocols - namely SOAP for HL7 V3. • Testing this layer is not in the scope NIST PIX/PDQ test tool, but a malformed message will prevent delivery to the tool. • Therefore, users need to ensure that messages are well-formed and adhere to transport layer requirements • Users need to test V3 messages at this layer before beginning testing with the interactive PIX/PDQ test tool or if you don’t get a response from the PIX/PDQ test system • The following slides provide some helpful hints and a link to additional tooling for debugging your V3 SOAP messages • Please note that these tools are not part of the PIX/PDQ tool, and the PIX/PDQ team does not support the tools
Debugging PIX/PDQ v3 Messages • Malformed SOAP envelopes may cause the PIX/PDQ tool to not respond • This is due mostly to malformed XML • Use the NIST XDS Toolkit to validate SOAP messages • http://ihexds.nist.gov/xdstools2/ • The tool provides testing for the various layers of the v3 message • HTTP Header • SOAP Wrapper • The tool does not provide validation of the SOAP body (or payload). • In this case the PIX/PDQ payload • The PIX/PDQ tool validates the payload in the context of the test case
Using the XDS Toolkit • The toolkit requires sending the entire HTTP message in plain text format • If this is not easily obtained from your server, consider using TCPMon to act as a proxy: • https://tcpmon.dev.java.net/
XDS Tool Kit http://ihexds.nist.gov/xdstools2/ Click here to reach the Message Validator
XDS Tool Kit Step 1: Leave this option as “Guess based on content” 3) Once the file has been selected click here to have the tool validate the SOAP message. Step 2: Use this button to locate the text file on your local system which contains the server’s HTTP SOAP message.
XDS Validation Results This section reports on the correctness of the HTTP header. This section reports XML violations