Download
1 / 30
300 likes | 380 Vues
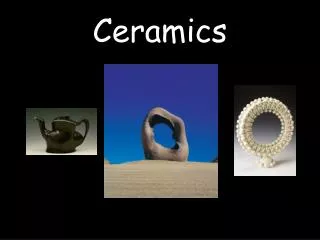
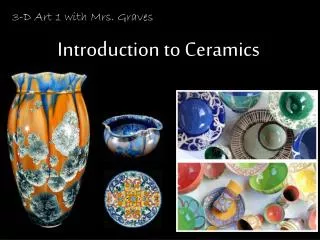
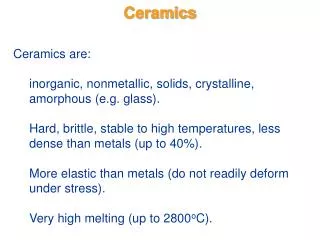
INTRODUCTION TO CERAMICS. Clay: a stiff, sticky type of soil made up of decomposed igneous rock and organic matter. It is formed by the decomposition of rock through the action of weathering.

E N D
Clay: a stiff, sticky type of soil made up of decomposed igneous rock and organic matter. It is formed by the decomposition of rock through the action of weathering. • Wedging: Kneading the clay with fingers and the heel of the hands in a rocking spiral motion, forces out trapped air pockets and helps to distribute moisture evenly throughout the clay.
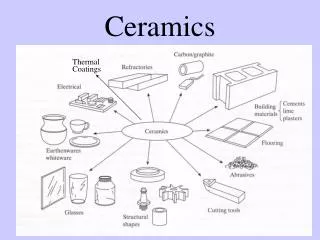
Types of clay • Porcelain: A high-firing fine-grained white clay body that mature to a durable, strong, vitreous ceramic. It is usually pure white because of its high kaolin content and lack of other ingredients like iron that can change the color and properties. • Stoneware: A mid- or high-firing coarse-grained clay body that can be anywhere between a buff color to gray to dark brown, because of varying levels of iron and other ‘impurities’. It is incredibly durable after firing, with little water absorption (vitreous). • Earthenware: A low-firing fine-grained clay body that is typically grey, orange, or red in color both in the raw state and after firing. This highly porous clay will remain highly absorbent even after firing and will melt at porcelain and stoneware temperatures.
SCORING is the best way of attaching one piece of clay to another. • Scratching the surface of clay pieces before joining them together with slip. • If clay is not properly scored, it will fall apart either when drying or during the firing process.
SLIP SLIPis liquefied clay. Slipis applied to scored surfaces and acts as a sort of “glue” to attach one piece of clay to another.
Hand building Three Methods… All Ancient…
PINCH POTS PINCH POTS are formed by quickly pinching and turning a kneaded ball of clay in the palm of your hand. One of the most simple hand building techniques. Assumed to be the oldest of the hand building forms.
COILING is an ancient hand building method in which walls are constructed with rolled, rope-like pieces of clay. The joints are then smoothed over to create one solid piece, or left for design. COILING
SLAB ROLLLING Hand Rolled Here. Use of Slats Important! Slab construction is another hand building technique in which the clay is rolled out into flat pieces. The slabs are usually an even, consistent thickness and are then cut, scored, slipped and joined together (best at the LEATHERHARD stage.)
Throwing Creating ceramic shapes/pottery, on the potter’s wheel.
SLIP • Clay mixed with 50% water to a mayonnaise consistency. Used in slip casting, decorating or the “glue” for attachments.
Plastic • Workable wet stage • molding stage • can be manipulated into different shapes without cracking or breaking • can be recycled. • can still be joined to other pieces. • 25% water
Leather-Hard • Stiff and will hold its shape; can still be joined to other pieces. 10% water • May be carved into. • Can still be recycled.
Bone-dry/Greenware • Bone-dry; can be carved into; VERY FRAGILE. Can still recycle. • Greenware; un-fired, kiln ready for first firing. • 2% water
FIRING STAGES • Fire: To heat a clay object in a kiln to a specific temperature. • Firing Range: The range of temperature at which a clay becomes mature or a glaze melts.
Bisqueware • Fired once in the kiln. • CAN NOT BE RECYCLED. • Glazing/Surface Treatment Stage.
Glazeware • Item is glazed then fired a second time. Before firing After firing
Ceramic glaze: is an impervious (won’t allow water to get through) layer or coating of a glass like substance which has been fused to a ceramic body through firing. • Glaze can serve to color, decorate or waterproof an item. • Glazes must always be shook before each use.
KILN • Furnace used for “firing” greenware/glazed bisqueware. • In order to become permanent, clay must be fired at very high temperatures in a kiln. • We fire anywhere from 1800-2400 degrees Fahrenheit.
Cut-off Wires: Probablythe most common ones have two hardwood handles at either end with a twisted wire between to cut clay or pottery off the bat. Needle Tool: These long heavy needles set into wooden, metal, or plastic handles are one of the most versatile tools in pottery. NOT a TOY! Potter’s Rib: A rubber, metal or wooden tool used to facilitate wheel throwing pottery. Scrappers: look a lot like ribs, but are lighter and used to smooth and compress wet and soft leather-hard greenware and are usually steal.Wooden Modeling Tools: Come in a variety of shapes, useful in all sorts of handbuilding.
Bat: A flat disc made of plastic or wood, placed on the potter’s wheel head. Bats are used to throw pottery on that would be difficult to lift off the wheel head.Banding Wheel: A revolving wheelhead which sits on a pedestal base. It is turned by hand and used for finishing or decorating pottery. Loop tool: A clay tool with wire loops at each end used to carve clayRibbon tool: A large looped ribbon tool made of iron that can be used for trimming as well as carving. handy for trimming greenware and for use in handbuilding. Wire and ribbon varieties are not recommended for use during throwing; they are too fragile.
Spray Bottle:used to keep clay moist while working the clay.Slab Sticks: Flat wooden sticks placed on either side of a piece of clay when rolling with a rolling pin to assure even thickness of the slab of clay.Sponge: A device used with water to moisten the surface of the clay and smooth surface.Rolling Pin: A wooden instrument used to roll out slabs of clay to an even thickness.Fettling Knives: These tools are useful in cutting large lumps of clay, cleaning edges of cast pieces.
Centering: Technique to move the clay in to a symmetrical rotating axis in the middle of a wheel head so you can throw it. Compress: Pushing the clay down and together, forcing the particles of clay closer. Dry‐Foot: To keep the foot or bottom of a pot free from glaze by waxing or removing the glaze. Extrusion: Clay forced through a die to form uniform shaped
Foot: Base of a ceramic form. Glaze: A thin coating of glass. An impervious silicate coating, which is developed in clay ware by the fusion under heat of inorganic materials. Peephole: A small observation hole in the wall or door of a kiln, release moisture. Slurry: A thick slip. First stage in recycling. Stacking: Load a kiln to hold the maximum number of pieces.
IMPORTANT to REMEMBER!! • The Ten Golden Rules of Ceramics: • Clay must be thoroughly covered up with a plastic bag to keep it from drying out. This applies to works in progress and moist clay. • Clay dust can be harmful if you are exposed to it for long periods of time, so keep your area clean, clay scraps off the floor and clean with water and a sponge. • Clay can be no thicker then your thumb. • In order for clay to stick together it MUST be scored and slipped together while the clay is moist or leather hard. • Wedge clay to remove air bubbles, achieve uniform consistency, and to line up the particles of clay. • Trapped air can cause clay to explode. So hollow out sculptural forms and put needle holes from the bottom so air can escape. • Don't glaze the bottom of a piece. • Always wash the piece before glazing. • Always handle your project with two hands at all times. In other words BE CAREFUL it’s your hard work. Never lift pots by the rim. • NEVER HANDLE ANOTHER PERSONS WORK EVEN IF IT LOOKS COOL!