Download
1 / 37
370 likes | 383 Vues
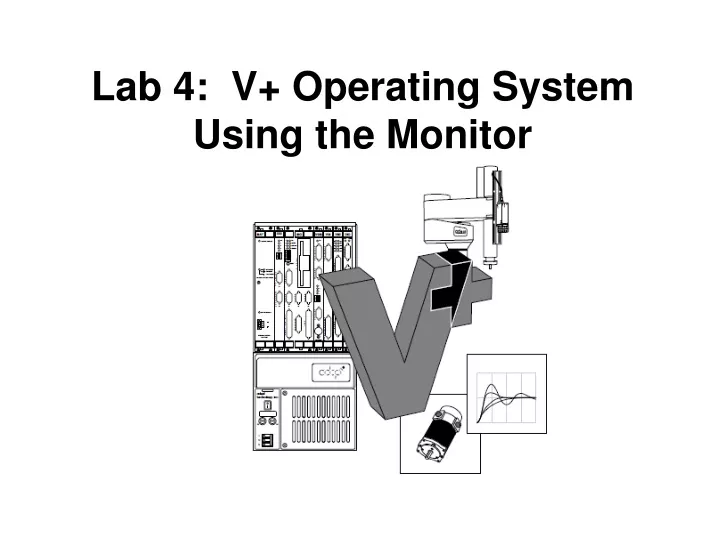
Lab 4: V+ Operating System Using the Monitor. Lab 4: Monitor Commands. Objectives: 1. Define #safe. 2. Define pick and place locations using the HERE Monitor 3. Examine robot locations using LISTL 4. Change locations using POINT 5. Store robot locations using STOREL

E N D
Lab 4: V+ Operating System Using the Monitor
Lab 4: Monitor Commands Objectives: 1. Define #safe. 2. Define pick and place locations using the HERE Monitor 3. Examine robot locations using LISTL 4. Change locations using POINT 5. Store robot locations using STOREL 6. Use the DO Monitor Command to move the robot 7. Edit defined locations from the MCP
This presentation illustrated only the most common monitor commands, Here are the most common.
The Coordinate System - Locations and Precision Points Use the MONITOR commands, location points can be created for a program to be created after a location file is created of all the points to used by a program.
The Coordinate System - Locations and Precision Points A robot location specifies the position and orientation of the robot tool tip in three-dimensional space. A robot location is a predefined position at which a robot will acquire or place a part or move through en route to acquiring or placing a part. Locations have controllable characteristics that produce smooth, efficient robot operation. You can define robot locations using Cartesian coordinates (transformations), or Joint values (Precision Points). Relative Location Joint Angles
Transformations A transformation is a set of six components that uniquely identifies a location in Cartesian space and the orientation of the robot tool flange. A transformation can also represent the location of an arbitrary local reference frame (also know as a "frame of reference"). X, Y, Z, and Roll axis
Precision Points A precision point allows you to define a location by specifying a value for each robot joint. These joint values are absolute with respect to the home sensors of the robot, and cannot be made relative to other locations or coordinate frames. Precision point locations are useful for jointed-arm applications and with applications that require full rotation of Adept arms with Joint 4. They are also helpful where joint orientation is critical to the application, or when you want to move an individual joint. Joint Angles J1 = “Shoulder” J2 = “ Elbow” J3 = Up – Down J4 = ‘Wrist – Roll”
Location Origin Locations are, by default, relative to the base of the robot. For a default (World) location, the coordinate offsets are from the origin of the World coordinate system (which is located at the base of the robot). Relative Location
Using the Controller: You interact with the controller by: • Entering Monitor commands and responding to system requests by typing entries at the command line. This is the most basic type of interaction and is used by all Adept controllers. • Using a pointing device to make selections. This type of interaction is used with programs written for the Adept A-Series graphical interface. Section describes the basics of the graphical user interface. • Initiating actions and responding to system requests with the manual control pendant. The optional MCP is generally used with motion systems.
The System Prompt and Typing Cursor: The V+ system prompt is a period, “.” (sometimes referred to as the “dot” prompt). When the system prompt is displayed, system commands (known as monitor commands) can be entered. Monitor commands allow you to access the file structure, execute programs, and display system status. The typing cursor is a black rectangle, “z”. When the system is first started up, the last line displayed will show the dot prompt followed by the typing cursor. Whenever the typing cursor appears, the system is ready to accept input from the keyboard.
Creating Location Variables The most straightforward method of creating a location variable is to place the robot or motion device at a location and enter the monitor command: HERE loc_name To see the location without creating a location variable type: WHERE
WHERE Display the current location of the robot and the hand opening. The WHERE monitor command applies to the robot selected by the V+ monitor (with the SELECT command). If the V+ system is not configured to control a robot, use of the WHERE command will cause an error. The location of the robot tool point is displayed in Cartesian World coordinates and as joint positions, together with the current hand opening. Example This example shows the output displayed by the WHERE command for a four-axis robot. .WHERE (in Cartesian mode) X Y Z y p r 253.063 592.110 764.914 0.000 180.000 -77.580 or in joint mode Jt 1 Jt 2 Jt 3 Jt 4 33.023 72.964 114.386 -151.594
HERE • HERE loc_variable • HERE @task:program loc_variable • Define the value of a transformation or precision-point variable to be equal to the • current robot location. If no task is specified, the HERE monitor command returns information for the robot selected by the V+ monitor • Examples • Define the transformation “place” to be equal to the current robot location. • HERE place • Assign the current location of the robot to the precision point “#pick”, which is • treated as a local variable in the program “test”. • HERE @test #pick
Speed, Acceleration, and Deceleration Robot speed is usually specified as a percentage of normal speed, not as an absolute velocity. The speed for a single robot motion is set in the Speed parameter. To set the speed for moves type: Speed 100 for 100% or Speed 60 for 60% of maximum.
Why is Gripper Orientation Important? When teaching locations, remember that the gripper orientation relative to the part is important. As you teach your pallet, you should check the gripper orientation to make sure you haven't changed it. This will ensure that the parts are picked and placed in the correct orientation. Using the monitor command to open or close the gripper, type: .DO SIGNAL 3001 the gripper should close. .DO SIGNAL - 3001 the gripper should open.
Approach and Depart Approach and depart heights are typically specified for pick and place locations. When approach and depart heights are specified, the robot moves in three distinct motions. In the first motion (Approach segment), the robot moves to a location directly above the specified location. For the second motion, the robot moves to the actual location and the gripper is activated. In the third motion (Depart segment), the robot moves to a point directly above the location.
Approach and Depart (Continued) Approach and depart heights are used to make sure that the robot approaches and departs from a location without running into any other parts in the assembly being built (or any other obstructions in the robot envelope). Approaches and departs are always parallel to the Z-axis of the tool coordinate system. Notice that all the motion parameters that apply to a motion to a location also can be applied to approach and depart motions. This allows you to move at optimum speed to the approach height above a location, then move more slowly when actually acquiring or placing the part, and finally depart quickly.
POINT POINT loc_variable = loc_value POINT @task:program loc_variable = loc_value Sets the value of the location variable equal to the value on the right, providing the variable and value are the same type of location representation. That is, they must both be transformations or precision points. If no “loc_value” is specified and the variable was previously defined, its value is unchanged and the user is given the opportunity to make changes to its components as described below. If the value is not specified and the variable is not defined, the variable is set equal to the value of the null transformation (0, 0, 0, 0, 0, 0). The value of the variable is displayed and its components may be modified by typing new values after the query “Change?”. Component values must be separated by commas and values that are not being changed may be omitted. Changes are asked for repeatedly until no change is made.
Modifying Location Variables: (Monitor ) The individual components of an existing transformation or precision point can be edited with the POINT monitor command: POINT loc_name displays the transformation components of loc_name and allows you to edit them. If loc_name is not defined, a null transformation is displayed for editing. A location variable can be duplicated using the POINT monitor command to give you a back up locations. The monitor command: POINT loc_name = loc_value The result in the variable loc_name being given the value of loc_value. The POINT monitor commandbest use is to edit a loc_name after it has been assigned using the here command.
Modifying Location Variables: (Monitor ) • Here is an example to change the Y axis to -120.2 • Change? • X Y Z P R Y • 240.03 - 125.2 125 0 172 0 • Type the following. The comma is a place holder • , - 120.2 , , ,
Using the ID Command: The ID command displays identity information about the components of the system: Software: version.revision opt1-opt2 Controller: model-serial options Processor n: version.revision type-options memMb Robot n: model-serial options module A sample display from the command “ID” is: Software: 11.0 81-1C0 Controller: 3302-108 0 Processor 1: 0.2 1-3 8Mb Robot 1: 100-0 0 8
To Cancel a Command: To cancel an executing command, press Ctrl+C. These keystrokes will NOT halt a program that was started with the EXECUTE command. The ABORT command halts an executing program.1 Many commands output information to the monitor. This output can be temporarily halted by pressing the “Scroll Lock” key. To restart the output, press “Scroll Lock” again. On an A-Series monitor, the main menu bar will turn red when output to the monitor has been halted.
Understanding Disk Files: One of the biggest differences between V+ and other operating systems is the nature of a disk file. In most operating systems, a disk file contains a single executable program, text document, or data file. In V+, a file can contain several items, the most common of which are programs and the values of global variables. V+ executes programs, handles subroutines, and stores the values of program variables, the reasons for this file strategy will become clear. The important thing to remember as you become familiar with the V+ file structure is that when you load or store a file, you are not necessarily loading or storing a single program. Subdirectories In normal operations, you may wind up with large quantities of files. If you had no way of organizing and isolating related files, your disk drives would quickly become awkward and difficult to use. V+ uses a directory structure to help organize and manage disk files.
Filename Requirements V+ filename requirements are similar to MS-DOS filename requirements. File names must: • Have a maximum of eight characters plus a three-character extension. • Use only alphabet characters (a - z), numbers (1 - 0), and the underscore (_) character. (V+ ignores the case of letters used in file names.) • Not contain any spaces or characters not listed above. • Use only one period, which marks the beginning of the filename extension. Reserved File Names You may use any valid file name for your files. However, Adept uses several common naming schemes including the following filename conventions: • The advanced camera calibration program uses “dat” as a file extension. • The Adept file compression utility uses “squ” as an extension. • The vision system stores vision models with a “vs” extension. • Adept’s AIM software uses the extensions “ovr”, “ov2”, “db”, “mnu”, and “rfd”.
File Directories: The FDIRECTORY command will list all the files in a subdirectory along with information about each file’s size, type, and creation date. Enter the command: FDIRECTORY or FDIR To Rename a Disk File: To change a file name without changing its location, use the FRENAME command. The command: FRENAME new_name = old_name will change the name of disk file “old_name” to “new_name”.
CD path (Change Directory) Display or change the default path for disk accesses. pathOptional string specifying the disk-directory path of interest. Normally this parameter contains directory names and backslash (\) characters. The V+ system adds a backslash if one is not included at the end of a path specification. Examples To display the default path: Type cd To change the default path to C:\TEST\JOBS\: Type cd c:\test\jobs\ In such a case, the final backslash can be omitted. To move up the directory path: Type cd . In this case the current directory path is C:\TEST\, and if you want to move back to C:\TEST\JOBS: Type cd jobs
To LOAD a Disk File: The controller cannot use the programs and information stored in disk files until they are loaded into system memory (RAM). The LOAD command takes a copy of the contents of a disk file and places it in RAM. LOAD my_file This command places the contents of the disk file “my_file” into RAM. “my_file” contains two programs and the values of variables used by those programs. To List a File: You can “peek” at a disk file to see what type of programs it contains by entering the command: FLIST file_name The contents of the file will scroll up the monitor window. Use the Scroll Lock key to pause scrolling. If a program is a monitor command program, all lines in the program will be preceded with an “MC”. Remember, a disk file can contain many programs, including both monitor command and executable V+ programs.
STOREL (Store the location Ffile) STOREL file_spec = program_name, ..., program_name STOREL /levels file_spec = program_name, ..., program_name Store location variables in a disk file. STOREL can be used while a program is executing. There must be sufficient room on the disk to hold the new disk file. Otherwise, the store operation will fail.
STOREP (Store a Program) STOREP file_spec = program_name, ..., program_name STOREP /levels file_spec = program_name, ..., program_name Store programs to a disk file. STOREP can be used while a program is executing, and an executing program can be stored. There must be sufficient room on the disk to hold the new disk file. Otherwise, the store operation will fail. Protected and read-only programs in memory cannot be stored. If no file name extension is specified, the extension “.PG” will be appended to the name given (for disk files only) Example Store the program named “test” STOREP test
STORE STORE file_spec = program_name, ..., program_name STORE /levels file_spec = program_name, ..., program_name This command stores the same information as the separate commands STOREP, STOREL, STORER, and STORES, but the STORE command creates only one file rather than four. It will store all program and location files loaded into the monitor under one file name. As the programs are stored on the disk, their names are displayed on the system terminal. You may see names other than those given on the command line since referenced subroutines are automatically stored. Programs are stored in alphabetical order regardless of the order used in the command.
To Delete a Disk File Disk files that are no longer used or needed should be deleted from the disk. This recovers space on the disk for other files. If you are copying or storing files to a disk and get a “disk full” message, the only way to continue with the copy or store operation is to delete some files from the disk. The FDELETE command removes files from the hard or floppy drives. To delete a single file, enter the command: FDELETE old_file and the file “old_file” will be removed from the current subdirectory. Note that the file name “old_file” is different from “old_file.v2”. You must specify the entire file name when deleting files. To delete all the files in the current subdirectory with the extension “v2”, enter the command: FDELETE *.v2 To delete all the files in the current subdirectory, enter the command: FDELETE *.* (Wild Card)
XSTEP program Execute a single step of a program. XSTEP can be used to single-step any of the system program tasks, independent of the execution status of other system tasks. When using the program debugger, you can press CTRL+X to generate an XSTEP command for the task being debugged. Examples Initiate execution of program “pack” for three cycles as task #0 (or the current debug task). The parameters “p2” and “17” are passed to the program. The first (executable) step of “pack” is displayed in anticipation of its execution with a subsequent XSTEP command (without parameters). XSTEP pack(p2,17),3 Prepare the program “assembly” for execution as program task #0 (or the current debug task) starting at step number 23. If “XSTEP” is then typed, step 23 would be executed. XSTEP assembly,,23 Execute the next step of the program executing as program task #2. XSTEP 2
ZERO Reinitialize the V+ system and delete all programs and data in the system memory. Delete all user-defined windows, fonts, and icons from graphics memory. Example Delete all programs and data in memory. ZERO Are you sure (Y/N)? Y
DOS Commands used in the monitor How to list the contents of a disk file FLIST filename How to list out your location file LISTL (Shows all the location coordinates) Load Location file first. How to list out you program file FLIST filename.V+ or pg (Shows all the program steps) How to save a location file STOREL filename How to save a program file STOREP filename How to save your location STORE filename and program file together
DOS Commands used in the monitor How to change directory or path CD C: or CD A: List your files in on the hard drive FDIR How to load your file (C Drive) LOAD filename How to load your file (A Drive) LOAD or a:\filename How to rename a file RENAME new_program_name = old_program_name How to delete a file FDELETE filename.ext How to change the name FRENAME new_file_name = Old_file_name
This presentation illustrated only the most common monitor commands, there are many more that can be found in the manual: V+ Operating System Reference Guide , Version 12.1
Lab 4: V+ Operating System Using the Monitor The End