Download
1 / 71
710 likes | 970 Vues
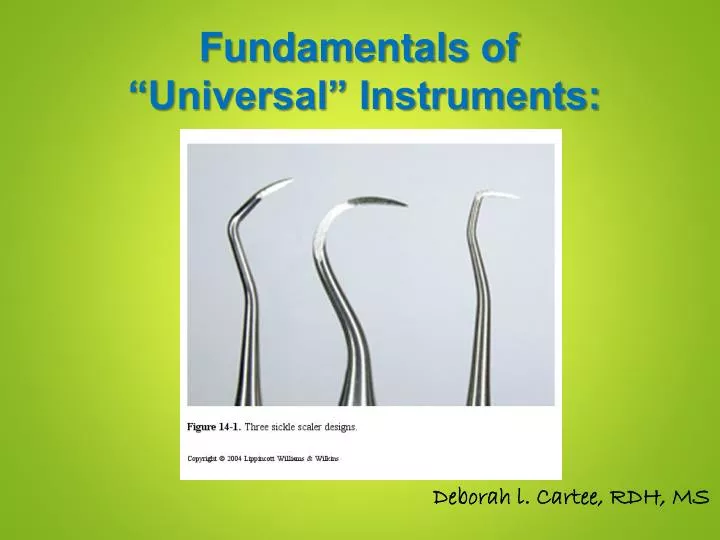
Fundamentals of “Universal” Instruments:. Deborah l. Cartee, RDH, MS. Homework. Reading Assignments: Wilkins Chapter 38 Darby Chapter 26. Objectives. Describe and identify the general characteristics of dental instruments.

E N D
Fundamentals of “Universal” Instruments: Deborah l. Cartee, RDH, MS
Homework Reading Assignments:Wilkins Chapter 38 Darby Chapter 26
Objectives • Describe and identify the general characteristics of dental instruments. • Discuss variations in instrument shank length, curvature, flexibility, and blade-to-shank angulation. • Identify a given instrument by its classification, design, number and manufacturer’s name • Select the appropriate instrument for a given task. • Discuss proper instrument blade adaptation and angulation. • Compare and contrast the metals used in instrument construction. • Compare scalers and curettes.
Objectives Cont. • Compare universal and area specific curet. • Describe the distinct characteristics of a scaler. • Describe the distinct characteristics of a curet. • Determine and descrbe the correct cutting edge for each instrument in the cassette. • Demonstrate proper adaptation, insertion, angulation, and activation of each instrument in the cassette. • Evaluate successful instrumentation.
Instrument Parts • Handle • Shank • Shape (straight or angled) • Flexibility • Lower or terminal shank • Working End- Blade
Materials Used for Blade • Stainless Steel • Metal • Maintains adequate sharpness • Do not rust or discolor • Carbon Steel • Metal • Feel sharper clinically and hold their sharpened edges longer • More brittle, can break more easily than SS • Tends to oxidize or rust • *Gold “tipped” • Metal • Expensive • Used for Implants • *Teflon • Plastic/Graphite reinforced nylon • Only used for Implants *See Darby page 1032-1035
Instrument Handle • Overall design – single ended vs. double ended • Weight • Diameter • Surface texture • Serrations
Parts of an Instrument Single ended Single ended A = Handle B = Shank C = Working-end
Double Ended Design Top instrument (Unpaired) is an example of a curet (on the left) and an anterior sickle on the (right) Bottom instrument (Paired) is an example of a posterior sickle on both ends.
Handle Texture smooth knurled knurled ribbed
2 Types of Universal Instruments: 1. Scalers - (in cross-section) pointed tip pointed back supragingival calculus removal 2. Curets - (in cross-section) rounded tip rounded back sub/supragingival calculus removal
Face Face
To date you’ve learned: *#17 Explorer * ODU Explorer
Types of Sickle Scalers: • Anterior- ‘straight’ shank instrument • Posterior- ‘curved’ or multiple shank instrument • (actually can be used universally in the mouth)
Terminal shank is at a 90 degree angle to the Face
Anterior Sickle Straight Shank
Design Characteristics: Basically there are 2 cutting edges at each end. The Face of the Sickle Scaler is at a 90 degree angle to the terminal shank. Flat “face” Terminal shank
Note: You do NOT have an anterior sickle scaler in your cassette. You have a “posterior” sickle scaler – 204S (S204S7). We will use this instrument in the anterior and the posterior (universal). We will use this instrument on proximal (mesial and distal) surfaces only. We will NEVER use it on facial and lingual surfaces.
Sickle scalers have a pointed tip and two cutting edges on each end of the instrument:
Must maintain side of tip! Correct! Incorrect
P. 210 (stool position) (supine, chin & head position) (light, bracket tray) (retraction, mirror) (sickle)
Keep In Mind: • Operator and Client Positioning • Instrument Blade Selection • Grasp • Fulcrum (Max. palm up, Mand. palm down) • Insertion at 0° • Adaptation open to 70°to 80° • Angulation- maintain side of tip
Please remember: The Sickle instrument is used SUPRAGINGIVAL! (You can go sub about 1-2 mm if necessary, but not more than that!!!) The Sickle instrument will be used Mesial & Distal! (You can NOT use on facial and lingual surfaces!!! )
Anterior Scaler Initial point of insertion is always at the line angle The above shows a straight shanked sickle. Since we will not use this type of instrument, please focus instead on the Terminal Shank and its cutting edges and how it relates to the tooth.
Mandibular Anteriors: BuccalRightHanded Clinician 5 6 4 3 1 2 #27 #26 #25 #24 #23 #22 • From a 11:30 position, insert at the Distal Buccal Line Angle of #22 (tip towards the col) • Initiate walking stroke towards and into the distal col. Remove at end of pull stroke • Reinsert at the Mesial Buccal Line Angle of #22 (tip towards the mesial col) • Initiate walking stroke toward and into the mesial col. Remove at end of pull stroke • Move onto #23 D and then #23 M, then #24D, #24 M, etc.
Mandibular Anteriors: LingualRightHanded Clinician #22 #23 #24 #25 #26 #27 • From a 11:30 position, insert at the Distal Lingual Line Angle of #22 (tip towards the col) • Initiate walking stroke towards and into the distal col. Remove at end of pull stroke • Reinsert at the Mesial Lingual Line Angle of #22 (tip towards the mesial col) • Initiate walking stroke toward and into the mesial col. Remove at end of pull stroke • Move onto #23 D and then #23 M, then #24D, #24 M, etc.
Mandibular Anteriors: BuccalLeft Handed Clinician 5 6 4 3 1 2 #27 #26 #25 #24 #23 #22 • From a 12:30 position, insert at the Distal Buccal Line Angle of #27 (tip towards the col) • Initiate walking stroke towards and into the distal col. Remove instrument at upward stroke • Reinsert at the Mesial Buccal Line Angle of #27 (tip towards the mesial col) • Initiate walking stroke toward and into the mesial col. Remove instrument at upward stroke • Move onto #26 D and then #26 M, then #25D, #25 M, etc.
Mandibular Anteriors: Lingual Left Handed Clinician #22 #23 #24 #25 #26 #27 • From a 12:30 position, insert at the Distal Lingual Line Angle of #27 (tip towards the col) • Initiate walking stroke towards and into the distal col. Remove at end of pull stroke • Reinsert at the Mesial Lingual Line Angle of #27 (tip towards the mesial col) • Initiate walking stroke toward and into the mesial col. Remove at end of pull stroke • Move onto #26 D and then #26 M, then #25D, #25 M, etc.
2 1 2 1 2 1 1 2 Notice that you will begin your working stroke at the Distal Line Angle(1) and proceed into the distal col. You will then reinsert tip at the Mesial Line Angle(2) (tip now pointing towards the Mesial). Remember, Terminal shank of instrument is parallel to the line angle- proceed with walking stroke into the mesial col area.
Auxiliary Shank Terminal Shank Correct working end:
Incorrect working end: Auxiliary Shank Terminal Shank
Working End Correct! Incorrect
Working End Correct! Incorrect
Angle <45° Angle >90°