Download
1 / 16
180 likes | 557 Vues
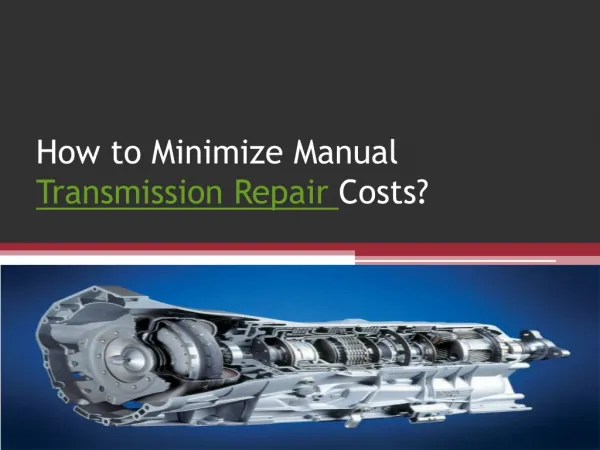
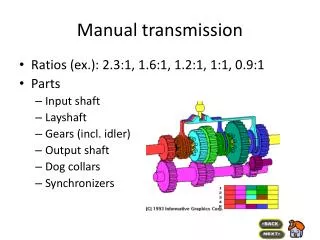
Manual Transmission Repair. General Disassembly Procedures. Refer to the appropriate service manuals for detailed disassembly procedures Check end play and clearances before disassembly Check detent springs and balls as they are removed They MUST be replaced correctly

E N D
General Disassembly Procedures • Refer to the appropriate service manuals for detailed disassembly procedures • Check end play and clearances before disassembly • Check detent springs and balls as they are removed • They MUST be replaced correctly • If force is required for disassembly use a soft faced hammer • Mark and remove all synchronizers as an assembly and keep the together • Including blocking rings • Be careful not to loose parts • Snap rings • Needle bearings • Thrust washers • Spacers • Detent balls • springs
Gear Failure Analysis • Look for the following failure modes when inspecting gears • Cracking • Galling • Spalling • Pitting • Wear
Elecon Engineering Cracking • Causes • Excessive loads • Excessive backlash
Galling • Definition • Galling is a condition in which two surfaces cold weld themselves together under high loads, then are torn apart transferring bits of metal from one surface to another
Pitting Generally caused by overload conditions
Spalling Next step after pitting
Wear • Metal is worn away from the normal contact area of the gear • Different levels of wear • Polishing • Moderate wear • Extreme wear • Abrasive wear
Abrasive Wear Caused by abrasive particles in the lubricant
Inspection • Input shaft • Examine splines for smoothness and rust • Inspect input gear for excessive wear, galling, pitting or chipping • Check clutch teeth for wear • Shift cone must be smooth and not scored • Replace front seal • Check pocket bearing surface
Inspection • Extension housing • Check bushings for wear • Replace seal • Inspecting main shaft and gears • Inspect bearing surfaces • Check all teeth for chipping, galling or wear • Check pocket bearing surface • All snap ring grooves must have sharp square shoulders • Thrust washers must be smooth and OEM specs for thickness • Check driveshaft yoke splines for wear • Check shaft for runout • Use V-blocks and a dial indicator • Check against OEM specs – Normally not to exceed .002”
Inspection • Countershaft and gears • Check teeth for wear, pits, or cracks • Check needle bearings • Check thrust washers or spacers for wear or damage • Reverse idler gear • Check idler gear bushing or needle bearings • Check thrust washers • Check gear teeth
Inspection • Synchronizers • Mark blocking ring and hub and return to the original position • Check spings and inserts for wear • Inspect hub inner splines • Sleeve clutch teeth must not be battered or tapered • Inspect blocking rings • Inner teeth must be sharp • Paper type must not show excessive wear
Inspection • Case • Check for cracks and porosity (aluminum) • Check all mating surfaces for burrs, dents, or warpage
General Reassembly • Always compare replacement parts to original for design, size and shape • Make sure it fits properly • Use new snap rings, thrust washers, seals, and gaskets • Apply sealer to pins or shafts which pass through the case to prevent leaks • Prelube all bushings shafts and gears with the appropriate lubricant • Any assembly lube/grease must be compatible with and dissolve in the oil being used in the transmission • Dummy shaft may be require to hold needle bearings in place during assembly • Ensure shift forks are properly engaged into the synchronizer clutch sleeves • Check transmission for ease of shaft rotation and shifting action