Download
1 / 22
230 likes | 466 Vues
Lightweight Directory Access Protocol. Objectives This chapter will first show you how to install and use LDAP Contents The LDAP Database Structure Scenario Configuring The LDAP Server Configuring The LDAP Client Common LDAP administrative tasks Practical Start ldap server & client

E N D
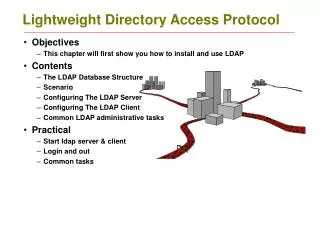
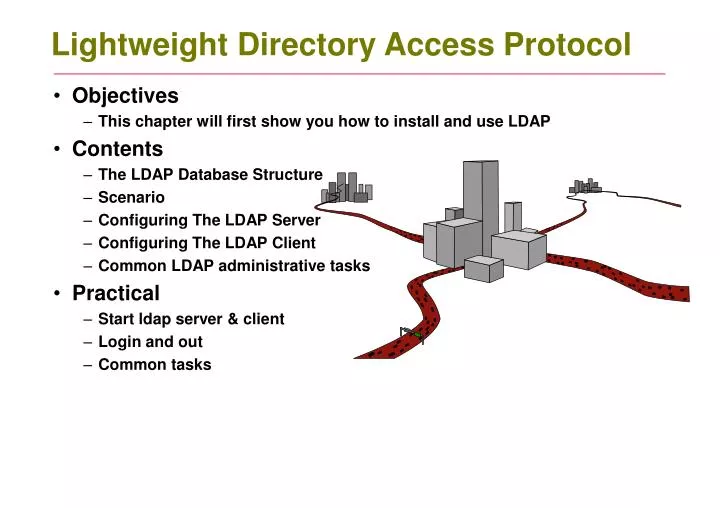
Lightweight Directory Access Protocol • Objectives • This chapter will first show you how to install and use LDAP • Contents • The LDAP Database Structure • Scenario • Configuring The LDAP Server • Configuring The LDAP Client • Common LDAP administrative tasks • Practical • Start ldap server & client • Login and out • Common tasks
The LDAP Database Structure • Scenario The I.T. department in a small organization ”my-site.com" has many Linux servers and people they need to administer • Domain Component, dc=my-site, dc=com LDAP domain ”my-site.com" for their LDAP database in which one domain component (DC) will be "example", and the other will be "com". dc=my-site, dc=com • Organizational Unit, ou=people The database will only have one organizational unit simply called "People" which is the LDAP default. ou=People • Attributes Each person will have attributes such as a username (User ID or UID), password, Linux "home" directory and login shell. • LDAP database is usally files in directory /var/lib/ldap The Linux server named "bigboy" will act as the LDAP server containing the database
The server & client RPMs • Installed on the server ”bigboy” • openldap - pam-ldap • openldap-clients - tls • nss_ldap - gnu-tls • openldap-servers • openldap-devel • Server "bigboy" has a special user account named "ldapuser" that will be used to test the LDAP logins. • It is a very good idea to have a up to date DNS as well • Installed on the client ”smallfry” • openldap-clients - pam-ldap • nss_ldap - tls • Openldap - gnu-tls • openldap-devel
Configuring The LDAP Server • Create a database directory • RH by defaults to putting all databases in the /var/lib/ldap directory • We'll create a dedicated ”my-site.com" directory owned by the user "ldap". • Create an LDAP "root" password • Only the LDAP "root" user can create, import data, export data into an LDAP database. • The ”password” {SSHA}… need to be copied and pasted as it is into file /etc/openldap/slapd.conf as seen on next page, it’s tagname is rootpw # mkdir /var/lib/ldap/my-site.com # chown ldap:ldap /var/lib/ldap/my-site.com # chown 700 /var/lib/ldap/my-site.com # slappasswd New password: Re-enter new password: {SSHA}v4qLq/qy01w9my60LLX9BvfNUrRhOjQZ
SLAPD the stand-alone LDAP daemon • This is the main LDAP server configuration file: /etc/openldap/slapd.conf • We'll now update it with the following information: database: database format, here plain ldap files suffix: the site fdqn (dnsdomainname) rootdn: The root container Manager rootpw: LDAP root password, is pasted from the ”slappasswd run” directory: where my-site.com ldap three root is found dc: domain component cn: common name • Options like: permission, password, database type, database location and so on can be configured in this file • Start the LDAP daemon and check /var/log/messages database ldbm suffix "dc=my-site,dc=com" rootdn "cn=Manager,dc=my-site,dc=com" rootpw {SSHA}v4qLq/qy01w9my60LLX9BvfNUrRhOjQZ directory /var/lib/ldap/my-site.com # /etc/init.d/ldap start
Extracting local users to become ldap users • Create the "ldapuser" test account • We'll now create the "ldapuser" account we'll use for testing. • Extract the desired records from /etc/passwd • We'll need to extract the "ldapuser" information from the /etc/passwd file using the "grep”,it is possible to extract more or all users in passwd file if you like • First time you also need root account • If this is your first time creating the LDAP database, you will also want to extract the information for the Linux "root" # useradd -g users ldapuser # passwd ldapuser Changing password for user ldapuser. New password: Retype new password: passwd: all authentication tokens updated successfully. # grep ldapuser /etc/passwd >> /etc/openldap/passwd.ldapusers # grep root /etc/passwd > /etc/openldap/passwd.root
Getting and setting up PADL MigrationTools • Find the conversion script migrate_passw.pl with locate • The migration to LDAP utilities can be downloaded here: • SuSE and some other unixes is missing the MigrationTools • For most comfort when migrating add your maildomain and default base in /etc/share/openldap/migration/migration_common.ph # locate migrate /usr/share/openldap/migration/migrate_passwd.pl # cd /usr/share/openldap/ # wget http://www.padl.com/download/MigrationTools.tgz # tar xvfz MigrationTools.tgz ; ln -s MigrationTools-47 migration # cd migration ; vi migration_common.ph # Default DNS domain $DEFAULT_MAIL_DOMAIN = "my-site.com"; # Default base $DEFAULT_BASE = "dc=my-site,dc=com";
Convert extracted users to LDIF files • Convert the extracted users in ”passwd.ldapuser" file to LDIF • We now convert the /etc/passwd data into an LDAP Data Interchange Files (LDIF) for previous extracted users: • Convert the extracted root user ”passwd.root" file to LDIF • We now have both LDIF files /etc/openldap/ldapusers.ldif /etc/openldap/root.ldif • In /etc/openldap/root.ldif we need to make root the Manager # cd /usr/share/openldap/migration/ # ./migrate_passwd.pl /etc/openldap/passwd.ldapusers \ > /etc/openldap/ldapusers.ldif # ./migrate_passwd.pl /etc/openldap/passwd.root \ > /etc/openldap/root.ldif dn: uid=root,ou=People,dc=my-site,dc=com uid: root cn: Manager
Create LDIF "my-site.com" domain • The attributes of the my-site.com domain haven't yet been defined. • You haven't defined the OU organizational unit called People • Create /etc/openldap/my-site.com.ldif • which should look like this: • If you need more OU’s organizational unit’s just add them below last. dn: dc=my-site,dc=com dc: my-site description: Root LDAP entry for my-site.com objectClass: dcObject objectClass: organizationalUnit ou: rootobject dn: ou=People, dc=my-site,dc=com ou: People description: All people in organisation objectClass: organizationalUnit
Import the LDIF files into the database • Import the 3 main LDIF files to our database • First we add the organizational unit Public: my-site.com.ldif • Next we add the root user: root.ldif • Last we add extracted users: ldapusers.ldif # ldapadd -x -D "cn=Manager,dc=my-site,dc=com" \ -W -f my-site.com.ldif Enter LDAP Password:****** adding new entry "dc=my-site,dc=com" adding new entry "ou=People, dc=my-site,dc=com" # ldapadd -x -D "cn=Manager,dc=my-site,dc=com" \ -W -f root.ldif Enter LDAP Password:****** adding new entry "uid=root,ou=People,dc=my-site,dc=com" # ldapadd -x -D "cn=Manager,dc=my-site,dc=com" \ -W -f ldapusers.ldif Enter LDAP Password:****** adding new entry "uid=ldapuser,ou=People,dc=my-site,dc=com"
Test the LDAP database • First we chat that we got the databases • Next do a search test, all entries • A long list will follow, you should be able finding UID: root and UID: ldapuser # ls /var/lib/ldap/my-site.com/ . .. dn2id.dbb id2entry.dbb nextid.dbb objectClass.dbb # ldapsearch -x -b 'dc=my-site,dc=com' '(objectclass=*)'
Configuring The LDAP Client • Edit the /etc/openldap/ldap.conf configuration file • Eace up for clients by adding LDAP server and domain suffix: • Edit the /etc/nsswitch.conf configuration file • Instead of modifying nsswitch.conf manually you can run • Run yast ldap or /usr/bin/authconfig on other linuxes • Select Use LDAP • Give the LDAP server's IP address which in this case is 192.168.0.1 • Give the base DN as "dc=my-site,dc=com" (no quotes). • Do not select TLS. (TLS is usally a good idea in production) • Automounting means mounting home-dirs on client from server’s • (Use MD5 and shadow passwords.) HOST 192.168.0.1 BASE dc=my-site,dc=com passwd: files ldap shadow: files ldap
Setup PAM on LDAP Client and test it • Next is to add LDAP to PAM logins /etc/pam.d • pam.d/login need some new entries (also other LDAP logins might need) • Restart SSH • So it re-reades the nsswitch.conf file • Test LDAP Logins • Using ldapsearch on the client • Using SSH or the Linux console To see that client has contact with server • Create ldapuser home If you have automount it is not nessesary • Exit and login with ldapuser at local console of client Type pwd to see where you land, if land in ”/” root it means automounting does not work auth sufficient pam_ldap.so use_first_pass account sufficient pam_ldap.so password required pam_ldap.so # service sshd restart # ldapsearch -x -b 'dc=my-site,dc=com' '(objectclass=*)' # ssh –l ldapuser 192.168.0.1 # mkdir /home/ldapuser
Common LDAP administrative tasks • LDAP users changing their own passwords • LDAP users can modifytheir LDAP passwords using the regular passwd command. • Modifying LDAP users by user "root” • Script usage sample, modify users at root on LDAP server $ passwd Changing password for user ldapuser. Enter login(LDAP) password: New password: Retype new password: LDAP password information changed for ldapuser passwd: all authentication tokens updated successfully. # passwd ldapuser Changing password for user ldapuser. New password: Retype new password: passwd: all authentication tokens updated successfully. [root@bigboy tmp]# modifyldapuser ldapuser Enter LDAP Password: modifying entry "uid=ldapuser,ou=People,dc=example,dc=com"
Common LDAP administrative tasks • Adding new LDAP users with addldapuser script • Add the user to the database • Create the Linux user kalle on the LDAP server w. useradd command • Run the addldapuser script with the username as the only argument. The script prompts you for your LDAP "root" password. • Create home directories for the user on all the LDAP client Linux boxes, otherwise they will have no home. Note that it is possible to let LDAP create temporary ”home’s” for users when they login, by using ”skel” catalog • Deleting LDAP users • Ldap Account Manager: http://lam.sourceforge.net/ # useradd kalle # addldapuser kalle Enter LDAP Password: adding new entry "uid=ldapuser,ou=People,dc=my-site,dc=com" ldapdelete -x -W -D "cn=Manager,dc=my-site,dc=com" \ "uid=$1,ou=People,dc=my-site,dc=com"
Configuring the stunnel cryptated LDAP client • Install package stunnel for general ssl tunnel support • Configuring the stunnel LDAP client • Edit the ldap.conf file • Modify stunnel user • Edit the /etc/stunnel/stunnel.conf configuration file HOST localhost BASE dc=my-site,dc=com # usermod –G stunnel stunnel # Configure stunnel to run as user "stunnel" placing temporary # files in the /usr/var/run/stunnel/ directory chroot = /var/lib/stunnel/stunnel pid = /var/run/stunnel.pid setuid = stunnel setgid = nogroup # Configure logging debug = 7 output = /var/log/messages # Use it for client mode client = yes # Service-level configuration [ldap] accept = 389 connect = 192.168.0.1:636
Generate certificates and start stunnel client • Creating the stunnel x509 certificates • See doc’s at /usr/share/doc/packages/stunnel • While creating certificate a number of questions arrives • Common Name must be FDQN • Start stunnel • Check the log files • Start stunnel at next boot # umask 077 # /usr/bin/openssl req -new -x509 -days 365 –nodes -config \ /usr/share/doc/packages/stunnel/stunnel.cnf -out /etc/stunnel/stunnel.pem \ -keyout /etc/stunnel/stunnel.pem # /etc/init.d/stunnel start # tail -100 /var/log/messages # insserv stunnel
Configuring stunnel encrypted LDAP server • Install package stunnel for general ssl tunnel support • Configuring the stunnel LDAP server • Modify stunnel user • Edit the /etc/stunnel/stunnel.conf configuration file # usermod -G stunnel # Configure stunnel to run as user "stunnel" placing temporary # files in the /usr/var/run/stunnel/ directory chroot = /home/stunnel/ pid = /stunnel.pid setuid = stunnel setgid = stunnel # Some debugging stuff debug = 7 output = /var/log/messages # Use it for client mode client = no #cert = /usr/share/ssl/certs/stunnel.pem #key = /usr/share/ssl/certs/stunnel.pem # Service-level configuration [ldap] accept = 636 connect = 389
Generate certificates and start stunnel server • Creating the stunnel x509 server certificates • See doc’s at /usr/share/doc/packages/stunnel • While creating certificate a number of questions arrives • Common Name must be FDQN • Start stunnel • Check the log files • Start stunnel at next boot # umask 077 # /usr/bin/openssl req -new -x509 -days 365 –nodes -config \ /usr/share/doc/packages/stunnel/stunnel.cnf -out /etc/stunnel/stunnel.pem \ -keyout /etc/stunnel/stunnel.pem # /etc/init.d/stunnel start # tail -100 /var/log/messages # insserv stunnel
Configuring Encrypted LDAP Communication • Create a home directory for the user "ldapuser” at the client or use automounting • Check to see if ldapuser is not in the /etc/passwd file. • Create the home directory for ldapuser on the client! # grep ldapuser /etc/passwd # mkdir /home/ldapuser # chmod 700 /home/ldapuser/ # chown ldapuser:users /home/ldapuser/ # ll /home total 2 drwx------ 2 ldapuser users 1024 Aug 4 08:05 ldapuser # # cp /etc/skel/.* /home/ldapuser/ cp: omitting directory `/etc/skel/.' cp: omitting directory `/etc/skel/..' cp: omitting directory `/etc/skel/.kde' # chown ldapuser /home/ldapuser/.*
Test LDAP Logins on secure server • Using ldapsearch on the LDAP client • Using SSH or the Linux console on the LDAP client • Try to log in as user ldapuser to the LDAP client Linux system. • Use the TCPdump command to verify port 636 # ldapsearch -x -b 'dc=my-site,dc=com' '(objectclass=*)' # tcpdump -n tcp port ldaps tcpdump: listening on eth0 09:20:02.281257 192.168.0.1.1345 > 192.168.9.2.ldaps: S 1665037104:1665037104(0) win 5840 <mss 1460,sackOK,timestamp 74401362 0,nop,wscale 0> (DF) 09:20:02.281356 172.16.1.200.1daps > 172.16.1.2.1345: S 1911175072:1911175072(0) ack 1665037105 win 5792 <mss 1460,sackOK,timestamp 20737195 74401362,nop,wscale 0> (DF) ... ...
Addons for TLS • Generate keys • Remove passphrase from keys • In slapd.conf add entries # openssl –req –newkey rsa:1024 –x509 –days 365 keyout \ slapd_key.pem –out slapd_cert.pem # openssl rsa –in slapdd_key.pem –out slapd_key.pem # chown slapd-user.slapd-group sl*.pem # chmod 600 sl*.pem TLSCertificateFile /usr/ssl/certs/slapd_cert.pem TLSCertificateKeyFile /usr/ssl/certs/slapd_key.pem TLSCiperSuite HIGH:MEDIUM:+SSLV2