Download
1 / 11
110 likes | 275 Vues
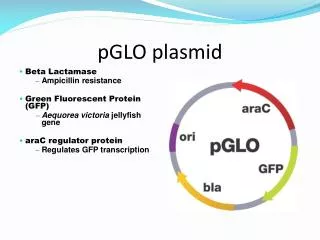
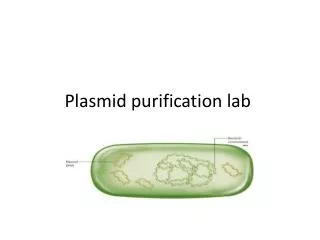
PLASMID ISOLATION AND ANALYSIS Part II Plasmid Purification and Isolation. Plasmid Purification and Isolation Step 1. Pellet 2 ml of overnight cell suspension by adding 1 ml (20 drops) of overnight culture suspension into a 1.5 ml reaction tube.

E N D
PLASMID ISOLATION AND ANALYSISPart IIPlasmid Purification and Isolation
Plasmid Purification and IsolationStep 1 Pellet 2 ml of overnight cell suspension by adding 1 ml (20 drops) of overnight culture suspension into a 1.5 ml reaction tube. Spin for 1 minute at 10,000 rpm in a microcentrifuge (MicroV). PLASMID ISOLATION AND ANALYSIS: Part II
Plasmid Purification and IsolationStep 1 (cont.) A pellet should form in the bottom of the tube. Drain off the liquid into a designated container and gently tap the tube on a paper towel to remove the excess broth. Repeat the procedure with a second 1 ml volume of overnight culture suspension. PLASMID ISOLATION AND ANALYSIS: Part II
Plasmid Purification and IsolationStep 2 Using a small needle pipette, completely resuspend the cell pellet by adding the entire contents of the tube marked “Cell Resuspension Solution”(P1). Mix the contents by finger flicking the tube or pipetting several times. No visible clumps of bacteria should remain. PLASMID ISOLATION AND ANALYSIS: Part II
Plasmid Purification and IsolationStep 3 Use a small needle pipette to add the contents of the tube marked “Cell Lysis Solution”(P2) to the Resuspension tube and mix by inverting the tube 4 times. The cell suspension should appear clear. PLASMID ISOLATION AND ANALYSIS: Part II
Plasmid Purification and IsolationStep 4 Use a small needle pipette to add the contents of the tube marked “Neutralization Solution” (N3) to the Resuspension tube and mix by inverting the tube 4 times. PLASMID ISOLATION AND ANALYSIS: Part II
Plasmid Purification and IsolationStep 5 Centrifuge the tube containing the lysate at 10,000 rpm for 10 minutes. PLASMID ISOLATION AND ANALYSIS: Part II
Plasmid Purification and IsolationStep 6 While the lysate is in the centrifuge, label two 1.5 ml tubes. Label the lid and side of one tube “L”. PLASMID ISOLATION AND ANALYSIS: Part II
Plasmid Purification and IsolationStep 7 Label the lid and side of the second tube “M.” Remove the lid from the tube with a scissors. Place the lid back on the tube and hold until Part III, step 7. PLASMID ISOLATION AND ANALYSIS: Part II
Plasmid Purification and IsolationStep 8 Use the small needle pipette to carefully remove all of the clear lysate/supernate from the miniprep in step 5. Do not remove any of the precipitate. Wipe the end of the pipette with a chem wipe or kleenex to remove any protein/chromosomal DNA precipitate. PLASMID ISOLATION AND ANALYSIS: Part II
Plasmid Purification and IsolationStep 9 Pipette the clear lysate/supernate into the tube marked “L.” At this point you can choose to store the tube in the refrigerator until the next day or, if time permits, continue to Part III. PLASMID ISOLATION AND ANALYSIS: Part II