Download
1 / 27
270 likes | 374 Vues
How to Electronically file a Campaign Contribution Disclosure Report . Revised 1.1.2014. CCDR MAIN MENU.

E N D
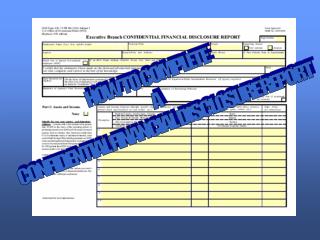
How to Electronically file a Campaign Contribution Disclosure Report Revised 1.1.2014
CCDR MAIN MENU Once you have logged into the e-filing system ,using the “C” filer id and corresponding password, you will be directed to the Main Menu. On the Main Menu you can continue working reports, start a new report, and view all submitted reports WORKING REPORTS The Working ReportsSection displays reports you have started but have not completed and submitted to the Campaign Finance Commission. START A NEW REPORT If you are ready to start a new report, select the covering calendar year, then click ALL SUBMITTED REPORTS The All Submitted Reports section lists all completed and submitted reports. The information in this section will display the year of the report, the reporting period, type, and date submitted.
Report Cover Page Once you start a new report, select your next upcoming Election Year. The campaign committee information is automatically entered from your Form RC. If you have not submitted a Form RC and you have a campaign committee, you can register your committee under the registration info tab on the MAIN MENU. The information will be included on the next upcoming report you submit. Next select the period for which you are reporting. Follow the schedule applicable to you. NOTE: A FINAL REPORT & TERMINATION should only be selected if you are terminating your campaign. You must meet the following criteria to terminate: You have a zero net balance; You have no campaign debt; You are not seeking reelection to your current office; You are no longer holding elected office. Once you have addressed the above criteria click
QUICK FILE OPTION Am I eligible to QUICK FILE? The Quick file option is for those who have no information to report including numbers that should come forward from a previous report. Make sure you meet all the qualifications listed before you select I MEET ALL the criteria above. If you do not meet all the requirements to QUICK FILE, select theI AM NOT eligible for the Quick File option and you will proceed to the next page to continue with your report.
Report Main Menu If you were not eligible to QUICKFILE, you are directed to the Report Menu. Read the entire screen before completing the report sections. The Report Menu is color coded to show what is required. Required Sections Red indicates that an action needs to be taken to complete that section. Completed Sections As you complete a section it will change to Green to let you know you’ve successfully completed the section. The links to the right of each section are a simple way to continue by stating you have nothing to report for that section. Click the button and the section will turn green. Optional Sections Teal indicates this section is optional. Other Required Sections Must be Completed First Grey indicates that another section above needs to be completed in order to be able to complete the section in Grey.
Contributions Select the Contribution Type from the drop down menu. Select the appropriate dial. If you received previous contributions from the same person, you can choose Import Previous Contributor. (Search the name of a previous contributor. Select the contributor and the system will bring forward information previously entered for that contributor.) If you are reporting a new contributor, continue completing the required fields: First Name Last Name Address Occupation Employer Date received Election Election Year Amount Click If you omit information the system will indicate an error message in red. The defect must be corrected in order for the system to proceed. All sections must be addressed before continuing.
Itemized Contributions Next, the program will allow you to review your data entry. Click “Edit” if it is necessary to modify the information. If you need to add additional contributions, you can do so by clicking add Contribution Received. If you are finished, click section Completed to return to the Report Menu.
Updated Report Menu Once you have returned to the report menu you will see that the section you just completed has turned green. EDIT ITEMIZED CONTRIBUTIONS If you need to edit any contributions You can click on EDIT ITEMIZED CONTRIBUTIONS . Otherwise proceed to the next section. FILE ITEMIZED LOANS
Itemized Loans Section Inside the ITEMIZED LOANS SECTION, complete each section for any bona fide loans to the campaign. Continue by completing the required fields: Type of Lender Address Date Received Election Election Year Loan Amount click (Remember money given from the candidate paid directly out of pocket for goods or services is an in-kind contribution not a loan.)
Add Responsible Person(s) Complete the details needed for person(s) responsible for loan repayment. Name Mailing Address Occupation Employer Fiduciary Position (if any) Then click ADD THIS PERSON
Add Additional Person If more than one person is responsible for the loan, add their details and click ADD THIS PERSON. Follow the instructions from previous slide. If only one person is responsible for repayment of this loan, click RETURN TO LOAN SUMMARY.
ITEMIZED LOANS received Next, the program will allow you to review your data entry. Click “Modify” if it is necessary to modify the information. If you need to add additional loans, you can do so by clicking add LOANS Received. If you are finished , click section Completed to return to the Report Menu.
Updated Report Menu Proceed to the next section. FILE ITEMIZED EXPENDITURES
Expenditures Made Select the Expenditure Type from the drop down menu. Select the appropriate dial for Type of Recipient. Complete the details for the expenditure made. Name Address Date of Expenditure ElectionElection Year Occupation –if applicable Employer- if applicable Expenditure Purpose Paid Amount Click
Itemized Expenditures The program will then allow you to review your data entry. Click “Modify” if it is necessary to modify the information. If you need to add additional expenditures , you can do so by clicking add EXPENDITURES Received. If you are finished , click section Completed to return to the Report Menu.
Updated Report Menu Proceed to the next section. FILE INVESTMENT STATEMENT This section is to report if you have invested your campaign funds. DO NOT REPORT PERSONAL INVESTMENTS.
Investment Statement Complete the details for any contributions that have been removed from the campaign account and invested. Investment Name Account Number Institution Name/Person Name Address Value at Beginning of Period Value at End of Period Interest Paid Out Cash Dividends Click
Complete the details for investment transactions for the investment entered on the last slide. Transaction Date Value of Investment Purchased Value of Investment Sold Profit from sale Loss from sale Person(s) involved in transaction Click Next, review your data entry. Click “Edit” if it is necessary to modify the information. If you need to add additional contributions , you can do so by clicking add investments held If you are finished , click Return to investment summary to return to the Report Menu.
Next, the program will allow you to review your data entry. Click “Modify” if it is necessary to modify the information. If you need to add additional investments, you can do so by clicking Add investments held. If you are finished , click section Completed to return to the Report Menu.
Proceed to the next section. FILE REPORT SUMMARY Updated Report Menu
Report Summary All data you previously entered as detailed information in the reports’ sections will show up on the summary page. The only contribution information remaining to be entered on the report summary section is located in the yellow highlighted boxes. Read each section and enter the information, if applicable. The computer will add up the numbers for you. Don’t forget to bring your previous contributions forward. To assist you with this, click on the click here to import summary data option. Select the applicable dial and reporting period and click continue.
Report Summary All data you entered as detailed information in the reports’ sections will show up on the summary page. The only expenditure information remaining to be entered on the report summary section is located in the yellow highlighted boxes. Read each section and enter the information, if applicable. The computer will add up the numbers for you.
Indebtedness Section Click on file indebtedness to add current file period indebtedness or prior campaign indebtedness. If you have no indebtedness click on the “No Indebtedness” tab.
Indebtedness Section Either way you need to complete this section by entering prior indebtedness or a zero if you have no current or past indebtedness by clicking on CLICK HERE TO COMPLETE action.
Indebtedness Section Enter any outstanding debt at the beginning of this period then click the UPDATE TOTAL tab. If you have no debt enter “$0.00” then click the CONTINUE tab.
Electronically Submit You have successfully completed all the sections of the Report Menu. If you choose to view the report before you submit it click on click HERE to view working report . Otherwise click the big red button at the bottom of the page labeled I ELECTRONICALLY SUBMIT THIS REPORT.
Success Confirmation Once you click I ELECTRONICALLY SUBMIT THIS REPORT the system will confirm your report has been submitted and send a confirmation to the email address of record. If you wish a carbon copy of the confirmation follow the instructions on the screen. Because you are electronically filing you will not need to sign or notarize this report. You can leave any comments about the e-filing system in the comment section then click on the gray button send confirmation and view report. You may now log out of the e-filing system.