Download
1 / 27
270 likes | 406 Vues
RRMC Part 1: Amalga for Physicians Getting Started Using Amalga and NetAccess with UAS Single Sign-On. Electronic Health Record Systems that provide patient information such as lab results, nursing documentation, transcription reports, radiology, orders, etc.

E N D
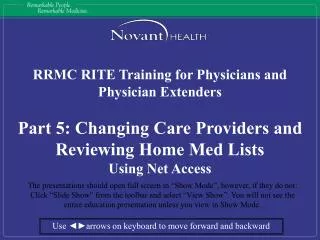
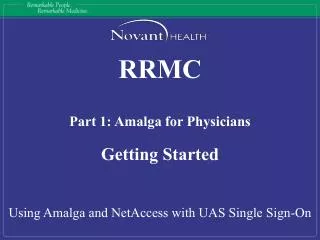
RRMC Part 1: Amalga for Physicians Getting Started Using Amalga and NetAccess with UAS Single Sign-On
Electronic Health Record Systems that provide patient information such as lab results, nursing documentation, transcription reports, radiology, orders, etc. Differences between the two systems: Amalga Prints the selected progress notes pre-populated with last labs since midnight, date/time, and patient information to support patient safety and save time Provides historical patient data from RRMC Star (Allergies, Radiology, etc.) Provides a view of patient information across Novant Facilities Can be used to view results during NetAccess downtime NetAccess Provides a view of Nursing Progress Notes The system in which care provider relationships are established (Attending MD, Consulting MD, etc) Can be used to view results during Amalga downtime Amalga and NetAccess
Provides the ability to log onto multiple applications (such as Amalga and NetAccess) with one entry of your User ID and Password Provides an easy “one-click” exit out of multiple applications Provides a bridge between Amalga and NetAccess. The bridge communicates the selected patient between the systems so that when a patient is selected in one system, the patient is automatically selected in the other system. This allows for quick switching between systems Will hold your last spot at the point of exit for 15 min and is not device specific. (Example: If you are viewing a patients lab results and exit out of UAS in a hurry. Then log into a different device within 15 min, UAS will take you back to your patient’s lab results) Will automatically lock your session after 5 minutes of inactivity to protect your sign on from being used by another person. This lock does not prevent others from signing in to the device using their own User ID and password UAS Single Sign On
Employee Services Click Tools and Services In order to log into and use the UAS Single Sign On bridge, it is extremely important to use Password Management before your first log in and each time you change your password. This will keep your passwords synchronized between applications Password Management can be accessed via the Intranet
kab039 Your Name should appear as the “User” in the UAS Launchpad Amalga and NetAccess buttons should appear in the UAS Launchpad Once you have synchronized your password using Password Management, Log into the workstation using your corporate User ID and Password
If you do not see the Launchpad on login, it may be set to autohide. Move your cursor to the top of the screen and it should appear. You can change the setting to not autohide by Right Clicking on the launchpad and unchecking the Autohide feature
Click the [Amalga] button on the Launchpad to log into Amalga
UAS Single Sign On will log you all the way through automatically The “My Patient” list automatically displays on login. If you are a physician extender and/or do not have patients with which you have an Attending or Consulting relationship, you may create a Group list to set as your default list on login
To create a Group list, click the button that displays your current list [My Patients]. This button opens up the View Manager
Select the “Inpatient Provider” view and click the [Clone View] button
You have the option to adjust the columns that appear in your view to your preference. The items that appear in this list from top to bottom represent the columns that appear in your view from left to right Or you can change the order in which they appear in your view by selecting the item which you want to move, then using the ▲and▼buttons Once you have your view as you would like, click the [OK] button Rename your view appropriately (example: “My Group”) You can remove certain selected columns
Now that you have cloned the template for your Group View, you will need to save the view so that it only displays patients that have an established relationship with your Group Click the [Cohorts] button
You can view or create lists by “Physician”, “Physician Group”, or “Nursing Unit” using [Cohorts] In this example, you want to click the “Physician Group” tab IMPORTANT: NICS group will be found under the “Physician” tab as “NICS Care, Team (Hospitalists)”
Click [Add >] and then [Apply] to display the selected group list Click in the box and type in the first few letters of your group name then select from the list
Click the View Manager button (the button that displays the name of your current view) Now that you are displaying your group’s patient list, you will need to save the changes to your newly created view so that when you select “My Group”, it will display this group list
Click the [Save] button to save your changes Extended Providers or those that do not have patients with an Attending or Consulting relationship will want to use the Group view list most often If this is the view that you will use most often, Make this the first list to display on log in by clicking the box to place a checkmark in the “Set as personal default view” Click the [Apply] button to display your new view with the saved changes
When you log into Amalga, the “My Patients” view will automatically display or the “My Group” view if you have changed that setting. To access any of your other non-default views, Click the ▼on the View Manager button to select from your list You can create as many views as you need. For example, if you cross-cover for a particular physician often, you can have your “My Patients” default view, your “My Group” view, the “Dr. ___” view, etc
To print your patient list for rounding: Click the ▼on the [System] button You can select “Print” or “Print Preview” The first time you select “Print”, the print preview screen will display to inform you that not all columns from your view will print If you do not want to see the Print Preview screen every time you select the “Print” option, place a checkmark in this box and you will only see this screen if you choose “Print Preview” Your Patient Rounding List will automatically print in Portrait orientation, however, you can change it to Landscape at anytime in the Print Preview screen
Click [Edit] to edit your selected view If you wish to always print the form in Landscape orientation, you can set Landscape as the default for this view in the View Manager settings Select the “Appearance” tab Change “Portrait” to “Landscape” and click [OK]
You can also change the sort order in which your patient list displays by using the [Sort] button -Or- By right clicking on a column header and selecting “Sort Ascending” or “Sort Descending” Your list will re-sort based on the criteria selected
For example: to create a view that displays patients with an Admit Complaint that contains the word “Sick”, choose the field name “Admit Complaint” You also have the ability, in Amalga, to create specialized lists using the [Filter] button Change “Equals” to “Contains text” Click [OK] to apply your filter(s) Click the [Add] button to add a filter criteria to a view Click the ▼to select from the available fields Type in your filter value
Your view will update to display all patients that fit your filter criteria If you find a need for a specialized view, you can call the Support Center and an Amalga team member will contact you to help create your view if possible
Use the [Shortcut] button for quick access to commonly used weblinks and resources
Protect yourself…ALWAYS remember to log out when you walk away! To log out, use the Red exit button on the UAS launchpad This is a ONE click log out and will log you out of all systems and UAS
You have back up access to both NetAccess and Amalga via the Intranet if for some reason the buttons on the launchpad fail. This route does NOT provide single sign on and it does not provide the patient link between NetAccess and Amalga. Intranet>Tools and Services>Patient Care Services>Amalga via Citrix Intranet>Tools and Services>Patient Care Services>NetAccess What if the NetAccess or Amalga buttons on the UAS launchpad fail?
See Part 2: Admission/Consultation(In-Patient Comprehensive Review) Includes changing Care Providers in NetAccess and Med Reconciliation See Part 3: Daily Rounding(In-Patient Focused Review) Includes printing a Progress Note with pre-populated lab results and patient label See Part 4: Individual Patient Look-up(Out-patient or Unlisted Inpatient) Includesreview of historical data from previous patient visits Now that you have completed Part 1 of your Amalga training, be sure to go through the Workflow Scenarios….


![‘ {]](https://tcdn.slideserve.com/1_1509981.jpg)