Download

1 / 17
200 likes | 396 Vues
ETD 1330 CAD Introduction to AutoCAD Features. Professor: Dr. Miguel Alonso Jr. Fall 2008. Outline. Syllabus Introduction AutoCAD Screen Command and Input Method Dialog boxes New Drawing Command Changing Units and Limits, Saving Printing Exiting. Introduction.

E N D
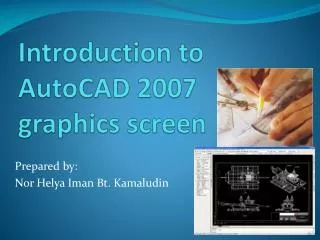
ETD 1330 CADIntroduction to AutoCAD Features Professor: Dr. Miguel Alonso Jr. Fall 2008
Outline • Syllabus • Introduction • AutoCAD Screen • Command and Input Method • Dialog boxes • New Drawing Command • Changing Units and Limits, • Saving • Printing • Exiting
Introduction • CAD (Computer Aided Design) • Develop designs and drawings and plot them on paper or film • 3D display
AutoCAD Toolbox • Drawings and models are constructed usign XYZ coordinates (Cartesian or rectangular coordinate system) • Angles measured in a counter clockwise direction • Text annotation and dimensions • Objects can be given colors, patterns, and textures • Tools to create isometrics, 3D and surface models
Applications of AutoCAD • Construct, layout, dimension, and annotate 2D drawings • Colors and layers convey information • 2D, 3D, or exploded assemblies • Wireframe, surface, rendered • Animation and virtual reality
AutoCAD Drawing Method • Learn the XYZ coordinate system • Plan your work and organize your thoughts • Learn and use classroom or office standards • Save your work often
Planning Checklist • Analyze the problem • Study all engineering sketches • Locate and list all available resources • Determine standards applicable to project • Sketch the problem • Decide on the number and kinds of views desired • Determine the final plotted scale of the drawing and of all views • Determine drawing sequence • List the AutoCAD commands to be used • Follow the standard and refer to the resources as you work • See Working procedures checklist
Exercise 1 • Using a piece of paper and a pen or pencil, make a sketch similar to Figure 1-4. Label the origin, +X axis, and +Y axis. Sketch a dot located at the intersection of three units in the +X axis and three units in the +Y axis.
Starting AutoCAD • Double Click Icon • Start->Programs->AutoCAD 2008->AutoCAD 2008
Standard Screen Layout • Figure 1-7 • Standard Screen Layout • Bordered by toolbars, command window at the bottom • Floating and docking • Workspaces • 2D Drafting & Annotation, and others… • Locking toolbars and windows • Window->Lock Location->
Pg 27 • Command Window • Menu Bar • Scroll Bars • Crosshairs • Coordinate System Icon • Toolbars • Standard Toolbar • Layers and Properties • Workspaces • Status Bar • Coordinate Display
Dialog Boxes • Insert->Block • Command Buttons • Text Box • Check Box • Radio Buttons • Tabs • List Box • Drop Downs • Preview Box • Scroll Bars and Buttons • Alerts • Help
Modeless Dialog Boxes • Some features are presented on screen in a special type of window called a modeless dialog box • Title Bar, AutoHide, Properties • Examples include: • The DesignCenter • Properties Window • Sheet Set Manager • Tool Palettes • QuickCalc calculator
Exercise 2 • Open the Properties window by pressing the [Ctrl]+[1] key combination. • Dock the Properties window to the right of the screen. • Open DesignCenter by pressing the [Ctrl]+[2] key combination. • Make the Properties window and DesignCenter floating. Move them around on the screen. • Use the [Ctrl] key to position the Properties window and DesignCenter to the left of the screen without docking them. • Close DesignCenter. • Set the Properties window to auto-hide.
Selecting AutoCAD Commands • Picking a toolbar button • Selecting a pull-down menu item • Shortcut menu item • Typing at the keyboard • Dynamic Input • Command window • Command Entry Shortcuts • RECTANGLE Example
Saving, Printing, and Misc. • File-> Save • File-> Save As • File-> Open • File-> Close • File-> Print
Using Help • Exercise: • Use help to find how to change units and limits • Use help to draw (via the menu, command, and toolbar) • 4 Lines • 5 Polygons • 3 Large Squares • 2 Rectangles • Enclose them all in a Revision Cloud • Set the color of each object to red, green, or blue • Save file as classwork1.dwg and Exit. • Get into groups of two and use these basic shapes, draw one of the following • House • Car • Your Cell phone • A Clock • Save this file as classwork2.dwg