Download
1 / 41
510 likes | 798 Vues
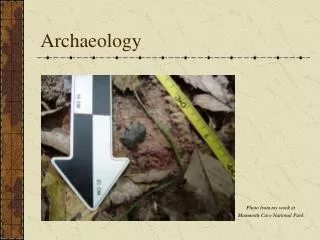
Archaeological Photography Workshop Field Archaeology ARCH1003. Archaeological Photography Objectives. Photo Documentation (Hester 1997) A comprehensive and technical record of an investigation from beginning to end

E N D
Archaeological Photography WorkshopField Archaeology ARCH1003
Archaeological Photography Objectives Photo Documentation (Hester 1997) A comprehensive and technical record of an investigation from beginning to end Excavation, process of recovering artefacts, sequences, units and profiles, survey finds. It is a historical record Ethical responsibility of archaeologist to visually record an irreversible process such as excavation or survey. Subsequent analysis or re-analysis of your work in future Photo Illustration (Hester 1997) To provide images for publication or presentation What are you trying to communicate to the public or in the journal? Why photograph and illustrate?
Lens Lens aperture Focusing ring Auto Advance Aperture or AV value Hot shoe Shutter speed or TV (Time Value) ISO setting Shutter release Frame counter Focal plane shutter Remote release socket Film Window Mirror Prism Single Lens Reflex (SLR) Camera Features
Light Light is focussed through a lens byrefraction (bending of light rays) to form an image behind the lens To produce a photograph we need: A light source An object such as a mirror to reflect the light A light sensitive medium to record the reflected light (film/digital sensor) Colour temperature (degrees Kelvin)
Aperture Value Aperture = f/stop = AV (Pentax camera) Size of the aperture opening in the lens A large number (F22) is a small aperture A small number (F2.8) is a large aperture To stop down is to reduce the aperture The f number derives from dividing the focal length (mm) of the lens by the diameter of the aperture
Time Value/Shutter Speed Time Value = shutter speed = TV (Pentax camera) Length of time the camera shutter opens to expose the film/sensor to the light coming through the lens 1/8 second or slow shutter speed (requires tripod to avoid camera shake) 1/4000 or fast shutter speed (captures water splashing)
Exposure Exposure is the total amount of light reaching the film calculated from a combination of aperture value (AV) and time value (TV) Reducing the AV value (or f-stop) from f16 to f22 necessitates doubling the exposure time or TV (time value) for the same exposure result 1/250 second at f22 will give the same exposure result as 1/125 second at f16 (TV reduced but aperture opened up)
Depth of Field Depth of field is the zone extending in front of and behind the focussed distance within which points will appear to be sharp The smaller the aperture (AV 22) increases the depth of field The larger the aperture (AV 5.6) decreases the depth of field Shorter focal length (wide-angle 28mm) increases depth of field Longer focal length (telephoto 300mm) decreases depth of field
Focal Length Light travels in parallel beams and reaches the lens The distance between the lens and the point at which such light is focussed is the focal length of the lens It is always expressed in millimetres An object the same distance away from a long focal lens will give a larger image than one of short focal length Standard focal length is 50mm for 35mm camera (negative is 35mm x 24mm)
Angle of View The angle of view for the human eye is around 45 degrees Angle of view is the amount of the scene in front of camera taken in by the lens. A fish eye lens (18mm focal length) will provide 180 degrees angle of view A telephoto lens (1200mm focal length) will provide 2 degrees Note: A longer focal length (300mm lens) will decrease the depth of field
Film speed ISO film speed is the films sensitivity to light rating The more sensitive the film, the higher the ISO number and the less light required ISO 6 is a slow, fine grained film and requires a tripod 800 or 1600 ISO is a fast film (newer films not so grainy, used with/without flash) TMax 3200 can be used with available light at night
Perspective The apparent distance in the relative sizes of near and far objects A function of the distance away of the camera Wide angle distortion 28 to 35mm may steepen the perspective of your trench or structure leading to convergence of lines and aberrations at edge of negative Standard focal length lens (50mm) or higher will give normal perspective Telephoto lens (above 50mm) may flatten perspective
Metering Current Single Lens Reflex (SLRs) cameras have built in metering Correct Exposure (Pentax) is when the green light is half-way and is changed by adjusting AV/TV values If positive = overexposed If negative = underexposed Note: internal meter reads whole scene not just object unless that fills the frame Incident, reflective, spot metering, grey cards
Camera Handling and Care Dirt, water, dust, sun can damage cameras and/or precious exposed film Use bag or waterproof case (e.g. Pelican) for rainy days Lens tissue for clearer picture. Check the lens! filters will help protect the lens Do not over tighten the tripod screw Batteries may leak if for a long time in the camera
Scale (range pole and/or centimetre scales) Additional cameras (black and white, slide and/or colour print, digital) Photographic proforma or notebook/register North arrow Tripod and remote cable release Flash/Supplementary Lighting Film! cards/laptop/burner Batteries Filters Special requirements for digital cameras Camera hood and waterproof case Reflectors Lens cleaning material Special lenses Field Equipment
Technical Photograph descriptive and realistic Control the light Use an appropriate scale A scale should be in the same plane as the object Viewpoint is critical. Fill the frame. Use macro lenses/function for small objects Film/CD media is low cost, while project time is not Exposure is critical Record on proforma/notebook (Never Later) Record meaningful information A changing landscape? Detail, Geology, construction materials, flora, Save images to digital archive at highest resolution possible and back up records General Principles of Archaeological Photography
Overall Site and Aerial Photographs The relationship between a site and surroundings is essential. Try to convey a sense of context or environment Try to take an elevated photograph if possible (wall, ladder, tree, elevating machinery, box Conventional aerial photographs - planes, Low-level aerial photographs - booms, balloons, and kites
IFRAO scale AURA, PO BOX 216, Caufield South VIC 3162auraweb@hotmail.com