Download
1 / 41
550 likes | 896 Vues
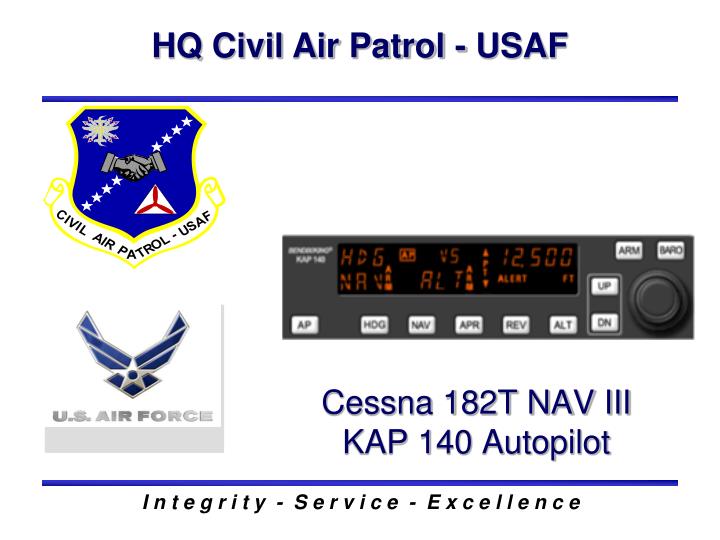
Cessna 182T NAV III KAP 140 Autopilot. Overview. Quick Tips Controls and Indications Limitations In-flight use Preflight After Takeoff / Climb Level off / Cruise Descent / Approach Missed Approach Effects of Equipment Failure Emergency procedures. Quick Tips.

E N D
Overview • Quick Tips • Controls and Indications • Limitations • In-flight use • Preflight • After Takeoff / Climb • Level off / Cruise • Descent / Approach • Missed Approach • Effects of Equipment Failure • Emergency procedures
Quick Tips • Only controls pitch and roll • Pilot must still control power and yaw • Two rows of information: • Top row displays current operational mode(s) • Bottom row displays armed mode(s) • Roll modes: • Wing leveler (ROL), Heading select (HDG), NAV1 coupling (NAV), Approach coupling (APR), Localizer back course (REV) • Pitch modes: • Vertical speed (VS), Altitude hold (ALT), Glideslope (GS) • AP Button – Autopilot engage/disengage • Altitude select – set using rotary knobs • Baro – set using rotary knobs
Controls and Indications BENDIX/KING KAP 144 ARM BARO 500 VS AP ROL P T ALERT FT UP P R DN AP ALT REV HDG APR NAV • Autopilot engage disengage button • Must be pressed and held • Turns AP on; initializes in ROL and VS modes • Turns AP off
Controls and Indications BENDIX/KING KAP 144 ARM BARO 500 VS AP HDG P T ALERT FT UP P R DN AP ALT REV HDG APR NAV • Heading mode selector button • Selects heading mode • Turns airplane to maintain current bugged heading • Used to switch between ROL and HDG mode
Controls and Indications BENDIX/KING KAP 144 ARM BARO 500 VS AP NAV P T ALERT FT UP P R DN AP ALT REV HDG APR NAV • Navigation mode selector button • Automatic capture of and tracking of VOR, LOC, or GPS signals set on HSI • Recommended for enroute navigation
Controls and Indications BENDIX/KING KAP 144 ARM BARO 500 VS AP APR P T ALERT FT UP P R DN AP ALT REV HDG APR NAV • Approach mode selector button • Automatic capture of and tracking of VOR, GPS, LOC and ILS glideslope • Recommended for instrument approaches
Controls and Indications BENDIX/KING KAP 144 ARM BARO 500 ALT AP REV P T ALERT FT UP P R DN AP ALT REV HDG APR NAV • Back course approach mode selector button • Automatic capture of backcourse LOC (GS locked out) • Response to LOC is reversed (set the front course) • Only active when LOC freq is loaded
Controls and Indications BENDIX/KING KAP 144 ARM BARO 500 VS AP HDG P T ALERT FT UP P R DN AP ALT REV HDG APR NAV • Altitude hold mode selector button • Toggles the AP between captured/current altitude and VS modes
Controls and Indications BENDIX/KING KAP 144 ARM BARO 500 VS AP HDG P T ALERT FT UP P R DN AP ALT REV HDG APR NAV • Vertical speed mode buttons – actions depend on active mode • While in VS hold, displays commanded VS for 3” • While VS mode is active momentary cycle will change commanded VS by 100 fpm; continuous select will change commanded VS by 300 fpm per second
Controls and Indications BENDIX/KING KAP 144 ARM BARO 3,500 ALT AP HDG P T ALERT FT UP P R DN AP ALT REV HDG APR NAV • Vertical speed mode buttons – actions depend on active mode • When established at a captured altitude, a momentary select will adjust the altitude in 20 ft increments (display will not change); continuous select will command 500 fpm change and capture current altitude upon release
Controls and Indications BENDIX/KING KAP 144 ARM BARO 500 VS AP HDG P T ALERT FT ALT UP ARM P R DN AP ALT REV HDG APR NAV • Altitude Arm button • Turns altitude arm on (ALT ARM annunciated) and off • When armed AP will capture altitude displayed in alerter, if the current VS will direct an intercept. • Upon capturing altitude, the AP is armed for a new altitude
Controls and Indications BENDIX/KING KAP 144 ARM BARO 29.94 ALT AP HDG P T ALERT FT UP P R DN AP ALT REV HDG APR NAV • Barometric pressure button • Momentary push changes altitude alerter display to barometric setting for 3”; 2” push toggles HG/HPA. • Large and small knobs are then used to set the desired current barometric pressure
Controls and Indications BENDIX/KING KAP 144 ARM BARO 500 ALT AP HDG P T ALERT FT UP P R DN AP ALT REV HDG APR NAV • Rotary Knobs • Used to set the altitude alerter • After pressing BARO button, knobs are used to set current barometric pressure
Controls and Indications BENDIX/KING KAP 144 ARM BARO 3,500 ALT AP HDG P T ALERT FT UP P R DN AP ALT REV HDG APR NAV • Altitude Alerter/vertical speed/BARO setting display • Displays altitude for altitude alerter. This is the ARMed altitude, chime sounds when 1000ft and 200ft from altitude • Shows captured or set VS after pressing UP/DN key • Shows BARO setting after pressing BARO
Controls and Indications BENDIX/KING KAP 144 ARM BARO 500 ALT AP HDG P T ALERT FT UP P R DN AP ALT REV HDG APR NAV • Pitch Trim annunciator • Indicates direction of trim • Flashes if trim is not satisfied in 10 seconds • Solid PT without an arrow is an indication of a fault
Controls and Indications BENDIX/KING KAP 144 ARM BARO 500 ALT AP HDG P T ALERT FT UP P R DN AP ALT REV HDG APR NAV • Autopilot engagement annunciator • On whenever AP is on • Flashes during pilot initiated or automatic disconnect
Controls and Indications BENDIX/KING KAP 144 ARM BARO 500 ALT AP HDG P T ALERT FT UP P R DN AP ALT REV HDG APR NAV • Pitch (P) and Roll (R) axis annunciator • Indicates failure of illuminated axis • In turbulent air P may illuminate during abnormal accelerations
Controls and Indications Top row: Shows what is active Bottom row: Shows what is armed
Limitations • Approved for Cat 1 operation only • Airspeed 160 KIAS max, 80 KIAS min • Maximum flaps 10 degrees • Maximum lateral fuel imbalance is 90 lbs • Must be disengaged below 200 ft AGL on approach, and below 800 ft for other phases of flight • Manually overriding AP pitch/roll is prohibited • Operation of AP is prohibited if audio panel is inop • AP must be off for T.O. and landing • AP preflight required before use of electric trim • Pilot must be strapped in left seat before AP use • De-energize AP if “PITCH TRIM” warning light illuminates
Preflight • Master and Avionics Switch BUS 2 –On • Self test good if: all elements, PT and tone come on • If Red P stays on- indicates failure • Manual Electric Trim (MET) test • LH trim switch - DN, off, then UP (no trim wheel movement) • RH trim switch - DN, off, then UP (red PT light on but no trim wheel movement) • Both LH and RH switch – DN and hold (Trim wheel turns) • Push and hold A/P DISC/TRIM INT Switch (wheel stops) • Release A/P DISC/TRIM INT Switch (Trim wheel turns) • Repeat 3-5 in switches in UP
Preflight continued • BARO Setting flashing – Set current local barometer • Autopilot - Engage • Flight Controls – Move (Ensure autopilot can be overpowered • A/P DISC/TRIM Switch – Push (Autopilot disengages warning tone heard) • Elevator Trim- Set for take off • Before Takeoff Check • A/P DISC/TRIM Switch – Push • BARO –Set • ALTITUDE Select – Set • If autopilot test fails the airplane may be flown if the Autopilot Circuit Breaker is opened
After Takeoff Climb • Trim aircraft and set stable airspeed and climb • After 800 ft AGL and wings level, turn on AP by pressing AP button • AP will will be in ROL and VS mode and displayed on face plate • Momentarily press UP/DN key to display captured VS rate • AP will capture the rate at the time the AP is turned on • A high climb rate could lead to a stall • Adjust the VS rate as required by pressing UP or DN as required • Use knobs to select level off altitude in Altitude Alerter and PFD (should be set before TO) • Arm Altitude Alerter by pressing “ARM” • Turn PFD HSI heading bug to desired intercept heading (may be set before TO) • Press HDG button to turn to desired heading • Press PFD CDI soft key as required to select desired nav mode • Press NAV key to arm AP to capture and fly the desired course
Indications During After Takeoff Climb BENDIX/KING KAP 144 ARM BARO 3,500 VS AP ROL P T ALERT FT UP P R DN AP ALT REV HDG APR NAV VS (vertical speed) Captures rate of climb when AP was turned on Press AP button to turn on autopilot ROL (roll mode) or wing level mode Altitude set in Altitude Alerter (Level off altitude)
Indications During After Takeoff Climb Momentarily press UP or DN button BENDIX/KING KAP 144 ARM BARO 500 VS AP ROL P T ALERT FT UP P R DN AP ALT REV HDG APR NAV Momentarily displays the captured rate of climb/descent
Indications During After Takeoff Climb Press ARM to arm the AP to level off at the preset “Altitude Alerter” (level off) altitude BENDIX/KING KAP 144 ARM BARO 3,500 VS AP ROL P T ALERT FT ALT UP ARM P R DN AP ALT REV HDG APR NAV ALT ARM will be displayed to show the AP is armed to capture the preset altitude Altitude Alerter (level-off) altitude
Indications During After Takeoff Climb Press HDG to make the AP turn to the heading under the heading bug on the HSI BENDIX/KING KAP 144 ARM BARO 3,500 VS AP HDG P T ALERT FT ALT UP ARM P R DN AP ALT REV HDG APR NAV Display will switch from ROL to HDG and aircraft will turn to selected heading
Indications During After Takeoff Climb BENDIX/KING KAP 144 ARM BARO 3,500 VS AP HDG P T ALERT FT ALT UP NAV ARM ARM P R DN AP ALT REV HDG APR NAV NAV ARM will be displayed showing that the AP is armed to capture and intercept the course selected on the HSI Press NAV button to arm NAV capture
Indications During After Takeoff Climb Indicator will change from HDG to NAV when the HSI course is captured BENDIX/KING KAP 144 ARM BARO 3,500 VS AP NAV P T ALERT FT ALT UP ARM P R DN AP ALT REV HDG APR NAV NAV ARM will disappear when the course is captured
Indications During After Takeoff Climb Desired level off altitude BENDIX/KING KAP 144 ARM BARO 3,500 ALT AP NAV P T ALERT FT UP P R DN AP ALT REV HDG APR NAV VS changes to ALT to show the preset altitude has been captured ALT ARM is extinguished when the preset altitude is captured
Level off / Cruise • After level off, reset altitude select/altitude alerter and PFD altitude to the next desired altitude (normally the first altitude required on approach) • ARM does not have to be reselected • If an enroute climb or descent is required, select VS mode by pressing ALT key (Toggles the AP from current altitude capture to VS mode). • Use UP/DN key as needed to select the desired rate of climb . • During a climb in the VS mode, the current altitude can be captured by pressing the ALT key regardless of what is set in the altitude select/alerter
Indications after Level Off Set the next desired altitude (normally IAF altitude) BENDIX/KING KAP 144 ARM BARO 3,000 ALT AP NAV P T ALERT FT ALT UP ARM P R DN AP ALT REV HDG APR NAV ALT ARM will be displayed showing the AP is armed to capture the next altitude Note: ARM is not pressed ALT is still displayed showing that the previous altitude is still captured
Indications During Descent Rate of descent momentarily displayed BENDIX/KING KAP 144 ARM BARO -300 VS AP HDG P T ALERT FT ALT UP APR ARM ARM P R DN AP ALT REV HDG APR NAV Press DN key to select desired rate of descent Press ALT to toggle to VS mode VS displayed
Approach • Select approach mode with APR key; aids accurate course capture • When the G1000 is switched from GPS navigation to NAV 1, the AP will revert to ROL mode. (Flashing NAV or APP) Re-select APP with appropriate nav mode selected. • Non-precision approach • Set MDA in Altitude Alerter and PFD • At FAF, select VS mode by pressing ALT key • Select descent rate with DN key • After leveling at Altitude Alerter altitude, MDA can be fine tuned with UP/DN key (20 ft change with each momentary press) • ILS approach • Set DH in PFD, Pre-set missed approach alt in Altitude Alerter • Autopilot will capture and follow the ILS glide slope • Disengage AP at DH
Indications During Approach Press BARO to reset barometric pressure setting BENDIX/KING KAP 144 ARM BARO 29.95 ALT AP HDG P T ALERT FT ALT UP APR ARM ARM P R DN AP ALT REV HDG APR NAV Attitude display switches to display the current altimeter setting Use knob to select the desired altimeter setting
Indications During Approach HDG is used to fly holding or the “Barb” (course reversal) on a procedure turn Press APR to arm the APR mode BENDIX/KING KAP 144 ARM BARO 3000 VS AP HDG P T ALERT FT ALT UP APR ARM ARM P R DN AP ALT REV HDG APR NAV APR ARM will be displayed to show the AP is armed to intercept the final approach course (AP will fly tighter tolerances in APR mode)
Indications During Approach BENDIX/KING KAP 144 ARM BARO 3,000 VS AP NAV P T ALERT FT ALT UP ARM P R DN AP ALT REV HDG APR NAV The autopilot will revert to ROL mode if the navigation source is switched (manually or automatically) from GPS to NAV1 or NAV 2 to GPS. HDG or APR mode as desired will have to be re-selected and/or armed. Note: The NAV or APR indicator will flash
Indications During ILS Approach BENDIX/KING KAP 144 ARM BARO 3,000 ALT AP APR P T ALERT FT GS UP ARM P R DN AP ALT REV HDG APR NAV The glide slope will arm as soon as the LOC final approach is captured and a valid ILS glide slope is received. At glide slope intercept, GS ARM goes out and GS replaces ALT or VS on the top line. Note: Hold 100 KIAS minimum (recommended)
Missed Approach • G1000 suspends automatic sequencing of waypoints at the missed approach, SUSP soft key is displayed • Disconnect the AP to execute a missed approach • Press CDI soft key on PFD if required to select desired navigation source • G1000 Nav source will normally have to be changed back to GPS to fly missed approach procedure • Press SUSP soft key on PFD to start sequencing of missed approach procedure • Ensure altitude restrictions of the published missed approach are followed before sequencing the missed approach procedure in NAV • Do not engage AP below 800ft AGL • Set missed approach altitude into Altitude Alerter and PFD • Missed Approach altitude should already be set in Altitude Alerter during an ILS approach • After start of missed approach follow the same procedures as climb out
Effects of Equipment Failure • Failure of Attitude Indicator – No effect • Failure of AHRS – ROL mode only • Failure of DC turn coordinator - Autopilot disengages • Failure of HSI – No heading signal so ROL mode only • Failure of Transponder pressure encoder - Altitude alerter/preset fails • Failure of No.2 GIA 63 (integrated avionics unit) – ROL mode only • Failure of GMA 1347 Audio Panel – No tone when AP disengages (do not use in this case)
Emergency Procedures • Airplane Control Wheel – GRASP FIRMLY and regain control of aircraft • A/P DISC/TRIM INT switch – PUSH and HOLD throughout recovery • Aircraft – TRIM manually as required • AUTO PILOT circuit breaker – OPEN (pull out) WARNING Following an autopilot, autotrim or manual electric trim system malfunction, do not engage the autopilot until the cause of the malfunction has been corrected.