Download
1 / 31
310 likes | 420 Vues
Agenda. Overview of Use and Purpose Overview of Security Login Instructions Walk-through of Application Functionality Wrap-Up and Q&A. Use and Purpose. What is Online Grading?

E N D
Agenda • Overview of Use and Purpose • Overview of Security • Login Instructions • Walk-through of Application Functionality • Wrap-Up and Q&A
Use and Purpose • What is Online Grading? • It is a web application that facilitates the collection of final grades, class and student specific comments, and the electronic submission of those grades to the Registrar’s Office. • Standardizes the process of grade submission, and reduces inefficiencies and costs by automating and streamlining a pervious manual paper process. • Who uses Online Grading? • Beginning with the 2009-2010 academic year, all M1 and M2 courses will be required to use Online Grading as the medium for submitting final grades to the Registrar’s Office.
Security Overview • Requirements: • User must have a valid MCWCORP network account • User must have a valid OASIS account • User must use a Windows PC with Internet Explorer 7.0 on the MCW IS Collaborative network. • If above is not possible, user can alternatively use Citrix • Roles and permissions are used to control access to add/view/edit courses • Course Coordinator: can add courses, edit courses’ & students’ data • Course Director: same as above, plus edit submission permission • Submission Permission: can submit final grades to the Registrar’s Office • Automatic logout after 10 minutes of inactivity
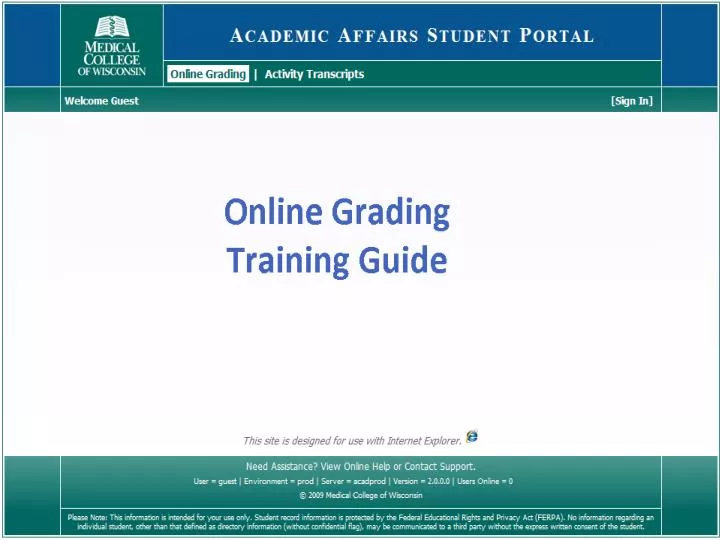
Login Instructions • Open Internet Explorer 7.0 and go to the URL: • Test Environment http://starstest.acad.mcw.edu/StudentGradesPortal/ • Click [Sign In] link • Login should be transparent, but in case you get a prompt, enter “MCWCORP\username” and your network password. • Course List page will load if successful, otherwise an error page will be displayed.
Course List Page • Displays courses which you have access to and have been set up in Online Grading • Created by Educational Services using Test Scoring • Created by you using Online Grading • Ability to manually add course • Click button to view list of courses which can be added to Online Grading. • Refer to Cheat Sheet for further guidance • Ability to sort and filter list • View course by clicking on its name
Course Details Page • Page broken into sections, aka boxes • Click for help related to that specific box • Locks and edit restrictions • Only one user can edit a course at a time • If a course is locked, others can still open a read-only view and print reports • Courses are locked upon loading the details page, and unlocked when navigating away from that page. • Contact Academic Affairs Support to clean up errant locks • Lock information displayed in Page Actions box
Left Column Boxes • Course Details • Course Access • Displays who can view the course • Displays which users have the submission permission • Delegate the submission permission by clicking the icon (Course Directors) • Course Comments • Allows for a standard comment to be added to every student’s comment on their grade sheet • Spell check by clicking on the icon, make bigger by clicking icon. • Grade Distribution • Grade Scale • Displays the course grade scale, if configured • Edit grade scale by clicking on the icon (Online Grading created courses only) • Choose scale type and enter cut points in the four editable boxes
Pending Changes Box • Pending Changes box tracks unsaved changes • Click Save icon to save changes permanently • Click Cancel icon to discard changes and reset the page • A confirmation prompt is displayed before discarding changes • Save & Cancel icons are disabled until a change has been made, at which point they are enabled • A confirmation prompt is displayed if you navigate away from page with pending changes
Student Roster Box • Displays the course roster, sorted by last name • Roster can be sorted by clicking the desired column header • Roster can be filtered by selecting desired radio button from the list • View student specific details by clicking on the desired student’s row in the list • Select one or more students for a batch process by checking the checkbox next to their name • A lock icon is displayed next to students who have had their grade submitted to the Registrar’s Office
Student Details Box • Displays information for the currently selected student from the roster • Displays picture, if available • Displays percent and standard score • If value is empty, it is editable for Test Scoring created courses. • Values are always editable for Online Grading created courses. • Displays Calculated Grade • Value derived from Educational Services’ calculations for Test Scoring created courses. • Value derived from import file for Online Grading created courses. • Adjusted Grade drop down allows tracking grade adjustments • Example uses for this field are student contested grade, student deserves higher grade, or calculated grade is missing (empty) • Note: you can only adjust grade upward.
Student Details Box • Displays information for the currently selected student from the roster • Student Comments text area • Comments are required for any student with a LP, F, I or adjusted grade • Spell check by clicking on the icon, make bigger by clicking icon. • Details about who submitted the final are displayed, if applicable • Email Icon • Opens Outlook with the student’s email populated in the to address
Missing Information Box • Missing Information box displays list of students who need further details entered before their grade can be submitted to the Registrar’s Office • Grades are required for all medical students • Comments required for students with a LP, F, I or adjusted grade • List is dynamically updated after every change to a student grade or comment • An error dialog is displayed if you try to submit a grade for a student with missing information.
Page Actions Box • Displays a list of actions that can be taken on the course • Save pending changes • Discard pending changes • Import course data • Submit final grades • Manage default comments • Manage course sections • Print reports
Import Course Data • Refer to Cheat Sheet
Default Course Comments • Default Course Comments provide a way to add a standard comment to every student who has a particular grade. • You can specify a different comment for each grade level • Possible uses: • You use a default comment for each grade level • You mostly use a default comment for each grade level—use default comments as a starting point. • Things to Remember: • Each grade level has its own comment • You must apply the default comment to the grade level in order for it to appear in the students’ comment. • If a student has an existing comment, you will be prompted to skip, overwrite or append the default comment. • When you apply the default comment, it is added to the student’s individual comment field. If you later change the default comment, the associated students’ comments will not reflect the change—you will need to re-apply and either overwrite or append the updated comment.
Group Instructors • Only applicable to courses which have sections configured by Educational Services. • Section information displayed under Student Details box for each student • Click the Group Instructors icon to edit the name of the section or the name of the section’s instructor.
Submit Final Grades • Select one or more students to submit grades • Submit all at once or in batches • Recommended to submit Academic Standing grades first and separately • Click the Submit icon • Enter your network password • Lock icon appears next to students who have had their grade submitted • Things to Remember: • You need to have the submission permission in order to click the submit button. • You can only submit grades for students who are not missing any information. • You can not resubmit grades at this time in Online Grading. You will still use paper grade sheets for the revised/remediated grade process. • Once a student’s grade has been submitted, you can no longer edit any of their data (comment, scores, etc.) • Once all student grades have been submitted, you can no longer edit any of the course and student data. • For grades submitted on behalf of a Course Director, the electronic signature will appear as “Course Directors’ Name / Initials of Delegate” on the grade sheets.
Reports • Click the Reports icon • Ability to generate: • Class Distribution Report • For all students in course • Grade Sheet Report • For only the selected students • Can create reports at any time, regardless of edit locks or status of grade submission. • Hard-copy grade sheets are no longer required to be sent to the Registrar’s Office. You must now submit grades electronically for all students.
Wrap-Up and Q&A • Practice: • Loading a course • Editing student grades & comments • Importing grade, scores, and/or comments • Submitting final grades • Printing reports • If you have a question, do not hesitate to ask! • If you have feedback or suggestions for improving the application, please let us know.