Download
1 / 17
170 likes | 300 Vues
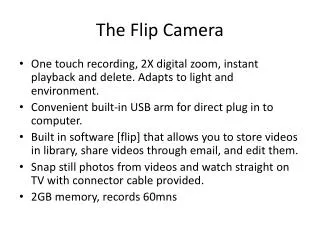
Saving FLIP Video Files and Using Apple Compressor to Transcode to ProRes for use in Final Cut Pro. Attach FLIP camera to USB port Create a new folder on your external hard drive (or Save Space, if necessary) titled NAME_FLIP_ORIGINAL_FILES

E N D
Saving FLIP Video FilesandUsing Apple Compressorto Transcode to ProResfor use in Final Cut Pro
Attach FLIP camera to USB port • Create a new folder on your external hard drive (or Save Space, if necessary) titled NAME_FLIP_ORIGINAL_FILES • Create another new folder on your external hard drive named NAME_PRO_RES_FILES • Create another new folder on your external hard drive named NAME_CAPTURE_SCRATCH • Create another new folder on your external hard drive named NAME_FINAL_CUT_PROJECT FILES • IMPORTANT!!! Do not embed those folders within one another. They should be separate folders. • Open the course website and go to the Useful Links page. There, download the Compressor Droplet for ProRes – save this to the desktop • Open Compressor (if it is not on the dock, locate it in the Applications Folder)
While in Compressor, go to the Job menu and select, New Job With File. Navigate to the folder containing your Flip footage. Highlight all video files, and select open.
Your video files will be dropped in the box in the upper left hand corner. Next, you will drag the Droplet into the box, to apply the necessary settings for conversion.
Navigate to the desktop where the Droplet is stored. Drag the droplet on top of the blue area in the box in the upper left hand corner, where your video files reside.
The Apple Pro Res settings are now applied. Now, go to the Target menu and select Destination –> Other. Navigate to your external hard drive (or Save Space if necessary) and create a New Folder titled NAME_PRO_RES_FILES, then select – Open.
Ensure that all of your video files are selected (click on one video file in the box, then Select-All or Command-A). You will see a notation indicating - “Multiple Items Selected”. Go ahead and hit Submit. Your files will now begin the transcoding process and will be saved to the destination folder. This can take anywhere from 10 minutes to upwards of an hour, depending on processing speed and length of media clips.
You may now Quit the Compressor program (you can quit without saving). • You are now ready to open Final Cut Pro and begin working with the ProRes files • Open Final Cut Pro
Navigate to the Final Cut Pro menu and select “System Settings”
Under the tab “Scratch Disks” – click the “Set” button and navigate to your external hard drive (or Save Space if necessary) folder titled NAME_SCRATCH_DISK. Set the Waveform, Thumbnail and Autosave in this manner as well (set them as “Scratch Disk). ***IMPORTANT*** This must be the FIRST thing you do each and every time you open Final Cut.
Go to the File menu and select, Import-> Files. Navigate to the PRO_RES folder on your hard drive and select all of the video files. Then, hit “Choose”.
Your files are now in your Final Cut project file, ready to work with. At this point, you should save your Project file using the File, Save Project As function. You will want to save the project file to the folder titled NAME_FINAL_CUT_PROJECT_FILES on your drive. ***IMPORTANT*** Be sure to you “Save Project AS” so that you can define where the project file is saved. Otherwise, Final Cut will save to the iMAC, where it will be deleted when shut down.
You can now begin working with your video clips. If you double click on any clip in the browser, it will show up in the viewer. Once in the viewer, you can define in/out points for the portion of the clip you’d like to bring into the timeline. Useful keyboard shortcuts are -> Spacebar (stops a clip from playing), J (plays a clip in reverse), L (plays a clip forward). Also, I (sets input point) and O (set output point).
Note the markers in the viewer indicating in/out points. Once these are defined, you can drop a clip into the timeline and begin to build your sequence.
The easiest way to make an initial edit is to click the Yellow button in the Canvas (see blue arrow above). This is an insert edit. Once you click that button and prepare to bring your first clip into the timeline, you will get a prompt as illustrated above indicating that “the clip does not match the sequence’s settings, etc.”. Click “Yes” to change the sequence settings to match the clip settings.
You now have your first clip in the timeline, and can continue editing. (Note the color of the bar on top of the timeline – if this bar is red, something was done incorrectly at some point in the process as the red line indicates that the clip needs rendering. Most likely, the transcode in Compressor was at issue.)
Continue editing!Refer to the Final Cut Tutorials for more information.