Download
1 / 32
350 likes | 791 Vues
Shaun Perry Grey Highlands Secondary. Introduction to Digital Photography. Overview. Digital Photography Basics The Art of Photography Hands-On. Digital Photography Basics. Digital vs. Film. When Size Does Matter.

E N D
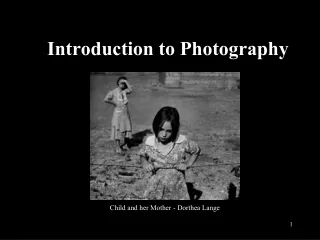
Shaun PerryGrey Highlands Secondary Introductionto Digital Photography
Overview • Digital Photography Basics • The Art of Photography • Hands-On
Digital Photography Basics • Digital vs. Film
When Size Does Matter • Most of the current small 5MP digital cameras use 1/1.8" sensors which are about 7mm x 5mm • The bottom line is that, for a given pixel count, the larger the sensor (and hence the larger the area of the individual pixels) the better the image quality and the lower the noise level
What are Pixels? • Pixel= picture (pix) element (els) • Megapixel= a million pixels • A pixel is essentially “a dot” • Generally the more “dots” the better the quality • Akin to “dpi”(dots per inch) which is a term used in printing
Megapixels and You • Never buy a camera with less than 5Mp • 5MP=2000x2500 pixels=8x10 prints • However, megapixels alone do not insure a good quality photo • Lenses, ISO sensitivity, flash, upgradability, battery endurance all play major roles
What is Resolution? • Resolution=quality of image • Degree of sharpness of an image displayed • The higher the resolution, the higher the number of pixels • The higher the resolution the larger the image file
Formats: JPG, RAW, TIFF • Forms of compression (using mathematical equations) • Jpg uses tricks in human colour perception to “squash” like colours together (95% of photos taken/stored are JPGs) • TIFFs offer better image quality • The higher the compression=smaller file=lower quality of image • RAW is uncompressed image data (huge files…popular with DSLR users)
ISO • ISO=sensitivity to light (most film based cameras use ISO 400 film). Basic rule, the lower the ISO the better the colour reproduction/detail, the higher the ISO the more responsive to light
Aperture • Aperture= The aperture of a lens is the diameter of the lens opening and is usually controlled by an iris • The larger the diameter of the aperture, the more light reaches the film / image sensor (measured in F-stops) • The larger the aperture=more light allowed in • Aperture works hand in hand with shutter speed (a good digital camera allows you a large range of F stops (F 1.8 to F16 would be ideal) • Changing the aperture also allows you to change your depth of field
The Art of Photography • Light, light, and more light • Focus means everything (the better the photo you bring back to be “edited” the better your result will be) • Rule of Thirds/Leading Lines/Fill the Frame/Point of View are all good techniques to follow
Focus and Light • A camera’s ISO rating is a good indicator of it’s sensitivity to light • The higher the ISO (some digital cameras will allow a setting of 3200) means more sensitivity • Cavet, as sensitivity to light goes up so does “artifacting” and noise
Focus and Light • Light is the most important element in taking “good” pictures • Understanding the role of light and shadows and how cameras focus will make for better pics • The internal flashes in most digital cameras will not work with subjects beyond 8 feet (they also tend to wash out most subjects that are too close)
Rule of Thirds • In your mind, divide the frame into thirds, both horizontally and vertically (think tic-tac-toe) • Most important part of your pic (center of interest) at one of the four places the lines cross • Action should appear to be moving to the center • Horizon lines should be on the horizontal dividing lines
Leading Lines • Can be almost anything (road, path, sidewalk, fence, river, hedge, etc) • You won’t find them in every photo opportunity, but if they are there, take advantage of them • Shadows may hamper the time of day @ which these type of photos can be taken • Start your leading line in the corner of your picture
Fill the Frame • Always move in close enough that your subject fills the viewfinder (remember on most digital cameras you only see 85-95% of the actual image in the viewfinder) • If you are showing people doing something, be sure that you are close enough to see what they are doing
Point of View • There is no law that says all pictures have to be taken from eye level. • Different angles change the story of the picture, and can produce some spectacular results • You can avoid cluttered or ugly backgrounds by looking up at people (with trees or blue sky as your background) • Pictures of small children or pets are alwa
Camera Controls • Feel free to experiment and get off the “auto” settings :-)
What the Different Settings Mean • Most digital cameras have predefined shooting modes (which auto set ISO/Aperture and Shutter Speed for different shooting situations) Often a camera icon (or a green box, or the word “auto”). Most popular usually “fail safe” setting. Produces less spectacular pictures. Portrait setting for close to medium distances. Can produce spectacular shots where the depth of field is shallow, thus having the person in focus and the background blurry.
What the Different Settings mean Night Portrait Mode is useful for low light situations where the subject is close to the camera. Macro Mode is useful when taking pictures that are very close to the camera. It is best to use a tripod with this setting. Landscape Mode is often used for long distances. Only use this setting when there is plenty of natural light. The Action Setting optimizes the ISO, Aperture and Shutter speed to “freeze action”. The detail is not very high in this setting. Tripod is recommended.
The Settings You Should Be Using Aperture Priority In this mode you as the photographer sets the aperture that you wish to use and the camera makes a decision about what shutter speed is appropriate in the conditions that you’re shooting in. Shutter Priority (time value) In this mode you as the photographer choose the shutter speed that you wish to shoot at and let the camera make a decision about what aperture to select to give a well exposed shot. Manual In this mode you control both the aperture and the shutter speed. This gives you the most control, but should be reserved for advanced photographers.
Hands-On/Questions • Questions? • Digital Scavenger Hunt (in groups) • Prizes? Did some one say prizes?
Thank-You shaun_perry@bwdsb.on.ca