Download
1 / 9
90 likes | 758 Vues
How to make the twisted box kite. By The Aerodynamaster . Kite-specific materials. This kite has some different materials that most do not have, but they are cheap and probably also in your home. hot glue (sorry, but normal glue types do not dry fast enough for certain parts of this)

E N D
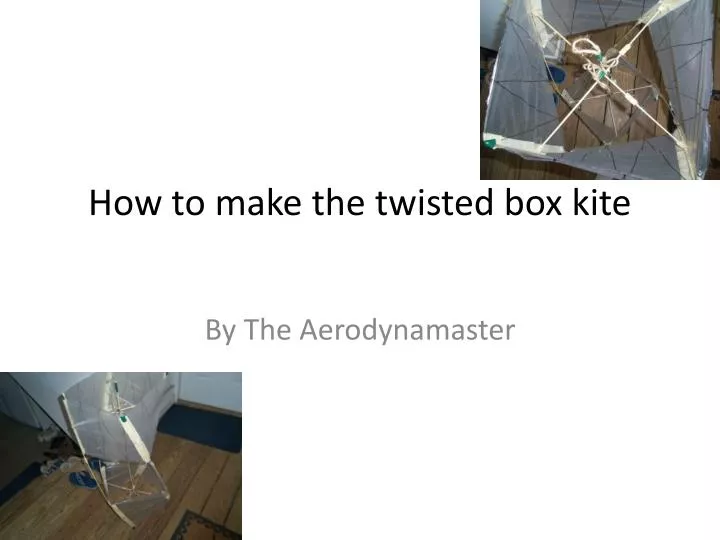
How to make the twisted box kite By The Aerodynamaster
Kite-specific materials This kite has some different materials that most do not have, but they are cheap and probably also in your home. • hot glue (sorry, but normal glue types do not dry fast enough for certain parts of this) • 2 fishing swivels, preferably the largest you can find. • Twine. Pretty important. Note: You can get very large kite- specific swivels from kite stores- but I didn’t bother.
Spars Eventually, four of the five long spars will be curved. However, don’t worry about that now. That actually comes in naturally. Also, whenever I say to use a skewer, I mean a 12” skewer with the sharp tip cut off to make 11 ½”. Now, glue together: • 5 spars, made of three skewers each. Cut one down to 33”. Four of these will be called the long spars, the short one will be called the central spar. • Four spars. Cut two skewers (in half)to the size of 5 ¾”, and attach them to the end of a full skewer. Now, on the ends place two small pieces of skewer that protrude just more than the width of one skewer. See the diagram on the next slide. These will be called the cross spars.
Spars diagrams and pictures Note: when joining your spars, put two short re-enforcers around the joint, pointed out by arrows. Long spar before glued Cross spar before glued. Completed cross spar. Don’t worry about the middle now. End of a cross spar.
Sail diagram and advice 12” Make eight units like this from thin plastic. Don’t scale this kite up nor down. This kite was designed specifically the way it was for a reason. 10” 2 5/8” You can measure out only one unit and use the same one to outline all of them. Using new ones can distort the dimensions.
Attachment to sails After these steps, put electrical tape on the spar ends like in the photo. Each end of a box kite is called a cell. Grab the four long spars. Attach one unit of sail, on one of the sides that appear slanted on the last slide, using wide, strong scotch tape. Put just less than half the width of the scotch tape on the sail unit’s edge, put the middle of the scotch tape on the spar, and attach another unit the same way on the other side. Your result should match the diagram. Do this until the rest of the spars and units are used, and put each end to another. Do the last steps to the other end of the box. Make sure the slant on each parallelogram is the same. What I was trying to say, is that the diagram on the right side is a flat version of one of the sides. Now place the cross spars in the middle of the box (the guide for how to do this is at the end, just skip ahead then back). Notice how the spars bend.
Completing the removable spars Before taking the cross spars out, mark where they cross on every spar. Remove them from the kite, and cut four pieces of twine about a foot long each. Just guess to save time. Put the twine next to the spar. Cut a piece of electrical tape 3-4 inches long. Wrap the electrical tape around both the twine and the spar. Look at the picture in the top left corner to see what I mean. Do this to all four cross spars. You know that spar I told you to make a the beginning of these instructions? The 33” long one? Well, here is what you need to do to it. You need to, inside of the fully set up kite, mark the central spar just below where the cross spars cross in the top cell. We won’t get to the reason for that just yet. Cut a piece of twine about four inches long. Hot glue about one inch of each end on to the tip of the central spar, on the end that is closest to the mark you made. Now, cover that area with electrical tape. Take a short length of flying line. Tie a cow hitch to the twine loop near one end as show. Get one of your swivels and tie flying line into the end of the swivel with a fisherman's knot. Now, about that mark. Cut two pieces of skewer about one inch long each. Hot glue one piece perpendicular to the spar right on top of that mark. After that cools, put the other on- perpendicular to both the spar and the other piece of skewer. Now you are finished with the kite.
Putting it all together Since this kite is 3-D, and mostly because I want all of my kites to be able to fold down into a long thin shape, and back up manually. This is also where you can find out how to place your cross spars. • Place your cross spars as shown, hopefully your sails are very tight. In fact, you might have to cut down the length of one or two cross spars. • Put the central spar in the middle of the kite, facing up, and with the small protruding skewer pieces just below the Cross spars. 3. Tie all four of the pieces of twine from the cross spars to the central spar. Now, attach a swivel to your flying line also, then attach the two swivels. You are now ready to fly!