Download
1 / 26
260 likes | 392 Vues
NQC. Brief Introduction – Part 3 David Schilling. NQC – Where is my data?. Programs have 32 global variables Tasks have 16 local variables These are always in the same location – that is, the locations (and hence the data stored in those locations) are shared between programs.

E N D
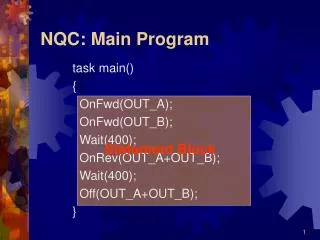
NQC Brief Introduction – Part 3 David Schilling
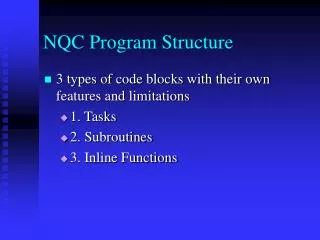
NQC – Where is my data? • Programs have 32 global variables • Tasks have 16 local variables • These are always in the same location– that is, the locations (and hence the data stored in those locations) are shared between programs
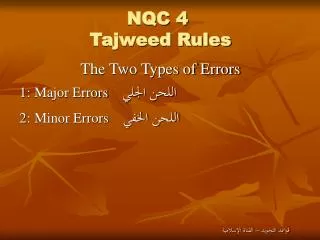
RCX Memory Map This is schematic; not an actual layout
Uninitialized Variables • In normal programming, (on a PC for instance), using a variable before you set its value can lead to very bad behaviour (often crashing your code) • It is a very bad idea! • In the confines of an RCX, with careful coding, however...
Data-location sharing implication • You can use the data stored from one program in another • This requires extra diligence! • If you want to share data, ALL your programs on the RCX need to respect this (Or your data will be overwritten)
How can it work? • The only reason this works is because variables are always assigned a location in the memory map based on their order of declaration • Similarly, tasks are stored according to the order they are defined in
An Example • Let’s look at an example robot – a sumo robot – that has two different behaviours • Aggressive • Evasive • We want to be able to change certain time delays used in these programs at runtime • Also, we need to calibrate a light sensor
#1 - Main Program • This is the main program that you run when you want to demo your robot • It uses these 5 variables: • light sensor high & low values • mid-point of light sensor values • timing delay for activity one • timing delay for activity two
#2 - Alternate Program • Alternate algorithm or behaviour for your robot • It uses these 6 variables: • light sensor high & low values • mid-point of light sensor values • timing delay for activity three • timing delay for activity four • timing delay for activity five
#3 - Setup Program • Use this program to set timing delays used by the main program and alternate program • Easiest way to ‘talk’ to this program is with the use of the IR remote control, using messages 1,2, and 3 • Use the LCD display to show what is happening (what you’re modifying and its value)
#4 - Battery Level Display • I always put the following program in slot #4 on every RCX (no variables are used):// Display Battery Level (Program #4)task main() {SetUserDisplay( BatteryLevel(), 3 );StopAllTasks(); // leaves the display on }
#5 - Light Sensor Calibration • This program ‘floats’ the motors, and for ten seconds collects high and low values on the light sensor • During this time the user pushes the robot back and forth over the edge • It stores the high & low, and also calculates the mid-point between them which can be used as a threshold
Using an Include File • Since the RCX is physically attached to one robot, there are many things that will be the same for each program • Motor and Sensor meanings • Motor directions and sensor setup • Global variables • It makes sense to put this in one place
Contents of our Include File • Use #defines to give meaningful names to all your sensors and motors • Declare names for all shared global variables • Write a setup function for sensors, etc. • Remember, this doesn’t result in any code for your program until you call it; at that point it is ‘inlined’
Include File (Part 1 of 3) // Include file for sumo robot // Sensor definitions #define BUMPER SENSOR_1 #define EDGE_DETECTOR SENSOR_2 #define PROGRESS_METER SENSOR_3 // Motor definitions #define LEFT_WHEEL OUT_A #define RIGHT_WHEEL OUT_B #define RAM OUT_C #define BOTH_WHEELS (LEFT_WHEEL+RIGHT_WHEEL) // SHARED Global variables int LightLow; int LightHigh; int LightMid; int Time1; // program 1: turn time int Time2; // program 1: delay before turning int Time3; // program 2: back up time int Time4; // program 2: turn time int Time5; // program 2: delay after turning void Init( void ) { SetSensor( BUMPER, SENSOR_TOUCH ); SetSensorType( EDGE_DETECTOR, SENSOR_TYPE_LIGHT ); SetSensorMode( EDGE_DETECTOR, SENSOR_MODE_RAW ); SetSensor( PROGRESS_METER, SENSOR_ROTATION ); ClearSensor( PROGRESS_METER ); SetGlobalDirection( RIGHT_WHEEL, OUT_REV ); SetPower( BOTH_WHEELS, OUT_FULL ); Float( BOTH_WHEELS ); Off( RAM ); }
Include File (Part 2 of 3) // SHARED Global variables int LightLow; int LightHigh; int LightMid; int Time1; // program 1: turn time int Time2; // program 1: delay before turning int Time3; // program 2: back up time int Time4; // program 2: turn time int Time5; // program 2: delay after turning
Include File (Part 3 of 3) void Init( void ) { SetSensor( BUMPER, SENSOR_TOUCH ); SetSensorType( EDGE_DETECTOR, SENSOR_TYPE_LIGHT ); SetSensorMode( EDGE_DETECTOR, SENSOR_MODE_RAW ); SetSensor( PROGRESS_METER, SENSOR_ROTATION ); ClearSensor( PROGRESS_METER ); SetGlobalDirection( RIGHT_WHEEL, OUT_REV ); SetPower( BOTH_WHEELS, OUT_FULL ); Float( BOTH_WHEELS ); Off( RAM ); }
Using the Include File • Each program loaded on the RCX should start like this:// Sumo Robot – program #1 – Aggressive version#include "Common Sumo Code.h"// Other global variables go hereint foo;task main() { Init();// rest of program }
Example of Calibration Program // Sumo Robot – Light Sensor Calibration – program #5 #include "Common Sumo Code.h" task main() { int tmp; Init(); LightLow = EDGE_DETECTOR; LightHigh = LightLow; Float( BOTH_WHEELS ); ClearTimer(0); while( FastTimer(0) < 1000 ) // for 10 seconds { tmp = EDGE_DETECTOR; if( tmp < LightLow ) LightLow = tmp; else if( tmp > LightHigh ) LightHigh = tmp; } LightMid = (LightLow + LightHigh) / 2; }
Sharing Local Variables in a Task • Since the location of local variables in a task are also always in the same place, if you are very careful about how you do things and how you arrange things, you can use that to your advantage as well • This is definitely“advanced programming”and not for the faint of heart
Saving Data using Task Locals • Another use might be to save data between runs, storing the results in local variables in a task • Gus’ Crate Contraption scripting system uses the highest three tasks to store the script in • These tasks are not used by the other programs on the RCX
Summary • The “feature” of the standard firmware using the same storage locations for all programs allows you to pass information from one program to another • You need to be careful that other programs don’t write over your data • The best method is to have a standard include file for each program
These slides can be found online at: http://www.brickshelf.com/gallery/David/SMART/Presentations/03-nov-2004-nqc_intro.ppt