Download
1 / 32
620 likes | 2.15k Vues
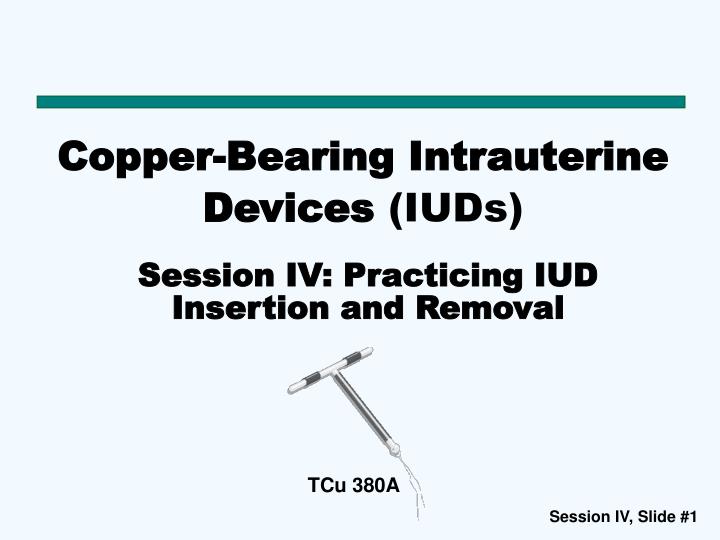
Copper-Bearing Intrauterine Devices (IUDs). Session IV: Practicing IUD Insertion and Removal. TCu 380A. Session Overview. This session describes the steps for inserting and removing a copper-bearing IUD and for preventing infection during insertion and removal.

E N D
Copper-Bearing Intrauterine Devices (IUDs) Session IV: Practicing IUD Insertion and Removal TCu 380A
Session Overview This session describes the steps for inserting and removing a copper-bearing IUD and for preventing infection during insertion and removal. Complications such as perforation of the uterus or expulsion are associated mainly with provider skill. Extensive practice on models, observations of master clinicians and supervised practice are necessary for the provider to be skillful in the IUD insertion and removal procedures.
IUD Insertion Procedure:Instruments and Supplies • IUD in unopened, undamaged, sterile package • Bivalve speculum • Tenaculum • Uterine sound • Ring forceps • Sharp scissors • Narrow forceps (uterine dressing or sponge)
IUD Insertion Procedure:Instruments and Supplies (2) (continued) • Light source to visualize cervix • Gloves (single use disposable, or HDL, or sterile) • Bowl with antiseptic solution • Chlorine solution, 0.5% • Sterile gauze/cotton balls • Drape/cloth to cover table and woman’s pelvic area
IUD Insertion Procedure:Preventing Infection During IUD Insertion Wash hands before and after procedure, and wear examination gloves. Use high-level disinfected (or sterile) instruments. Load the IUD within the sterile package without touching the IUD. Clean the cervix with antiseptic.
IUD Insertion Procedure:Preventing Infection During IUD Insertion (2) (continued) Insert the IUD without touching the speculum blades or vaginal wall Pass sound and loaded IUD only once through cervical canal Decontaminate instruments after the procedure Dispose of contaminated waste properly
IUD Insertion Procedure:Procedure Overview • Conduct bimanual and speculum pelvic examination to: • Screen for eligibility • Determine the position of the uterus • Sound the uterus to determine depth • Load the IUD into inserter without taking it out of the sterile package • Set the depth-gauge to sounded depth • Place the IUD into the uterus • Allow the woman to rest
IUD Insertion Procedure:Step 1: Perform Pelvic Exam Conduct pelvic exam (bimanual exam, then speculum exam) • Screen for medical eligibility: • If no signs and symptoms of infection—proceed with insertion • If suspicious of infection—do not insert IUD— diagnose/treat as appropriate, then reassess for insertion • Assess position of uterus (tilted up or down) to determine appropriate orientation of sound
IUD Insertion Procedure:Step 2: Sound the Uterus • Clean the cervix with an antiseptic solution. • Apply a tenaculum to the cervix. • Gently pull the tenaculum to align the uterus, cervical opening, and vaginal canal. • Insert the uterine sound into the vagina and through the cervical opening. • Advance the sound into the uterine cavity until a slight resistance is felt. • Slowly withdraw the sound and assess the level of mucus/blood to determine the depth of the uterus (average depth is 6 to 8 cm).
IUD Insertion Procedure:Step 3: Load the Copper IUD (Copper T 380A) • Load the IUD by folding its arms and placing them inside the insertion tube. • Do not load more than five minutes before inserting the IUD into the uterus. • If IUD arms remain folded for more than five minutes, they may not return to their original shape when released.
Loading the Copper T IUD:Step 3.1: Load the Copper T Adjust the contents of the package through the clear plastic cover • Ensure that the vertical stem of the T is fully inside the insertion tube • Ensure that the other end of insertion tube is close to sealed end of package
Place the package on a clean, hard flat surface with the clear plastic side up. Pull up on the clear plastic cover from the end farthest from the IUD. Keep pulling the plastic cover until package is open half way to the blue depth-gauge. Loading the Copper T IUD:Step 3.2: Load the Copper T Partially open the package:
Pick up the package and hold open end up toward ceiling. Fold the clear plastic cover and white backing flaps away from each other. Grasp the white plunger rod by circular thumb grip and place it inside the insertion tube. Gently push until tip of rod almost touches bottom of T. Loading the Copper T IUDStep 3.3: Load the Copper T Place the white plunger rod in the clear insertion tube:
Release the white backing flap, and place package on a clean, hard surface with clear plastic side up Place your thumb and index finger over the tips of the arms of T Push the measurement insert so it slides under the IUD Grasp the insertion tube and push it against the T; the arms will start to bend downward Bring your thumb and index finger together Loading the Copper T IUD:Step 3.4: Load the Copper T Bend the arms of the T downward:
Loading the Copper T IUDStep 3.5: Load the Copper T Pull the insertion tube away from the folded arms of the T: • When the arms of the T are folded down enough to touch the sides of the insertion tube, pull the insertion tube back, so its opening is positioned right underneath the folded arms.
Loading the Copper T IUDStep 3.6: Load the Copper T Push the folded arms of the T into the insertion tube: • Gently push and rotate the insertion tube back over the tips of the folded arms of the T, so that both tips are caught inside insertion tube. • Do not try to push the copper bands on the arms into the insertion tube; they will not fit.
Loading the Copper T IUDStep 3.7: Load the Copper T Set the blue depth-gauge to reflect the uterine depth as measured by the sound: • Move the depth-gauge so its upper edge is aligned with the appropriate centimeter mark on the measurement insert. • Press down on the depth-gauge while sliding the insertion tube, until the tip of the IUD aligns with the tip in the diagram on the measurement insert. • Ensure that the distance between tip of the IUD and the inside edge of the depth-gauge is equal to the depth of the uterus.
Loading the Copper T IUDStep 3.8: Load the Copper T Align the depth-gauge and the folded arms of the T so that they are both in a horizontal position.
Loading the Copper T IUD:Step 3.9: Load the Copper T Remove the loaded IUD from the package, keeping it level.
Loading the Copper T IUD:Step 3.10: Load the Copper T Remove the loaded IUD from the package, keeping it level.
IUD Insertion Procedure:Step 4: Insert IUD into Vagina • Gently grasp the tenaculum (still in place from sounding the uterus) and apply gentle traction. • Insert the loaded IUD, without touching vaginal walls or speculum blades.
IUD Insertion Procedure:Step 5: Advance IUD into Uterus • Gently advance the loaded IUD into the uterine cavity. • STOP when the blue depth-gauge comes in contact with the cervix or light resistance is felt.
IUD Insertion Procedure:Step 6: Release Arms of Copper T • Hold the tenaculum and white plunger rod stationary, while partially withdrawing the insertion tube. • This releases the arms of the Copper T.
IUD Insertion Procedure:Step 7: Gently Push Insertion Tube • Gently push the insertion tube until you feel a slight resistance. • This step ensures placement high in the uterus
IUD Insertion Procedure Step 8: Remove Plunger Rod • Remove the white plunger rod, while holding the insertion tube stationary.
IUD Insertion Procedure Step 9: Partially Withdraw Inserter • Gently and slowly withdraw the inserter tube from the cervical canal until strings can be seen protruding from the cervical opening.
IUD Insertion Procedure Step 10: Cut IUD Strings • Use sharp Mayo scissors to cut the IUD strings at 3–4 cm from the cervical opening • If scissors are dull, IUD strings may get caught in blades. • Completely withdraw insertion tube with cut ends of strings inside
IUD Insertion Procedure Step 11: Remove Tenaculum • Gently remove the tenaculum • Observe the woman’s cervix for bleeding • If there is bleeding, hold swab to site using clean forceps
IUD Insertion Procedure Step 12: Remove Speculum and Decontaminate Instruments • Gently remove the speculum. • Place tenaculum and speculum in a 0.5% chlorine solution for 10 minutes for decontamination.
IUD Insertion Procedure Step 13: Allow Woman to Rest Allow the woman to rest Begin post-insertion tasks Provide post-insertion instructions and other key messages
IUD Removal Procedure Follow infection prevention guidelines. Counsel client that cramping/bleeding may occur. Perform bimanual exam. Inserts vaginal speculum and looks at length and position of strings. Apply slow, gentle traction to avoid breaking strings. Swab cervix and vagina with antispectic.
IUD Removal Procedure, continued Grasp strings close to the cervix and pull gently but firmly to remove IUD. Dispose of waste materials according to guidelines. Refer difficult removals. Insert a new IUD immediately following removal (if desired).