Download
1 / 24
270 likes | 665 Vues
Qualtrics Instructions. In these slides the following will be reviewed: Basic Qualtrics ’ instructions How to create an account and log into Qualtrics How to copy the survey from the library How to distribute the survey How to compile and analyze the survey results . What will be reviewed.

E N D
In these slides the following will be reviewed: • Basic Qualtrics’ instructions • How to create an account and log into Qualtrics • How to copy the survey from the library • How to distribute the survey • How to compile and analyze the survey results What will be reviewed
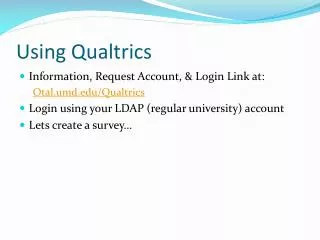
The Qualtrics survey tool is available free for Duke Users at http://duke.qualtrics.com • Qualtrics is integrated with Duke's NetID authentication system but also allows sharing of surveys with non‐Duke users. • To create a Qualtrics account, log in from http://duke.qualtrics.com using your NetID and NetID password. Creating a Qualtrics Account
Navigate your browser to http://www.duke.qualtrics.com/ and log in with your NetID and password. You will first be asked to confirm and update your account information, via a popup box. • Once you have logged in, you will be able to create and view surveys in the main dashboard area. Logging In
1. Select DUSON from the drop down for Please Select a Library2. Then select SAP Perf Review for Category3. Select Peer Review DUHS for Survey4. Create a survey name in the New Survey Name field5. Click on Create Survey
Click on DistributeSurvey, click on the copy you just added and Activate your survey
This is your anonymous link, copy it to a word document, so that you may add extensions to it in the next step To copy the link, highlight it and right click on your mouse and select ‘copy.’ Open up a blank Microsoft Word document and right click on your mouse and select ‘paste.’
1. You will paste the link into the Word document and add the extension of: &n=(first name%20last name) 2. Type in the name of the person being surveyed, NOT the words above in parenthesis. 3. Repeat step 2 above for each employee being surveyed. 4. Copy this link into the body of your email that will be sent out to responders from your outlook mailbox This is a sample https://duke.qualtrics.com/SE/?SID=SV_8dFDINKDmmplumh&n=Elizabeth%20Taylor
This is the screen, that people will see when they start the survey. This is how the name you entered in the previous step will appear.
Click on View Results to get to the view of all respondents.
1. Fill in the value of ‘n’ in the embedded data field and fill in the employee name being surveyed exactly as you typed it in the link on slide 14, into the equals to field. 2. Click Apply Changes.
In the top right of the report, click on the icon that indicates the format of how you would like the results to appear when downloaded.
If you chose to download the survey results in Word, this is what it would look like.
When you are ready to close the survey to responders, return to the My Survey tab and remove the green check
You will have a chance to ensure that you really want to deactivate your survey