Download
1 / 25

E N D
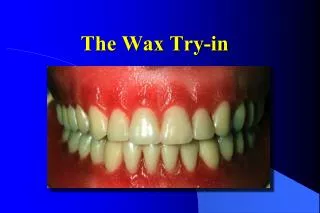
You are now ready to begin the waxup of the dentures. Soften a sheet of baseplate wax over the Bunsen burner or in a hot water bath and cut it into three sections. The wax is too brittle at room temperature to work with and will crack, so it must be kept warm while you work with it. Heat up a piece and place it on the buccal and labial surfaces. While it is warm, adapt it to the contours of the denture with finger pressure.
Soften the baseplate wax with a Hanau torch to keep it pliable. Press it into place and trim off the excess along the external border of the land area by pressing the soft wax with the thumb. After it is well-adapted to the contours of the denture, use a Roach carver to contour the wax to fit around the teeth.
Press the wax in from the border with a thumbnail or green-handled knife. Start with the canine and cut the wax from around it, first by pressing the wax against the tooth with a roach carver, then by cutting the wax using the point of the carver.
The process is repeated on the other side and a straight edge is used to make sure the height of the wax to the teeth raises uniformly from the canine to the second molar. Any wax on the teeth is removed with a knife blade and the wax is then heated and smoothed with a Hanau torch.
Start the festooning by scalloping the wax on either side of the canine to develop the canine eminence. This is done first because the canine is the cornerstone of the mouth and is the only tooth that has a convexity the extends all the way to the vestibule.
Continue to refine the labial and buccal contours of the wax denture using the #7 wax spatula until it is all completed to the desired form, then carefully heat it with the flame to smooth its surface.
If an area is overheated, allow it cool then re-contour it carefully, then flame it again to smooth the wax. Use the blade of a green handled knife against the surfaces of the teeth to remove any wax that flows onto the teeth. A ruler is used to make sure the buccal gingival height rises uniformly from the front to the back for improved esthetics.
As you are working with the wax it will become brittle fairly quickly, so you will need to constantly warm it with the Hanau torch. When it is well-adapted and contoured around the teeth and borders of the flanges you can begin festooning, starting with the canine eminence. The larger end of the #7 wax spatula works very well for this procedure.
Next, move to the lateral incisor, then to the central incisor. The depth of the fossa gingival to the lateral incisor will help to make the canine eminence stand out. These variances in anatomy reflect the size and angulation of the roots of the natural teeth. The central incisor is scalloped in the same way as the lateral incisor, except that the labial fossa is shallower and further apical than the lateral incisor, again reflecting natural root contours.
Now, move back to the premolar region and scallop to create a depression similar to the one made in the incisor region. This further enhances the prominence of the canine eminence. Gradually work your way posteriorly, noting that the further posterior you go the more shallow the depressions become.
Clean the surface of all wax residue created by the festooning process and use the Hanau torch to lightly flame the surface. Too much heat will make the wax flow into the spaces around the teeth and reduce the contours you have just established. It can also leave a carbon residue in the wax, so avoid overheating! It will help to prevent the pooling around the teeth if the wax is heated with the torch held so that the flame is directed apically.
After the bucco-labial surfaces are completed, adapt one of the strips of wax to the palate. Cut it off at its junction with the strip that was used for the buccal portion so that there is a butt joint. This will provide an even thickness of wax. Remember to heat the wax with the Hanau torch to keep it pliable or it will crack and have to be redone.
Trim off the excess wax with a suitable instrument and adapt the remainder closely around the teeth. Festooning of the palatal section, although present, is much less prominent than the festooning on the bucco-labial surface.
Heat a piece of wax over the Bunsen burner or in a hot water bath and press it into place. Reheat it with an alcohol torch and then press it into place again, also pinching off the excess wax overlying the teeth. Do this series of reheating and pressing into place as much as is necessary to get the wax closely adapted to the baseplate in all areas.
Heat the green-handled knife and split the wax from the central incisor area down to the tongue area and remove the excess. Trim the wax away from the teeth with the Roach carver.
The blade of the green-handled knife can be used to good advantage in trimming the wax from the teeth. Due to the broad area of the handle and blade, it can be easily grasped and manipulated. Use the point of the Roach carver to press the wax in place in the interdental papilla area. Use the broad end of the #7 wax carver to contour the wax, going from the teeth to the land area.
Heat the wax gently with the flame of an alcohol torch to avoid over-melting the wax while smoothing the surface. The lingual flange of the mandibular denture is festooned, but is less pronounced than the bucco-labial surfaces. A major concern on the lingual flange is the lingual groove or concavity. This is created to allow space for the tongue to rest and aids in retention. A view from the distal shows the lingual concavity that is so important for stabilizing the mandibular denture. Allow the heated wax to cool for a few minutes before adding the wax to the other side.
Apply wax to the facial surfaces in a similar manner and use the wax carver to do the cutback. When the wax begins to harden, flame it lightly to soften it. Trim off the excess wax from the border with the green-handled knife and press it into the desired shape.
Festoon the mandibular denture the same way and in the same sequence as was used on the maxillary denture, starting with the canine and carving forward. Smooth the wax with an alcohol torch, being careful to not let the wax flow.
The texture of the labial and buccal surfaces of the denture can be enhanced by a procedure called stippling. Use a stiff-bristle brush (such as a denture brush) to tap the surface of the warm wax. This will leave a “pebbled” appearance. Lightly flame this surface with a Hanau torch. The more flame that is used, the less stippling that is left, so be careful to not over-flame the surface. The ideal surface should have an “orange peel” look which will serve to break up the amount of light that is reflected back and resembling the reflection of the natural tissues.
A more esthetic result can be achieved if the occluso-gingival height of the teeth decreases uniformly from the canine to the last molar.