Download
1 / 62
730 likes | 1.1k Vues
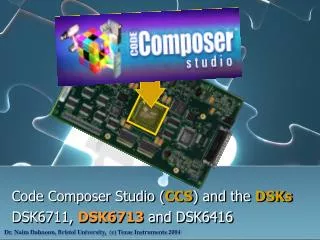
Lecture 3 Code Composer Studio and the DSK6416. Learning Objectives. Introduction to Code Composer Studio (CCS). Installation and setup of CCS. Introduction to the DSK. Laboratory. Code Composer Studio.

E N D
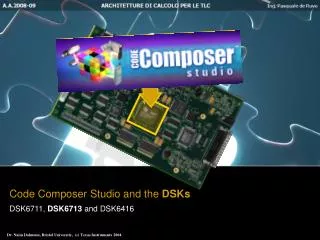
Lecture 3 Code Composer Studio and the DSK6416
Learning Objectives • Introduction to Code Composer Studio (CCS). • Installation and setup of CCS. • Introduction to the DSK. • Laboratory.
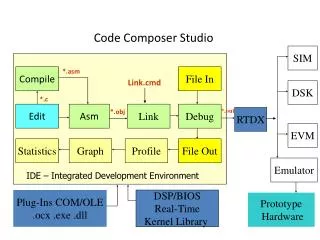
Code Composer Studio • The Code Composer Studio (CCS) application provides an integrated environment with the following capabilities: • Integrated development environment with an editor, debugger, project manager, profiler, etc. • ‘C/C++’ compiler, assembly optimiser and linker (code generation tools). • Simulator. • Real-time operating system (DSP/BIOS™). • Real-Time Data Exchange (RTDX™) between the Host and Target. • Real-time analysis and data visualization.
CCS Installation and Setup (A) Insert CD and Install the CCS Software. (B) Connect DSK to Power and USB and Run CCS Setup (do not remove CD): • Start CCS setup utility by using the following desktop icon: • Alternatively: • Windows Start Menu -> Programs -> Texas Instruments -> Code Composer Studio 3.1 (‘C6000) -> Setup Code Composer Studio 3.1 • Run cc_setup.exe located in: c:\CCStudio_v3.1\cc\bin\
CCS Installation and Setup (C) After Installation you should see the following icons:
CCS Installation and Setup • You should now see a screen similar to this: Note: If you don’t see the Import Configuration dialog box you should open it from the menu using: File: Import.
CCS Installation and Setup • You can clear the previous configuration by selecting the configuration you wish to clear and clicking the clear button. • Next select a new configuration that you would like to add: • Select the C6416DSK Port x y Mode. • The port number, x, and port mode, y, depend on your PC setup.
CCS Installation and Setup • Finally save and quit the import configuration dialog box.
Testing Your Connection • If you want to test your DSK and USB connection you can launch the C6416 DSK Diagnostic Utility from the icon on your desktop. • From the diagnostic utility, press the start button to run the diagnostics. In approximately 30 seconds all the on-screen test indicators should turn green.
Using CCS • Start CCS by either: • Using the desktop icon: • Start -> Programs -> Texas Instruments -> Code Composer Studio 2 -> Code Composer Studio. • Run cc_app.exe in c:\CCStudio_v3.1\cc\bin\
Troubleshooting • If the following window appears on your screen then: • Check that the DSK is connected properly and powered up. • Check if the port address and mode is correct
Software: (1) DSK Help • DSK6416 help is available via the Help menu in CCS.
Communicate from Windows program (C++, VB) via parallel port using Win32 DLL CCS uses parallel port to control DSP via JTAG port You can use full TI eXtended Dev System (XDS) via 14 pin header connector Use HPI via Win32 DLL JTAG ....... ....... Software: (2) PC DSK Communications DSP JTAG Emulation Port Note: You should not use the parallel port for simultaneous emulation and HPI connection.
Communicate from MATLAB (SIMULINK) CCS uses USB to control DSP via JTAG port You can use RTDX Use USB JTAG ....... ....... Software: (3) PC DSK Communications DSP JTAG Emulation Port Note: Limited data rate up to 2MB/Sec.
Software: (4) PC DSK Communications • Win32 API functions for Host to DSK communications: dsk6x_open( ) Open a connection to the DSK dsk6x_close( ) Close a connection to the DSK dsk6x_reset_board( ) Reset the entire DSK board dsk6x_reset_dsp( ) Reset only the DSP on the DSK dsk6x_coff_load( ) Load a COFF image to DSP memory dsk6x_hpi_open( ) Open the HPI for the DSP dsk6x_hpi_close( ) Close the HPI for the DSP dsk6x_hpi_read( ) Read DSP memory via the HPI dsk6x_hpi_write( ) Write to DSP memory via the HPI dsk6x_generate_int( ) Generate a DSP interrupt
Software (5): Project Management • Intuitive organization • Drag & drop • Fast access • Easy file manipulation • Graphically configurebuild options • Saved with each project
Software: Program Code Editing Features Code Composer Studio allows you to edit C and assembly source code together. The integrated editor provides support for the following activities: o Highlight of keywords, comments, and strings in color o Mark C blocks in parentheses and braces, parenthesis or brace matching o File Find and replace, and quick search o Context-sensitive help o Custom key commands
Software: Debugger in CCS • Debugging is optimized for DSP • C expression based conditional breakpoints • Advanced breakpoints • View source and dis-assembly simultaneously • C and Assembly debugging • Advanced Watch Window • Multi-processor debug • Global breakpoints • Synchronized control over groups
Software: What is DSP/BIOS? • A scalable real-time kernel for applications • Real-time scheduling and synchronization • Host-to-target communication • Real-time instrumentation • DSP/BIOS provides • Preemptive multi-threading, hardware abstraction, real-time analysis, and configuration tools • Packaged as a set of modules that can be linked into an application • Integrated with CCSTM, requires no runtime fees, and is fully supported by TI • Supports the TMS320C6000 DSP platform • DSP/BIOS Users’ Guide SPRU303B.PDF
Software: eXpress DSP Support Libraries • Chip Support Library (CSL) • Board Support Library (BSL) • DSK version • EVM version • DSPLIB • C62x version • C64x version • Image/Video Library (IMGLIB) • C62x version • C64x version
Software: Chip Support Library (CSL) • Provides a C-language interface for configuring and controlling on-chip peripherals. • It consists of discrete modules that are built and archived into a library file. • Each module relates to a single peripheral with the exception of several modules that provide general programming sup-port, such as the interrupt request (IRQ) module which contains APIs for interrupt management, and the CHIP module which allows the global setting of the chip. • SPRU401.PDF
Software: DSK Board Support Library (BSL) • BSL is a set of APIs used to configure and control all on-board devices • To make it easier for developers by eliminating much of the tedious grunt-work usually needed to get algorithms up and running in a real system
TMS320C6416 DSP Starter Kit (DSK) The TMS320C6416 DSP Starter Kit (DSK) developed jointly with Spectrum Digital is a low-cost development platform designed to speed the development of high performance applications based on TI´s TMS320C64x DSP generation. The kit uses USB communications for true plug-and-play functionality. Link: Reference Manual
TMS320C6416 DSK Hardware Line Out Mic In Line In Headphones Expansion CPU Codec RAM Reset Supply +5V USB JTAG LEDs Sw3 Switches
Typical C6416 DSK Setup USB to PC to +5V Headphones Microphone
'C6416 DSK Block Diagram Daughter Card CE0 CPLD ProgramCache CE2 Room for Expansion CE1 Flash ROM(512 kB) L2 RAM Prog/Data (1 MB) EMIFB CPU CE3 CE0 SDRAM (16 MB) EMIFA TMS320C6416 DSP Starter Kit (DSK) DataCache • DSK uses both EMIFs (A and B) • EMIFA • CE0 for SDRAM • CE2 and CE3 pinned-out to daughter card connector • EMIFB • CE1 for Flash Memory and CPLD (switches, LED’s, etc.)
C6416 DSK Memory Map TMS320C6416 C6416 DSK CPLD: • LED’s • DIP Switches • DSK status • DSK rev# • Daughter Card
DSK6416 Block Diagram Switch SW3
Laboratory Exercise: DSK Hardware Setup (1) Connect the following cables: • USB. • Audio cables. (2) Connect the power and observe the Power On Self-Test (POST) (Refer to Slide 15). (3) A . If using the DSK6416 Configure and test the DSK with the utilities shown below:
Laboratory exercise: DSK Hardware Setup Notes: • The SDRAM may take a while due to the large amount of SDRAM on the ‘C6416 DSK. • The CODEC test performs two operations: (1) a 1kHz tone output, and (2) an audio input to output loopback. You must have a speaker connected to the the output jack to hear the test. • If the confidence test fails: (1) Remove the power and parallel cable from the DSK. (2) Reset your PC. (3) Reconnect the power and the parallel cable. (4) Invoke CCS.
Laboratory Exercise (hello64): Using CCS • First Project • Hello World! #include <stdio.h> void main() { int nTarget = 0; printf("Hello, CCStudio Scripting World!\n"); nTarget = 0x64; printf("We are a C%x!\n", nTarget); } (1) Create a working directory and copy the following files from \Lab03\Code\Hello64: (a) rts6400.lib (b) hello.c (c) lnk.cmd (d) vectors.asm (2) Create a new project (Hello64): (a) Start CCS. (b) Create a new project as shown on the following slides.
Laboratory Exercise (dotp64): Using CCS Implement: with: ai = {40, 39, …, 1} xi = {1, 2, …, 40} (1) Create a working directory and copy the following files from \Lab03\Code\Dotp64: (a) rts6400.lib (b) dotp.c (c) lnk.cmd (d) vectors.asm (2) Create a new project (Dotp64): (a) Start CCS. (b) Create a new project as shown on the following slide.
Laboratory Exercise (dotp64): Using CCS Note: When you type in the “Project Name” a directory is created in the “Location”. Delete this if not required.
Laboratory Exercise (dotp64): Using CCS (3) Add files to the project (dotp.c, lnk.cmd, vectors.asm, rts6400.lib).
Laboratory Exercise (dotp64): Using CCS (4) Change the build options (compile and link):
Laboratory Exercise (dotp64): Using CCS (4) Change the build options (compile and link):
Laboratory Exercise (dotp64): Using CCS (5) Build the output program (dotp64.out): (a) Build the project by: (i) Clicking the Rebuild All toolbar icon. (ii) Selecting Rebuild All in the project menu. (b) Verify that the build output window is complete with “0 errors, 0 warnings”: CCS menu
Laboratory Exercise (dotp64): Using CCS (6) Load the output file Dotp64.out into DSP memory: (a) The program will be automatically loaded after each project build if the “Program Load after Build” option is selected as shown below:
Laboratory Exercise (dotp64): Using CCS (6) Load the output file dotp64.out into DSP memory: (b) Load the dotp64.out by selecting File:Load Program as shown below: