Download
1 / 72
720 likes | 724 Vues
This project offers a series of modeling activities to educate students about the cell cycle and cancer. From information gathering to lab simulations, students will learn about mitosis, cancer causes, and the cell cycle in a normal and cancer cell.

E N D
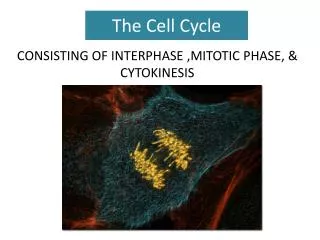
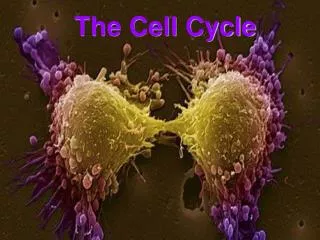
The Cell Cycle: A series of modeling activities Cancer Education Project University of Rochester
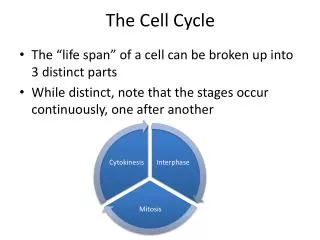
Premise: Students learn best when exposed to a variety of activities
Information Gathering: the story of Sheena Exploration: Cancer in a historical context Class Lecture Notes Mitosis Lab: Simulation, online and hands-on Cell Animations Modeling the Cell Cycle in a normal cell Modeling the Cell Cycle in a cancer cell Overview
Part 1: Catching Some Killer Rays • Read together in class. • Assign questions for homework or to be completed as a group • Textbook as resource • Review for accuracy as a class
Video Clip 1 • NIH supplement: News Alert Videos
Part 3: Class Lecture Notes • Two pages of fill-in style lecture notes • Emphasis on LE Core understandings.
Part 4:Lab: Mitosis in Plant and Animal Cells • Completed during lab class • Three main parts • Mitosis simulation • Computer activity • Hands-on microscope exploration
Lab Part 1: Mitosis Simulation • Teacher-directed simulation of the steps in mitosis. • Uses red and yellow popping beads available through Wards, Science Kit, Carolina
Lab Part 2: Computer Activity • Allows students to become confident in identifying cells in the various stages of mitosis. onion root tip mitosis
Lab Part 3: Hands-on Microscope Mitosis • Students are asked to locate and draw five cells in the various stages of mitosis.
Animation Clip 1 • NIH Supplement:Cell Cycle Animations
Part 6: Modeling the Cell Cycle in a Normal Cell • Your Task: Model the events and the controls of the cell cycle. • Work in groups of 4 students.
At Your Station You Should Have: ·A cell cycle wheel ·A large Ziploc bag with materials ·Scissors ·Tape ·Dried lima beans ·Balance (not here, today)
How do these paper chromosomes compare to real chromosomes? a B C D e F
a B C D e F j K L m N A b C d E f J K l M n First, become familiar with the chromosomes that will be used in your cell model. Your cell has 2 pairs of chromosomes. These are made from blue and pink paper. • Each pair is the same length. Find the 2 pairs. Throughout this simulation, each person in the group will be responsible for one of the chromosomes. • Each pair of chromosomes is made up of 2 partners, a maternal chromosome and a paternal chromosome
During this simulation, how would you tell the difference between the maternal and paternal chromosomes?
a B C D e F A b C d E f J K l M n j K L m N Homologous Homologous Maternal = pink Paternal = blue
The chromosomes are found inside your cell that is represented by the small Ziploc bag labeled “Nucleus”. • Place your 2 pairs of chromosomes into the small Ziploc bag.
The remainder of the materials will be used throughout the activity and should be kept in the large bag labeled “Materials”, as a supply/synthesis area.
Let’s Begin! • A cell next to your cell has died. This cell’s death causes an external growth signal and tells your cell to begin the cell cycle. growth signal
Turn Your Wheel to G1 Phase • According to the cell cycle chart (from Part 1), what should happen during G1 phase?
Please add beans one at a time to your cell until the mass of your cell is _______grams Options for teachers: Use a balance and mass out the sample cell Give students the total mass they need and the mass of one bean and have them calculate how many beans they will need to add Simply count out ‘X’ number of beans Simulate Growth of Your Cell
Turn your wheel to the first checkpoint • At this checkpoint a growth regulator protein, called Ras cyclin, checks that cells are big enough to enter the next part of the cell cycle. • Raise your hand so that Rascyclin (your teacher) may check the mass of your cell.
Why is it important to check that the cell is big enough to continue with the cell cycle?
Turn your wheel to the next checkpoint • DNA in these chromosomes can be damaged by a number of agents including radiation, toxic chemicals, and free radicals. • At this checkpoint, another protein known as p53 will inspect the chromosomes’ DNA for damage. • Raise your hand to have p53 check your DNA for damage.
What do you think would happen if this p53 surveillance system did not work properly?
Turn your wheel to the S phase of the Cell Cycle • During this part of the cell cycle, DNA must be replicated • Using the materials from the supply bag, make exact copies of each of your DNA strands. • Place the centromere regions of the chromatids on top of each other
a B C D e F a B C D e F Turn your wheel to the S phase of the Cell Cycle • During this part of the cell cycle, DNA must be replicated • Using the materials from the supply bag, make exact copies of each of your DNA strands. • Place the centromere regions of the chromatids on top of each other
Summarize the events that occur during the S phase of the Cell Cycle.
Turn your wheel to the next checkpoint • A protein complex called ATM/Nibrin inspects to make sure that the DNA was copied without mistakes. • Raise your hand to have ATM/Nibrin (your teacher) check your replicated DNA for damage.
Turn your wheel to the G2 phase • During this part of the cell cycle, the cell prepares for mitosis by synthesizing the materials it will need. • Pull black/white lanyard out of large bag.
G1, S, and G2 of Interphase used to be called the “resting phase”. Why is resting phase not a good name?
Move your wheel to Mitosis • During Prophase, DNA in the chromosomes condenses and coils. • Wrap each chromatid around a pencil and then remove the pencil. • Attach your two coiled chromatids together by placing the centromeres on top of each other.
Move your wheel to Mitosis • During Prophase, DNA in the chromosomes condenses and coils. • Wrap each chromatid around a pencil and then remove the pencil. • Attach your two coiled chromatids together by placing the centromeres on top of each other.
Move your wheel to Mitosis • During Metaphase, the chromosomes line up in the center of the cell. • Place one set of black and white spindle fibers at each side (pole) of your desk (cell).
Move your wheel to Mitosis • Attach one spindle fiber from the left side of your desk to the centromere on one chromatid. • Attach a spindle fiber from the right side of your desk to the centromere on the other chromatid.
Turn your wheel to MAD1 • A protein called MAD1 checks to be sure the spindle fibers have attached properly. • Spindle fibers need to be attached correctly so that chromosomes are distributed evenly to the new cells. • Raise your hand to have MAD1 check your spindle attachment.
Proceed with Anaphase • Proceed to Anaphase by pulling on the spindle apparatus to separate chromatids at the centromere. • Complete Telophase by removing the spindle from the chromosomes. • Place the spindle fibers back in the supply bag.
Proceed with Telophase • Complete Telophase by removing the spindle from the chromosomes. • Place the spindle fibers back in the supply bag.
Turn your wheel to Cytokinesis • Cut your small Ziploc bag, labeled “CELL” in half. • Place the chromosomes from the left side of your desk into one half of the bag, and the chromosomes from the right side of your desk in the other half.
Turn your wheel to Cytokinesis • Tape the open ends of the cut ziploc bag closed. • You should now have two smaller cells.
Let’s Begin! • A cell next to your cell has died. This cell’s death causes an external growth signal and tells your cell to begin the cell cycle. growth signal
Turn Your Wheel to G1 Phase • To simulate growth of your cell, please add beans to your small bag.
MUTATION! • You have a mutation in the gene that produces the Ras protein and this checkpoint does not work. • Do NOT check the mass of your cell