1 / 0

Introduction to Dreamweaver

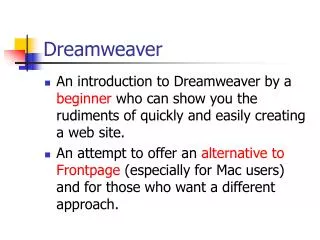
Introduction to Dreamweaver. Valerie Priester ASCIT University at Buffalo. What is Dreamweaver?. Software used to create web pages Does not require HTML knowledge (but is helpful) Design view is WYSIWYG Pages can be designed with images, backgrounds, formatting, tables, etc.

wynn
Télécharger la présentation

Introduction to Dreamweaver

An Image/Link below is provided (as is) to download presentation Download Policy: Content on the Website is provided to you AS IS for your information and personal use and may not be sold / licensed / shared on other websites without getting consent from its author. Content is provided to you AS IS for your information and personal use only. Download presentation by click this link. While downloading, if for some reason you are not able to download a presentation, the publisher may have deleted the file from their server. During download, if you can't get a presentation, the file might be deleted by the publisher.

E N D

Presentation Transcript


  1. Introduction to Dreamweaver

    Valerie Priester ASCIT University at Buffalo
  2. What is Dreamweaver? Software used to create web pages Does not require HTML knowledge (but is helpful) Design view is WYSIWYG Pages can be designed with images, backgrounds, formatting, tables, etc.
  3. Getting Started Map a site for areas where you frequently update or create web pages Departmental web sites Your home page Mapping a site Select Site > New Site Click the Advanced tab You must map a site for each computer you will use, not each page
  4. Mapping a Site Local info: Give it a recognizable name (i.e., My home page) Leave all other default information
  5. Mapping a Site to UBUnix Remote info: Access: FTP FTP host: ubunix.buffalo.edu Host directory: Public Sites (UBfs space): /ubfs/myfiles/f/s/UBITName/public_html (where f and s are the first and second letters of your UBITName and UBITName is your UBITName, i.e., /ubfs/myfiles/j/d/jdoe/public_html) Your computer’s directory, i.e. default in My Documents
  6. Mapping a Site to UBUnix Login: Enter your UBITName Password: Leave blank (CRITICALLY IMPORTANT). Do NOT select Save password. Use Secure FTP (SFTP)
  7. File check in and check out Remote option to allow file check in and check out Useful if more than one person modifies a site. Prevents more than one person from working on a file at the same time Files must be checked in when done in order to view changes or allow others to edit
  8. Connecting to Your Site Once a site is mapped, you can connect to it Sites will appear in the Files tab on the right Click the connection icon to establish a connection to the remote server You will be prompted for your password each time you connect unless you entered it in the site map setup We discourage saving the password as it is less secure – anyone who can access the computer then has access to the site through your ID.
  9. Creating a New Page Select File > New The Blank Page tab lets you create a blank page The Page from Templates tab lists any templates you created Select Basic Page > HTML Click Create
  10. Three Modes Code View Uses all HTML code Split Screen Code View on the top half Design View on the bottom half Design View No code, what you see is what you get (usually)
  11. Document Title A document’s title appears in the title bar at the top of the browser window The title bar appears in all browsers: IE, Firefox, Safari, Opera, Netscape, etc. in both Mac and Windows systems By default a document is untitled. You should always give your pages document titles
  12. Entering Text Click on the page and enter text Format text using the Properties bar options Works just like formatting in Word Can bold, underline, italicize, change text color, font face, font point size, etc. Fonts not available on the viewer’s computer will be substituted with other fonts like Times New Roman Be sure to use fonts that are common unless they are in an image
  13. Creating Links Select text that you want to turn into a link In the Link box in the Properties area, enter the URL http://www.buffalo.edu You can also do this for a mailto (a link that opens a window in the email client and fills in the address in the to field) mailto:ubtlc@buffalo.edu Link is underlined
  14. Lists You can create ordered (numbered) lists: 1. Oranges 2. Apples 3. Bananas You can create unordered (bulleted) lists: Oranges Apples Bananas
  15. Inserting Lists Select the Unordered list or Ordered list icon Enter the text in the body of the page Deselect the Ordered list or Unordered list icon to end the list
  16. Images You must have the image ready beforehand You cannot create the image in Dreamweaver Images do not need to be in the same directory as the file itself People frequently create an images directory in which to store the images within a given directory for organizational purposes
  17. Adding Images You can click the add image icon (tree) Browse for the file You can also drag and drop them from the Files pane on the right hand side
  18. Library Items Use library items to reflect things you include often in pages When you need to make a change, you change the library item and the pages update automatically Library items appear light yellow when modifying the document, but not when they are viewed in html
  19. Creating a Library Item Select Assets in the right-hand pane Right-click and select New Library Item Give the item a name Click the Edit icon Edit and save the library item
  20. Inserting a Library Item Click the Assets tab in the right-hand pane Select the Library icon Drag and drop the library item into the web page
  21. Templates Files that all have the same characteristics (background, navigation, banner image, etc.) use templates Templates files end in .dwt You must apply a template to the page that you want to use it Resulting pages end in .htm or .html
  22. Applying Templates Create a new file that uses a template: File > New Choose the template style from within the Blank Templates tab Choose HTML Template for now, the select a template style from the list of options. A preview will appear to the right Select Create
  23. Applying Templates You can also apply saved templates to existing pages: Select Assets (in the right-hand pane) Select the Templates icon Click once on the template name, then click Apply This only works if you create and save a template
  24. Creating a Template File > New Click the Page from Template tab Select the template Click Create
  25. Saving Your Work File > Save File > Save all (to save all open pages)
  26. Uploading Files Click the up arrow to FTP up to UBUnix, Wings, etc. You can click the Check in icon ( it has a padlock) if you enabled check out/check in You can also select the local and remote file icon and then drag and drop the files
  27. Previewing Your Documents Save your files Select File > Preview in browser Firefox or Preview in browser IE It’s a good idea to preview in multiple browsers because some browsers display things differently
  28. File Permissions Use web browser (http://ubfs.buffalo.edu) to set Ubfs permissions (public_html directory) Use the same permissions for Wings as for UBUnix Can use Dreamweaver or direct login to UBUnix to set permissions Owner read, write, execute Group read, write, execute Everyone (World) read or read, execute Make sure Everyone is not set to write or else anyone can change your page
  29. File Permissions for Wings In the Files pane, right-click on the name of the file Select Set Permissions… Make sure Owner and Group have read, write, execute Make sure Everyone has read, execute You can also enter 775 in the numeric box instead These permissions let everyone view (read) your file
  30. Questions? I will be around after class if you have questions
  31. Getting Help Faculty and TA’s: Teaching and Learning Center 212 Capen (inside the libraries) ubtlc@buffalo.edu (716) 645-7700 Students, Faculty, or Staff: CIT Help Desk 214 Lockwood, Lockwood 2nd Floor Cybrary cit-helpdesk@buffalo.edu (716) 645-3542
  32. Thank you Thank you for attending An online survey will be emailed to you soon Please provide feedback to help us improve our workshops
More Related