Download

1 / 24
240 likes | 415 Vues
This template demonstrates Stage 7 of your IguanaPaint Academy course lesson, visit to IMOFA (Iguana Museum of Fine Art) :. Course & Lesson #. Welcome. The Art Life. Review. Lesson. Assignment. IMOFA. Closing Slide.

E N D
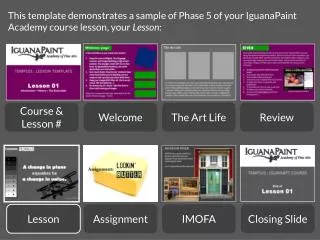
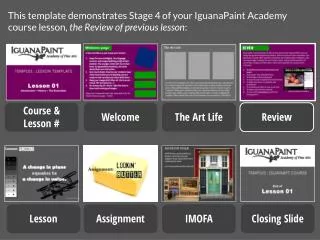
This template demonstrates Stage 7 of your IguanaPaint Academy course lesson, visit to IMOFA (Iguana Museum of Fine Art): Course & Lesson # Welcome The Art Life Review Lesson Assignment IMOFA Closing Slide
Welcome to IMOFA, IguanaPaint Academy’s critically-acclaimed virtual Museum of Fine Arts! Art history is an integral part of every IguanaPaint Academy’s aimto offer a well-rounded arts education. The IMOFA tours provide an opportunity for students to see the richness of art, and to gain an appreciation for what you’re teaching. We receive a lot of positive feedback from students for the IMOFA portion of the courses. We have created this PowerPoint template to make it easy for you to take your students through an inspiring tour at IMOFA during each lesson. We’ve included helpful hints throughout the template. Creating your IMOFA tour is easy to do, and you’ll be surprised at your own enjoyment and benefit!
IMOFA IMOFA stands for Iguana Museum of Fine Arts. It is our own virtual museum, and teachers enjoy “curatorship.” You create tours for your class that teach and inspire. No worries- you don’t need to know the history behind the works. Simply consider what would inspire you if you visited a museum. Plenty of resources exist for digital images of great works of art that relate to your lesson. Add these to your Ppt lesson and take your students on a tour. You may find, as I did, inspiration for your own work!
IMOFA • To provide your students an enriching experience at the Iguana Museum of Fine Arts, here’s all you have to do: • Include 10-12 examples of worthy works in each lesson’s tour. • Search online for photos that pertain to your lesson and course. I use online search engines to find hi-quality, hi-res (large) files and save them to specific folders on my hard drive for use throughout my courses. • Replace the sample images in this template with your own images. In PowerPoint’s Insert menu, select > Picture. Then locate and select your image to be inserted into the slide of choice. • Resize as necessary. Maximum dimensions are either 6.5” high and/or 9” wide. • Add a caption with Artist, Title, and Date. • Add narration, sharing your excitement and awe over the works. • Click on the comments icon in the sample slides that follow for helpful tips. • Have fun curating at IMOFA!
IMOFA I start off each tour with an IMOFA transition slide and a comment about the current show. For example… IMOFA has a great exhibit on display right now that just happens to be about what we’re studying this week. Let’s step inside and be inspired! Sample IMOFA slide 5. More samples at the end of the tour.
Gallery Tips 1: Keep in mind this is supposed to be fun. Enjoy this stage of the lesson, both in creating and viewing. It’s a break for you and the students. Be inspired. You don’t need to know anything about the items in the exhibit other than the title, artist’s name, and date/period. The purpose is to develop an appreciation for art throughout the ages and to be inspired by great art. Relax, and enjoy the tour with your students! Artist’s Name, Title YYYY
Gallery Tips 2: Maximize your image sizes. For a typical 7.5”h x 10”w slide, your images should be size to max out at 6.5”h and/or 9” wide. Always include the artist’s name, the title of the work, and the date (year). Include work from historical and contemporary artists, including your own if you like, to show students what good art looks like. In your narration, share what excites you about the work, interesting anecdotes, etc. Artist’s Name, Title YYYY
Name of Piece in Italics, by Artist First/Last Name, Date (year)
Wreath Of Oak Leaves And Acorns Greek, Late Classical or Early Hellenistic Period, 4th century B.C.
Gallery Tips 3: Aim for consistency from slide to slide in terms of image sizes, margins, etc. In this example, all images are 6” high. Use the Align tool (Home ribbon>Arrange>Align) to center your images horizontally and vertically. Avoid borders, unless it helps the image. If used, keep borders minimalistic. This provides a more sophisticated appearance across all IguanaPaint courses. Include 10-15 images per lesson. Artist’s Name, Title 1901
View from the Window at Le Grasby NicéphoreNiépce, 1826. The first successful permanent photograph, captured on oil-treated bitumen. Due to the 8-hour exposure, the buildings are illuminated by the sun from both right and left.
Abraham Lincoln, 16th President of the United States by Alexander Gardner, 19th c.
Gallery Tips 4: Keep your examples within your course topic. The variety shown here (architecture, drawings, jewelry, paintings, photography), are for example only. In keeping with the IMOFA visit being distinct from your lesson, make the background different from your lesson, and the same throughout the entire IMOFA tour. Conclude your tour with a slide noting the rewards of viewing beautiful works of art. Remember, enjoy and be inspired! Artist’s Name, Title YYYY
IMOFA Sample IMOFA slide 2. Loremipsum dolor sit amet, consecteturadipiscingelit. Vivamusmalesuadaorcised magna aliquameuismod. Integer malesuadapurus ac aliquamfacilisis. Integer purusest, hendrerit non ante sit amet, mollisfeugiatnunc. Suspendisseultricieserosnecornareornare. Nullameutortorvenenatis, condimentumurnaeu, dictum nibh.
IMOFA Sample IMOFA slide 3. Your IMOFA image can be color or grayscale. It can fill the frame, be cropped, etc. Integer purusest, hendrerit non ante sit amet, mollisfeugiatnunc. Suspendisseultricieserosnecornareornare. Nullameutortorvenenatis, condimentumurnaeu, dictum nibh.
IMOFA Sample IMOFA slide 4. Feel free to use the IMOFA museum photo in creative ways or formats. This includes using it as black/white, cropping, etc. Just make sure to include the entrance and name over the entry. Loremipsum dolor sit amet, consecteturadipiscingelit. Vivamusmalesuadaorcised magna aliquameuismod. Integer malesuadapurus ac aliquamfacilisis. Integer purusest, hendrerit non ante sit amet, mollisfeugiatnunc. Suspendisseultricieserosbamboozaornareornare. Nullameutortorvenenatis, condimentumurnaeu, dictum rabbit.
IMOFA Sample IMOFA slide 5. Feel free to use the IMOFA museum photo in creative ways or formats. This includes using it as black/white, cropping, etc. Just make sure to include the entrance and name over the entry. Loremipsum dolor sit amet, consecteturadipiscingelit. Vivamusmalesuadaorcised magna aliquameuismod. Integer malesuadapurus ac aliquamfacilisis. Integer purusest, hendrerit non ante sit amet, mollisfeugiatnunc. Suspendisseultricieserosbamboozaornareornare. Nullameutortorvenenatis, condimentumurnaeu, dictum rabbit.
IMOFA Sample IMOFA slide 6. You can see that there are many ways to incorporate the IMOFA entrance into your presentation. This slide uses PowerPoint’s image editing tools shown to the right: >(double-click the image for the tools to show on your Ppt menu ribbon to view). Include the IMOFA name in the upper left corner for your opening slide, as shown here. Loremipsum dolor sit amet, consecteturadipiscingelit. Vivamusmalesuadaorcised magna aliquameuismod. Integer malesuadapurus ac aliquamfacilisis.