Download
1 / 14
150 likes | 253 Vues
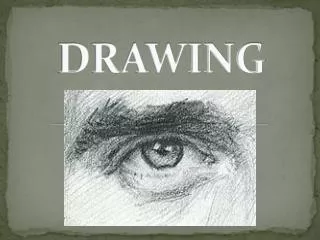
Design Drawing. Important Concepts Plan, section and elevations are a conceptual form of representation, in that they do not match optical reality. Parallel projectors meet the picture plane at right angles.

E N D
Important Concepts • Plan, section and elevations are a conceptual form of representation, in that they do not match optical reality. • Parallel projectors meet the picture plane at right angles. • Any element parallel to the picture plane remains true in size, shape and configuration. • One advantage of this drawing type gives us the ability to precisely locate points, length, slope of lines, etc. • One disadvantage of this drawing type is there is ambiguity of depth, requiring multiple drawings to convey dimension.
Principal Planes • Horizontal plane-plan or top view • Frontal plane-front elevation (side and rear elevations) • Profile plane-side elevation • Fold line-where two perpendicular planes intersect
Arranging views • The plan view is above and aligned with the front elevation. The side elevations are horizontally aligned with the front elevation. See illustration on page 138. • The number of views depends on the geometry and complexity of the object.
Constructing views • Alternate views can be constructed using given dimensions and transferring these dimensions and points by constructing a common fold line at 45 angle to the construction lines. For example, once a plan is drawn we can transfer the length vertically on the drawing surface to an elevation below. Similarly, we can project vertical dimensions of height horizontally on the drawing surface from one elevation to adjacent elevations. See page 140. • Review Principles and Techniques on page 142.
Exercise 1: Complete Exercise 6.1 in your sketchbook. Create the 3-D image for each of the 3 plan and elevations exercises. (30 minutes)
Plans • View from above an object looking down. • Rarely seen in reality. • Horizontal picture plane, and a horizontal section • Depicts length and width, but not height • All planes parallel to the picture plane maintain their true scale, size shape and proportion. • You must be able to distinguish between solids and voids to read a floor plan.
Line Weights • Line weights and poche can be used to distinguish elements on the plan that are cut, as well as infer the relative depth of elements beyond the plane of the cut, to convey depth. • Heaviest line weights are used to delineate cut materials, like walls and columns. • Intermediate line weights are used to delineate the edges of horizontal surfaces that lie below the plan cut, like counter tops. The further the surface is from the plan cut, the lighter the line weight used. • The lightest line weights are used to represent surface lines, pattern or texture.
Exercise 2-Draw a ¼”=1’-0” (approximate) floor plan of the small classroom at the back of the studio. Use line weights to communicate the difference between structural elements, furnishings and floor patterns. (30 minutes)
Poche is used to distinguish cut elements in plan and create a figure/ground relationship. Black is often used in small scale drawings, where a medium gray tone is used in large-scale drawings, as black can get too heavy.
Exercise 3-Redraw the floor plan of the classroom, but use poche to emphasize the shape of cut elements. (30 minutes)
Plan Elements • Doors and Windows-plan show the location and width of door openings, to a limited degree the door jambs and type of door operation (swing, slide, folding, pocket, and bi-pass) • Stairs-plan shows the actual size of the treads, but the rise is unknown. The path of travel terminates where the stairway passes through the plane of the cut in plan, indicated by a diagonal line. The arrow signifies the path of travel from the floor plan. • Elements above or below the plan cut are indicated by the use of dashed lines. Longer dashes used above the cut line (removed), shorter dashes for hidden elements below the plan cut.
Drawing Scale • Floor plans are generally drawn at 1/8” or 1/4” scale. The larger the scale of the plan, the more detail we must include, including wall thicknesses, window casings, door jambs, etc. • We use break lines to crop a drawing when its size is too large to fit a sheet or when the entire drawing is not required
Homework • Finish reading Chapter 6 Multi-view Drawings • Construct 5 different floor plans of spaces in your home, office, etc. Use line weights or poche to clarify your drawings. Please use ¼” = 1’-0” scale. Do not draft the plans. You may use a scale for measuring and creating guide lines, draw all lines without the use of a straight edge in pen or soft pencil.