Download
1 / 17
170 likes | 268 Vues
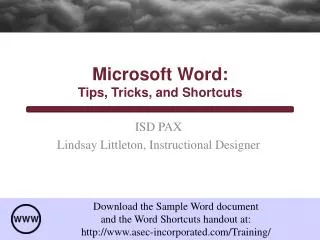
Word Tips. Objectives. Open and close MS Word Learn the parts of the Word window Learn the toolbar, their buttons, and what they do Create and save a new Word document Enter text Select words, lines, paragraphs Format text by changing alignment, font, font size, and font style

E N D
Objectives • Open and close MS Word • Learn the parts of the Word window • Learn the toolbar, their buttons, and what they do • Create and save a new Word document • Enter text • Select words, lines, paragraphs • Format text by changing alignment, font, font size, and font style • Create bulleted text • Insert and size clip art from Clip Art Gallery • Insert and size clip art from a file • Use Spell Check • Use Print Preview • Print a document
To Get Started… • Open Word by going to the “Start” button, finding Microsoft Office and then Word • Another way to open Word is to double-click on the blue Word icon that may be on your desktop
Toolbars • Word uses the following toolbars • Standard • Formatting • Drawing • Status • Also the ruler and task pane are visible
Standard Toolbar • The common applications used here are • New -- Open • Save -- Print • Cut -- Copy • Paste --Tables • Help -- Show Marks
Formatting Toolbar • The common applications used here are • Style -- Font • Font size -- Bold/Italics/Underline • Alignment -- Indent • Numbering --Bullets • Borders -- Highlighter and Text color
Status Toolbar • Cursor location • Current page -- Current section --Total number of pages • From top of page -- Line Number -- Column Number • Mode Indicator • OVR if this one is black you will write over your work if you try to edit • Spelling and Grammar Status
Task Pane • Use the task pane to quickly access • Clip art • Blank document • Help • Clipboard • Styles and formatting
Ruler • Some things you might measure in a document • Page width and height • Margins - top, bottom, left, right • Header and footer heights • Column widths • Table cell width and height • Tab indentions • Image size or distance from other page parts
Different Views • Normal • In this view you can not see graphics • Web Layout • How the page will look on the Internet • Outline • Need to use paragraph styles for this view to work properly • Reading • This is easier to read, but not how page will print • Print • This view shows you exactly how the document will look on a printed page. Here you can see any graphics or tables as well. This is the easiest view to work in.
Page Setup • File – Page setup • Margins • Paper size • Paper source • Layout
Save Document • It is a good habit to save your document when you create it and then to often click the save icon to ensure that you do not loose data • Remember that the default location is “My Documents” and the default file name is “Document1.doc” • You may change either of these defaults when you first save your presentation
Add and Format Text • Once you start typing in your document you may change the way the document looks • Styles • Font dialog box (or use Formatting toolbar) • Format painter • Bullets • Borders and shading • In order to make changes to a word or line you first have to highlight the text
Clip Art • You can add graphics to a document to add interest • Insert – Picture – Clip Art • Insert – Picture – File • Task pane – Clip Art • Once you have a graphic in place you can change the size or location if needed
Clip Art • To change the location of graphic • Right-click on graphic, choose “Format Picture”, then go to the “Layout” tab and choose “Square” • To change the size of graphic • Right-click on graphic, choose “Format Picture”, then go to the “Size” tab and enter the dimensions you need • You can also change the size by grabbing the handles around the graphic and dragging to the needed size
Tips • Use the “Show-Hide” button to see the formatting marks so you can double-check the formatting in a document • Use “Spell Check” to double-check your work before you print • Check “Print Preview” before you print to catch any problems in alignment, formatting or number of pages
Print • Once you have finished you are ready to print your document if you need hard copies • You can print right from “Print Preview” or through “File” then “Print” • The “Print Dialogue” box allows you to choose how you want to print out a hard copy • Options • Number of copies • Which pages need to be printed