Download
1 / 25
800 likes | 2.82k Vues
Engine Removal and Disassembly. Chapter 50. Objectives. Label and organize parts prior to engine removal Remove an engine from a vehicle in a safe and methodical manner Disassemble the engine following the correct procedures Keep parts organized for reassembly

E N D
Engine Removal and Disassembly Chapter 50
Objectives • Label and organize parts prior to engine removal • Remove an engine from a vehicle in a safe and methodical manner • Disassemble the engine following the correct procedures • Keep parts organized for reassembly • Inspect and interpret causes internal engine wear
Introduction • Procedures must be followed carefully • Parts must be removed and inspected in an orderly manner • You cannot hurry • Signs of wear can be clues • Correct repair will prevent the problem from occurring again • Be sure to consult the applicable repair manual • Procedures differ
Engine Removal • Important steps • Disconnect battery cables • Remove the hood • Remove air cleaner • Label all wires and vacuum lines • Drain coolant and oil • Remove the radiator • Remove the distributor and spark plug wiring • Remove the direct current (DC) generator • Remove the heater hoses and ground strap
Engine Removal (cont'd.) • Remove switches and sensors • Remove the throttle linkage, cable, or wiring • Mark accessory brackets and remove accessories • Remove exhaust components • Remove and plug the fuel line • Determine whether to remove the transmission • Separate the engine and transmission/transaxle • Unbolt the engine mounts
Engine Removal (cont'd.) • Remove the engine from the vehicle • Remove transaxle (if necessary) • Remove lower ball joints • Have drain pan ready • Disconnect speedometer cable, transmission shift linkage, and clutch cable • Attach a sling to the engine and transaxle assembly • Remove bolts • Roll shop crane until the engine can be lowered safely
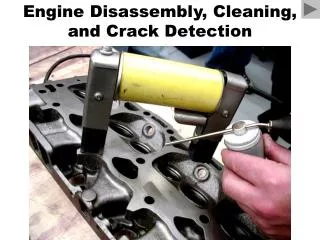
Engine Disassembly • Important steps • Remove clutch parts • Remove hybrid armature (puller required) • Mount engine to a stand • Remove coolant pump • Remove oil pan • Remove valve covers • Slip a knife blade between head and sheet metal valve cover • Tap a curved, strong area with a rubber mallet
Engines with Pushrods • Stud mounted rockers • Loosen nuts on studs before disassembly and cleaning • Turn rocker arms to the side to remove the pushrods • After heads are cleaned they can be removed one at a time • Keep pushrods in order
Engines with Pushrods (cont'd.) • Shaft-mounted rockers • Should be loosened slowly and evenly • Remove the pushrods • Pushrods can be pushed through holes made in a piece of cardboard • Pushrods must be kept in order
Engines with Pushrods (cont'd.) • Valve lifters • Remove valve lifters • Wipe oil off bottom of lifters • Label with a felt marker • Reused flat tappers must be used on original cam lobe • Usually replaced • Roller lifters are usually reusable • Use chemical cleaner to soften varnish
Engines with Pushrods (cont'd.) • Pushrod engine camshaft • Some pushrod engines use bolt-on cam thrust plate • Varnish may builds up on edges of cam journals • Makes it difficult to remove the cam • Vibration damper removal • Most engines have a bolt that holds it on the crankshaft • Some will slip off after the bolt is removed • Others are pressed-fit
Overhead Cam Cylinder HeadRemoval • Important steps • Position the number one piston at TDC and note the location of timing marks • Compare the sketch in the repair manual to the marks on the timing belt • Draw a sketch of the cam timing • Remove timing cover
Overhead Cam Engines (cont'd.) • Remove the cam drive assembly • Pushrod engines • Unbolt cam sprocket and slide or pry off the cam • Remove the chain • Reinstall sprocket and tighten one bolt finger tight • Overhead cam engines • Remove the chain or bolt tensioner
Overhead Cam Engines (cont'd.) • Remove the cylinder heads • Mark one of the cylinder heads “left” or “right” if there is more than one • Be careful not to break a casting • Inspect the head gasket • Evidence of coolant or oil leakage • Signs of detonation
Cylinder Block Disassembly • Modern engines use premium piston rings • Will not accommodate a worn cylinder bore • Ridge causes • Pressure of combustion forcing the piston ring against the cylinder wall • Lack of clean lubrication at the top of the cylinder
Cylinder Block Disassembly (cont'd.) • Important steps • Turn engine over and mark main caps and rod caps • Main caps must be installed in one direction only • Connecting rods and caps are mated to one another and must be marked for identification • Remove and inspect the piston and rod assembly • Inspect the piston, rings, rod, and bearings • Remove the crankshaft and inspect for wear • Remove the camshaft
Cylinder Block Disassembly (cont'd.) • Remove and label cam bearings • Remove core plugs • Clean engine parts • Remove the crank sprocket or gear • Finish diagnosis and repair of engine assembly