Download
1 / 48
480 likes | 643 Vues
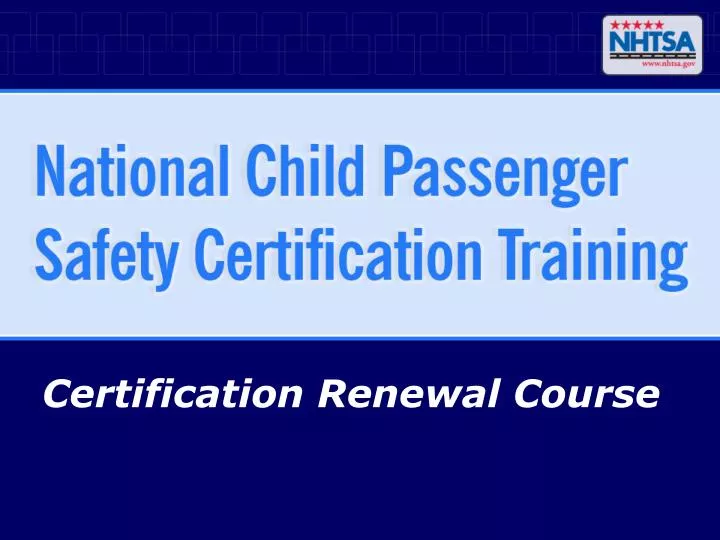
Certification Renewal Course. Renewal Course Objectives & Content. For expired CPS Technicians who have maintained their knowledge and skills To renew certifications without having to retake the entire certification course Renewal course - NOT a refresher course.

E N D
Renewal Course Objectives & Content • For expired CPS Technicians who have maintained their knowledge and skills • To renew certifications without having to retake the entire certification course • Renewal course - NOT a refresher course
National CPS Certification Program: A Partnership • NHTSA • Developed the original CPS curriculum in the mid-1990s • Updates content as needed • National CPS Board • Oversees the quality and integrity of the training and certification requirements • Certifying body – Safe Kids Worldwide • Responsible for administering all aspects of certification
Course Content • Presentation/Lecture • What is new and what is different with 2007 curriculum • Brief technical update and look at major trends • Skills test • 4 “Select and Install” scenarios • 3 “Misuse” scenarios. • 2 attempts on each of the 7 scenarios are allowed • Written test • 50 questions - Most are multiple choice • Open book • Graded on-site by instructors • 84% is passing (can miss 8 questions)
Course Objective • Expired Technicians who successfully complete this course will have met the requirements to be recertified as CPS Technicians • Students who do not pass • May take the Renewal course again or • Can retake the Certification course
What Is New, What Is Different With Revised Curriculum • New Design features • More emphasis on “need to know”, less “nice to know” information • More emphasis on Techs as educators rather than installers • More information on LATCH
The Curriculum Workbook - New Design Features • Student workbook intended to be a resource • New design features for this edition: • Each chapter focuses on a single topic – less repetition of information • Student manual used as a “workbook • Appendix, glossary and index
Chapter Topics • Learn, Practice, Explain • Basics of Injury Prevention and Crash Dynamics • Who makes the Rules? • Seat Belt Systems that Pre-Crash Lock • Seat Belt Systems Without Pre-crash Locking Features • LATCH • Other Vehicle Occupant Protection Systems
Chapter Topics • Introduction to Child Restraints • Rear Facing Child Restraints • Children in Forward Facing Child Restraints • Children in Booster Seats • Kids in Seat Belts • CPS in Other Vehicles • Communication and Location in the Vehicle
What Is Different - Philosophy • “Need to know” emphasized in chapter text • “Nice to know” in appendices and resources • Learn, Practice, Explain • Focus on technicians as educators, not installers Learn Practice Explain
What Is Different - Terminology • Terminology • “Seat belt” preferred over ”safety belt” • “Non-regulated” products has replaced “aftermarket” • New terms for way belt systems are taught • Way belt systems are taught: • Belts that pre-crash lock, and • Belts that do not pre-crash lock
Seat Belt Systems With Pre-Crash Locking Features • Latchplates • Locking Latchplate - No distinction between “standard” and “lightweight” locking • Switchable latchplate • Retractors • Automatic Locking Retractors (ALR) • Switchable Retractors
Seat Belt Systems Without Pre-Crash Locking Features • Latchplates • Sliding latchplate • Sewn-on latchplate • Retractors • Emergency Locking Retractor (ELR) • When neither latchplate nor retractor locks, use one of four approved additional steps: • Locking clip/lockoff • Belt shortening clip • Flip latchplate • Twist buckle stalk
Other Content • More LATCH information - LATCH is much more prevalent now than in 2004 • “Choosing and using” chapters based on NHTSA’s 4 Steps for Kids • Each “4 Steps” chapter consists of four main areas for discussion: • Selection - Right CR for the child • Direction - Face the right way • Location - In the right spot in the vehicle • Installation - Secure CR to the vehicle with the child secured in the CR
NHTSA’s 4 Steps for Kids • Rear-Facing • Forward-Facing • Boosters • Seat Belt
Technical Update and Major Trends - Topics • Who Makes the Rules • LATCH • Airbags • Step 1. Rear-facing • Step 2. Forward-facing • Step 3. Booster Seat • Step 4. Seat Belt
Who Makes the Rules - NHTSA FMVSS 213 as of August 2005: • Performance standards for child restraint systems up to 65 lbs. • New test requirements including: • A bench seat cushion that is more sloped • A more reclined bench seat back • Test speeds closer to 30 mph
Who Makes the Rules - NHTSA • New dummies • 12-month old, 22 lb. CRABI • 3-year old, 34 lb. Hybrid III • 6-year old, 52 lb. Hybrid III
Who Makes the Rules - NHTSA • Revised “Ease of Use” ratings • Up to 5 stars based on: • Preassembled vs. assembly required • Clarity of labeling on CR • Ease of securing child in CR • Ease of installing CR in vehicle • Clarity of written instructions • Manufacturers take ratings into consideration for new products
Belts that pre-crash lock: Locking latchplate Automatic locking retractor Switchable retractor Belts that do not pre-crash lock: Sliding latchplate Sewn-on latchplate Emergency locking retractor Four approved additional steps to install a CR: Locking clip/lockoff Belt shortening clip Flip latchplate Twist buckle stalk Seat Belt Systems
LATCH Definitions • Tether Anchor: Vehicle hardware the CR’s tether strap hooks to. May be factory installed or retrofitted • Tether Strap: Strap of webbing on the CR that attaches to the tether anchor Courtesy: “The LATCH Manual 2007”, Safe Ride News Publications
LATCH Definitions • Lower Anchor: Horizontal bar in or near the vehicle seat bight that provides a secure anchor for the CR’s lower attachments • Lower Attachment: Rigid metal or flexible webbing that connects the CR to the lower anchor in the vehicle Courtesy: “The LATCH Manual 2007”, Safe Ride News Publications
Lower Anchors And Attachments • Sometimes lower anchors and attachments provide a better fit, sometimes the seat belt does • Cannot use inner anchors from side positions unless both CR and vehicle manufacturers allow • Only one CR attachment per lower anchor • Main emphasis: Follow the CR and vehicle manufacturer instructions Courtesy: “The LATCH Manual 2007” Safe Ride News Publications
Why Use a Tether Strap? • Tethers improve performance of forward facing CRs • Reduces the forward movement and rotation of the seat • Adds additional stability to CR installation Courtesy: “The LATCH Manual 2007” Safe Ride News Publications
Tethers - General Recommendations & Cautions • Encourage top tether use with all FF CRs • Tether required with FF CRs installed with lower attachments • Use only those anchors designated for a seating position • Generally permitted to hook only one tether per anchor • Tether anchors may be made of belt webbing in pickup
LATCH Weight Limits • Follow the CR and vehicle manufacturer instructions for anchor and attachment weight limits • Limits vary from manufacturer to manufacturer • Contact manufacturers for answers to unresolved questions Courtesy: “The LATCH Manual 2007” Safe Ride News Publications Courtesy: “The LATCH Manual 2007” Safe Ride News Publications
Rear Facing Tethering • NEVER tether rear-facing CR unless allowed by CR manufacturer • Most rear facing CRs cannot be tethered
Airbag Reminders • Children under 13 in a back seat - almost always safer than in the front • Rear-facing infants must never ride in front of an active air bag Courtesy of Insurance Institute for Highway Safety
Air Bag Active Suppression: On-Off Switches • Built in on-off switch in vehicles with no rear seat • On-off switches may be installed with written permission from the NHTSA if: • An infant must be transported in the front seat • Children <13 must be transported in the front seat • Drivers cannot move seat at least 10 inches from the air bag • Driver has medical condition needing deactivation
Air Bag Automatic/Passive Suppression • Turns passenger air bags off under specific conditions • Smaller occupant • If seat is empty • Use back seat, if possible, even if air bag suppression system is present
NHTSA’s 4 Steps for Kids 1. Rear-Facing 2. Forward-Facing 3. Booster 4. Seat Belt Courtesy: Children's Hospital of Philadelphia
Step 1. Rear-facing • More focus on keeping children facing the rear as long as possible • Basic AAP recommendations: • Face the rear until at least 1 year of age and weigh at least 20 lb • Infants who weigh 20 lb before age 1 should ride rear-facing in a higher weight convertible or infant seat until at least 1 year of age. • For maximum protection, rear-facing until reaching the maximum RF weight/height for CR
Rear-Facing Selection • RF seats with higher height/weight limits more common • Almost all convertibles RF to 30-35 lbs. • Not many models for low birthweight infants (<5 lbs.) 14 months, 24 pounds
Rear-facing Installation • Reminder: Never place a RF CR in front of active front airbag • Recline angles range from 30-45 degrees from vertical • Use manufacturer specified angle • Use angle indicator as indicated by the manufacturer
YES! Rear-facing Installation • Rule of thumb: Use either adjustable foot or towel/noodle, but not both • Avoid too much recline Adjustment foot
Rear-Facing Tilt • Can occur with a base and a switchable retractor • May be due to over-tightening and/or pulling up on the shoulder belt • Fixes: • Reinstall it without over-tightening • Try another seating position • Switch to ELR and use a locking clip
Step 2. Forward-Facing: Selection • When to use? • Minimum 1 year old and 20 lbs. • Until child reaches max weight or height allowed • More models with harnesses beyond 40 pounds
Graco Nautilus 65 lbs. Evenflo Triumph Advance 50 lbs. Britax Frontier 80 lbs. Safety 1st Apex 65 65 lbs. Step 2. Forward-Facing: Selection • Higher weight harness restraints recommended for: • Heavier than 40 lbs but behaviorally “challenging” children (e.g., 40+ lb. 2 year old) • If other option is restrained by lap-only seat belt
Step 2. Forward-Facing: Installation • Recline angle • Many CRs recommend upright position when forward facing • Some are allowed to be semi-reclined as well as fully upright • Use tether when possible
Step 3. Boosters: Selection • Boosters are twice as effective than belts alone • Use high-back models with: • Low vehicle seat backs, and • No head restraints
Step 3. Boosters: Installation • A few boosters allow for connecting them to the vehicle using lower attachments and/or tether as well as seat belt - Check the instructions • If a child in a booster must ride in the front seat: • Be sure belts are properly positioned • Move vehicle seat back as far as possible
Step 3. Boosters: Installation • Belt-positioning boosters must be used with lap and shoulder belts • Belt-positioning boosters must never be used with only a lap belt Courtesy of Children’s Hospital of Philadelphia
Poor Belt Fit Correct Belt Fit Step 4. Seat Belts • When children can: • Sit without slouching • Bend knees over edge of seat and feet stay flat on floor • Correctly wear the seat belt with: • Lap belt low and snug across the hips • Shoulder belt across mid-chest and shoulder • Use properly adjusted vehicle head restraint • Stay in position for the entire ride • Center-rear shoulder belts - required in all 2008 passenger vehicles
As A Final Reminder… • Attention to Non-Traffic Car Injuries • Reducing Liability • Re-certification Overview • Role of the CPS Technician
Attention to Non-Traffic Car Injuries • Be prepared to share other “in and around cars” safety information other than child restraints and seat belts • Issues needing attention include • Vehicle back-overs • Being locked in a trunk • Children being caught in power windows • Unattended children and heat related injuries and death
Reducing Liability • Seek knowledge & take training SERIOUSLY • Stay current • DOCUMENT (training & activities) • Provide ONLY current & up-to-date information • Say “I don’t know” if necessary • Always follow manufacturers’ instructions
Re-certification Overview • 2-year certification cycle • Two general steps to successful re-certification: • Meet all pre-registration requirements, including: • Verified seat checks • Community event • Continuing education • Teaching hours (for Instructors) • Register and pay for re-certification Courtesy: www.safekids.org/certification Page 1 of 2
Role of the CPS Technician • Provide current CPS information to the community • Educate and demonstrate correct use to the parent(s) • Help parent(s) make educated decisions about “tough choices” and “best practice” recommendations