Download

1 / 4
0 likes | 10 Vues
Get the best tips on achieving a professional look with wood finishes paint in Ahmedabad, India. Perfect your wood surfaces with smooth and long-lasting results.<br>visit : <br>https://angelcoating.com/wood-finishes-paint

E N D
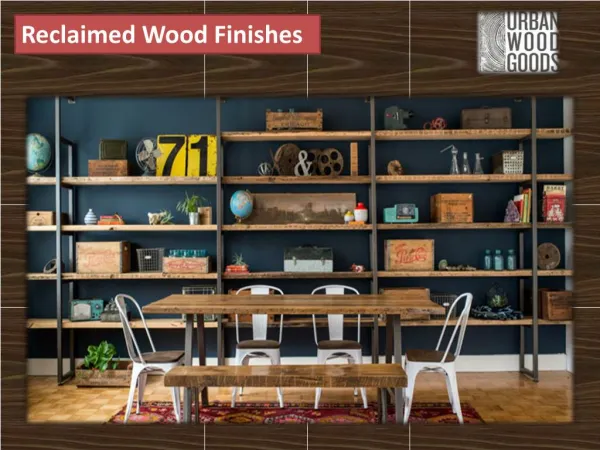
How To Achieve A Professional Look With Wood Finishes Paint Achieving a Professional Look with Wood Finishes Paint Wood finishes paint can transform your furniture and woodwork, giving them a polished, professional appearance. Whether you’re a DIY enthusiast or a seasoned craftsman, achieving a flawless finish requires the right materials, techniques, and a bit of know-how. Here’s a comprehensive guide to help you get that professional look with wood finish paints.
How to Get a Professional Finish with Wood Paints 1. Choose the Right Paint The first step to a professional finish is selecting the right type of paint. Wood finish paints come in various formulations, each suited for different applications and desired outcomes. ● Water-Based Paints: These are easy to clean up, have low odor, and dry quickly. They are great for indoor projects. ● Oil-Based Paints: Known for their durability and smooth finish, oil-based paints are ideal for high-traffic areas and outdoor projects. ● Acrylic Paints: Versatile and durable, acrylics work well for both indoor and outdoor projects. They offer a good balance between water-based and oil-based paints. 2. Prepare the Surface Preparation is key to achieving a professional finish paints. Follow these steps to ensure your wood surface is ready for painting: ● Clean the Surface: Remove any dirt, grease, or old finish. Use a mild detergent and water, then let it dry completely. ● Sand the Wood: Sanding creates a smooth surface and helps the paint adhere better. Start with coarse-grit sandpaper (80-100 grit) to remove rough spots, then use finer grit (180-220 grit) for a smooth finish.
● Fill Imperfections: Use wood filler to fill any cracks, holes, or imperfections. Sand the filler smooth once it’s dry. 3. Prime the Wood Priming is an essential step that shouldn’t be skipped. A good primer will seal the wood, provide a uniform base for the paint, and enhance adhesion. ● Choose the Right Primer: Match your primer to the type of paint you’re using (water-based primer for water-based paint, oil-based primer for oil-based paint). ● Apply Evenly: Use a brush or roller to apply an even coat of primer. Allow it to dry completely, then lightly sand with fine-grit sandpaper to smooth out any imperfections. 4. Apply the Paint Now it’s time to apply the paint. Follow these tips for a professional finish: ● Use Quality Brushes and Rollers: Invest in high-quality brushes and rollers designed for your type of paint. They provide better coverage and a smoother finish. ● Apply Thin Coats: Apply multiple thin coats of paint rather than one thick coat. This helps to avoid drips and ensures even coverage. ● Sand Between Coats: Lightly sand between each coat with fine-grit sandpaper (220-320 grit) to remove any imperfections and ensure a smooth finish. Wipe away the dust with a tack cloth before applying the next coat. ● Follow Drying Times: Allow each coat to dry completely before applying the next. Follow the manufacturer’s instructions for drying times. 5. Finishing Touches To achieve a truly professional look, pay attention to the finishing touches: ● Seal the Paint: For added durability, apply a clear topcoat or sealant. This is especially important for surfaces that will see heavy use, such as tabletops and kitchen cabinets. ● Buff for a Smooth Finish: Once the final coat is dry, lightly buff the surface with a fine-grit sanding sponge or steel wool for a super-smooth finish. Wipe away any dust with a tack cloth. ● Clean Up Edges: Use a razor blade or fine-grit sandpaper to clean up any paint that has bled over edges or onto hardware. 6. Maintenance
To keep your wood finishes looking their best, follow these maintenance tips: ● Clean Regularly: Dust and clean surfaces regularly with a soft, damp cloth. Avoid abrasive cleaners that can damage the paint. ● Touch-up Scratches: Keep a small amount of the paint used for touch-ups. Address any scratches or chips promptly to maintain the finish.