Download
1 / 5
50 likes | 79 Vues
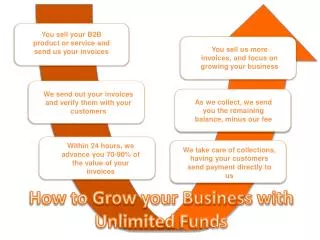
With the passage of time, we have evolved ourselves in such a way that today we have all the services at our hand. Whatever we want, we can get easily as all these things are just one click away. Take anything from the present world, whether it is any service or product, all these things can be accessed remotely. You need not do the task in real or manually.<br><br>visit us our website to know more: - https://goo.gl/NDM4o4

E N D
How to send Invoices through your iOS device in QuickBooks
With the passage of time, we have evolved ourselves in such a way that today we have all the services at our hand. Whatever we want, we can get easily as all these things are just one click away. Take anything from the present world, whether it is any service or product, all these things can be accessed remotely. You need not do the task in real or manually. Now, in this blog, QuickBooks support is talking about sending invoices through your iOS device if you are self- employed. Big companies and organizations have set rules or letterheads to send notifications but for a self- employed person, there are no such rules. No, but this does not mean that self-employees are free to do anything. They also need to send invoices and bills to maintain their work properly.
QuickBooks offer this feature which is already embedded in its software package. You can follow the following trends to learn how this thing is done. • On the bottom of your screen, look for the invoices button and press it. • In the next page, tap the create invoice link to create one. You can also press the + button to add one. • Type in the name of the recipient or you can choose the contacts column to select one recipient from your phone contact list. • On the next screen, enter the details such as email address, phone number and home address etc to make it more professional.
• button. • can add as many items as you want. • Fill the description according to your need. • In the Rate column, enter the amount. You can set a flat rate, hourly rate or per unit rate etc also. • Finally, add some contact info or your own contact and after this, press the send button to send it. Save these details by pressing the save Now, add some invoicing items to the list. You
If you are facing any difficulty in following the above- described steps then you can contact QuickBooks support for your help. This support team can solve your problems instantly by remotely controlling your account for a short moment of time. The expert on the other side of the phone is trained enough to tackle any situation. Original Source