Digital Photography From Using the Camera to Integrating Images into Your Program
370 likes | 769 Vues
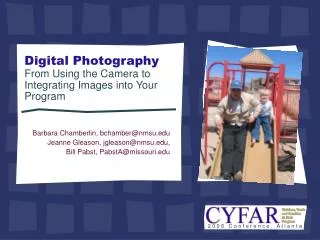
Digital Photography From Using the Camera to Integrating Images into Your Program Barbara Chamberlin, bchamber@nmsu.edu Jeanne Gleason, jgleason@nmsu.edu, Bill Pabst, PabstA@missouri.edu Our Plan for the Next 90 Minutes Using any Camera Taking better photos Fixing photos

Digital Photography From Using the Camera to Integrating Images into Your Program
E N D
Presentation Transcript
Digital PhotographyFrom Using the Camera to Integrating Images into Your Program Barbara Chamberlin, bchamber@nmsu.edu Jeanne Gleason, jgleason@nmsu.edu, Bill Pabst, PabstA@missouri.edu
Our Plan for theNext 90 Minutes • Using any Camera • Taking better photos • Fixing photos • Organizing photos • Sharing • You won’t learn everything, but you’ll know enough to learn everything
Turning the camera on Turn camera on
Taking photos Shoot photos
Viewing photos Play or view photos
Viewing photos Move to next photo
Zoom Wide/Telephoto
Flash Toggle flash
Flash options Flash on Flash off Red eye
How many images on camera? • Size of storage card(8, 16, 32, 64, 128, etc)
How many images on camera? • Size of storage card(8, 16, 32, 64, 128, etc) • File Size (number of pixels in the picture) • 640x480 • 2260x1614 • Compression or Quality
Changing Settings/Menu Menu button
Moving through Settings Navigation button
Settings - file size (pixels) Image Size/Resolution
Settings - quality, compression Image Quality/Compression
Extra stuff you’ll want • Extra battery • Card reader • Additional card (with more space)
Deleting on the camera Deleting images off camera Delete button
Getting images off camera • Use cable and software • Use card reader • Use Adobe Album
Resource for Teaching • Digital 4-H Photography Project • 6 learning experiences • PowerPoint presentations (with notes) • Handouts cahe.nmsu.edu/4h/photography
Resource for Teaching • Good book for teaching content Teaching with Digital Images: Acquire, Analyze, Create, Communicate. Editors: Bull and Bell. ISBN: 1564842193
Fixing and Organizing Photos • Your photos are perfect… but what about those that other people take? • How do you organize and group your photos so they are useful?
Let’s Play with Album • Getting photos: from camera and computer • Organizing photos: • tagging/titles/keywords • albums/folder • Fixing photos • Stuff you can make • Printing options
Album Software • Many types • Adobe Photoshop Album ($49.00) and free download • http://www.adobe.com/products/photoshopalbum/ • Google Picasa (Free) • http://picasa.google.com/) • Apple iPhoto (part of $79 iLife Suite)
Brainstorming… • How can digital images be used… • With YOU holding the camera? • With THEM holding the camera?
Questions • What camera should I buy? • Why are my PowerPoints so big? • Is it really ok to print photos at home?
What to do with them once you’ve got ‘em • Printing • High-speed access: Online • Printer • Photo development house (take card) • Web or presentation • Resize before using (72-100 ppi) • Save in proper format
What to do with them once you’ve got ‘em • Archive • Back up photos to CD • Back up photos to DVD • Post photos to online service and order CD