Download
1 / 8
80 likes | 128 Vues
simple description about how to implement jquery for designing websites.

E N D
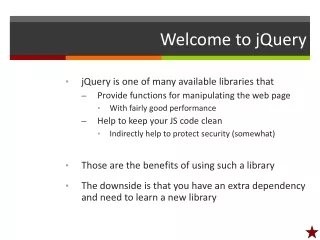
Learning Objectives By the end of this lecture, you should be able to: • Describe what is meant by a software library- particularly as it applies to JavaScript • Describe the need for libraries as applied to the issue of cross-browser compatibility • Describe the role played by jQuery • Install/Configure jQuery to run on your web pages • Become familiar with a page containing everything you need to get started with jQuery that integrates CSS (internal and external), CSS classes, standard JS function, and the jQuery ‘ready()’ function.
Rinse, Lather, Repeat, Repeat, Repeat • All programmers eventually observe that certain types of tasks/requirements have a habit of appearing over and over again. • As an example relating to web design, a common task encountered is to ensure that a specific type of functionality works consistently regardless of which browser the visitor happens to be using. • In fact, this particular task is one of the thorniest issues in web design. • The issue is even more pronounced in recent years now that so many people do their web surfing using handheld devices. • Skilled JavaScript programmers have made $$ using JS to help deal with this issue. For example, one can write code to check to see what type of browser the visitor is using, check for the size of their browser window, and then adjust the dimensions of images on their web page accordingly. • The code to accomplish a task such as is likely to be: • Tedious • Lengthy • Error-prone • To further complicate things, suppose that down the road, a new uber-popular browser gets introduced. Suddenly, your JS code that has tweaked for hours and hours to achieve a certain look based on all the “major” browsers in the past, no longer works for this new, trendy browser.
Software Libraries • Software Library: A software library is a collection of code. A JavaScript library is typically a file or collection of files each of which has a bunch JS functions. These files have (usually) been widely tested and finessed to tackle some commonly encountered problems/issues in web page design. • Public Domain: These libraries are often in the public domain which means that they are intended (typically) to be free. One of the major benefits to this system, is that there is typically an entire community behind these ventures that is forever adding, modifying, improving the libraries’ code as needed. This means that if some new browser suddenly appears on the scene and becomes insanely popular, it’s only a matter of time before the community will jump in and update the library to deal with issues encountered by the newcomer. • This is very similar to the philosophy behind Wikipedia (and in fact, any ‘wiki’) with which many of you are familiar. • There are several JS libraries out there including: • Dojo • Prototype • jsPHP • And…….. jQuery • If you wish to use any of these libraries, you can easily download and/or link to any of these libraries in your web pages.
Enter jQuery! • Each JS library has its own advantages and disadvantages. Some of the reasons that jQuery has become so popular (and why we have chosen it for this course) include: • Small size: Every time a user visits your page, along with the HTML file, CSS file(s), images and so on that will be needed to be downloaded to their browser, they will also need to download the library. Some versions of the jQuery library are less than 10K in size! • Popular: We’re not taking popular in the high-school sense of the word. When it comes to a software library, popular is good since it means that there is a large and active community constantly testing, updating, and improving the code. • Tested: Because of the widespread use of jQuery, bugs and other limitations are quickly revealed and fixed. • Plug-Ins: These are small add in programs that typically have some highly specialized use. The large jQuery community has resulted in the development of thousands of plug ins. As an example, the little calendar that pops up when you visit some sites and click on a date would take quite a bit of JS progrmaming. However a single line of jQuery code linking to the ‘Datepicker’ plug in would accomplish the same thing! • Free: jQuery is free. Some libraries are developed by commercial software design firms and therefore do cost money. Professionally written and maintained code does of course have its own set of advantages, but again, you (literally) pay for it.
Running jQuery • jQuery exists as a single external JS file. You can run jQuery one of two ways: • Download the jQuery library file to your computer • Link to a remotely hosted version of the library code from a reliable website • Each option has its pros and cons • Download: The main benefit is that if you are offline, the file will still be there on your computer when you are developing your code. • Link: These externally linked files are typically the most up to date. However, it requires that the viewer of your page is online. It also takes a few extra milliseconds which can, in theory, slow down your site a little bit. Still, once your page goes ‘live’, we typically use the version linking to an external file. • Here is a link to an article discussing these issues in more detail. • I would recommend using the externally linked version. • There are many different servers from reputable companys such as Microsoft, Google, jQuery and others. You can easily find links to these online. Here is the link to the April 2017version on Google’s site. <script src="https://ajax.googleapis.com/ajax/libs/jquery/3.2.0/jquery.min.js"></script> • Remember that this link must go in the ‘head’ section of your HTML file. • Note that the closing </script> tag IS required. • Notice that this link refers to version 3.2. If you encounter links to later versions of jQuery, feel free to use the latest version. • This link must be present on every page in which you use jQuery commands. • Not surprisingly, this link must appear before any jQuery commands you use. • Both you – and the viewer visiting your page -- must be online for this link to work. If you are doing some coding work in an offline environment you will have to download the jQuery library to your computer and link to it locally. • IMPORTANT: Links to CSS stylesheets (whether external or internal) must be placed BEFORE Any JavaScript programming, including jQuery.
The ‘ready()’ function Okay, let’s get started with our first jQuery function! We will begin with a function called ‘ready()’, or more specifically, document.ready() • The ‘ready’ function executes after the entire web page has finished loading in the visitor’s browser. This is a very important function to be comfortable with since much of what we do in real world JS involves modifying content only after being certain the it has been loaded and made visible to the user on the page. • As a result, you will typically include this function on every page in which you are using jQuery. <script> $(document).ready( function() { // Some jQuery code will // go in here... } ); </script> I am *well* aware that this is some awkward looking code, but, never fear, all will be explained in time!
Type it out! • See the file: first_jquery.htm • As always, study the file closely. Be sure you clearly understand everything that is in the document • I don’t expect you to completely understand the ready() function just yet. While I’m sure many of you can see what that line is intended to do, don’t worry if you can’t. We’ll cover it in our next lecture. • Don’t be passive - TYPE THE CODE OUT FOR YOURSELF!!! • It’s important not to study “passively”. This means actually typing out the code yourself. Once you’ve typed it out without errors and confirmed that it works, you can – and should – modify and experiment with the code. • At the very least, be sure to type out the jQuery lines (the script tag, and the ready function). • Your objective is to put everything we’ve done so far together: • HTML Comments • JS Comments • Order (CSS before scripts), Link to jQuery file before any actual jQuery code, etc • Use of div sections (or semantic tags) • Use of ID attributes • CSS classes • External and Internal (aka embedded) CSS • JS functions • Linking a button to a JS function • Syntax of the jQuery ready() function