
Suspended Ceiling Installation – Step-by-Step Process
The other benefit of a drop ceiling is it is easy to install and maintain. You can install the drop ceiling yourself if you have little knowledge about the architectural field. All you need is to gather the instruments and tools. You need to create a grid with the help of ceiling furring channels to level out the ceiling and walls. Furring channels will help you create a symmetric ceiling frame for your drop ceiling. You can install the drop ceiling in a domestic or commercial place. Your drop ceiling will help you reduce the moisture factor.

Suspended Ceiling Installation – Step-by-Step Process
E N D
Presentation Transcript
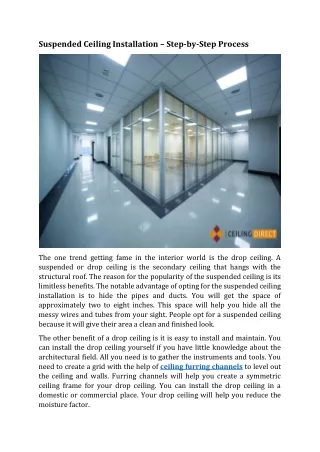
Suspended Ceiling Installation – Step-by-Step Process The one trend getting fame in the interior world is the drop ceiling. A suspended or drop ceiling is the secondary ceiling that hangs with the structural roof. The reason for the popularity of the suspended ceiling is its limitless benefits. The notable advantage of opting for the suspended ceiling installation is to hide the pipes and ducts. You will get the space of approximately two to eight inches. This space will help you hide all the messy wires and tubes from your sight. People opt for a suspended ceiling because it will give their area a clean and finished look. The other benefit of a drop ceiling is it is easy to install and maintain. You can install the drop ceiling yourself if you have little knowledge about the architectural field. All you need is to gather the instruments and tools. You need to create a grid with the help of ceiling furring channels to level out the ceiling and walls. Furring channels will help you create a symmetric ceiling frame for your drop ceiling. You can install the drop ceiling in a domestic or commercial place. Your drop ceiling will help you reduce the moisture factor.
A drop ceiling is also beneficial for insulation. The double cover of the roof will help you keep the inner temperature moderate. You can install the drop ceiling in many ways. You have to select which type of material you should use for the drop ceiling. One of the most common materials is none other than gypsum sheets. In addition to the sheets, you can also use fabricated panels. You are on the right page if you want to know the simple method to install the ceiling easily. You can read the below points to learn the step-by- step process of installing the drop ceiling. 1. Take accurate measurements: The first point is to measure out your space with precision. Understand that this first step is the most crucial point and needs your total attention. Any negligence or error in this step can cause you many problems afterward. You have to take out a measuring tape and measure the length and width of your roof. You also need to mark all the points where you want to install the ceiling joist while you measure the ceiling. Know that doing all the calculation before is easy and helps in the installation process. Use a pencil to chalk out the points. You also need to write down the measurements of your roof. You also need to mark the points at least three inches below the previous ceiling.
2. Cut the wall angles: With the help of tin snips, you can cut the wall angles according to the length of your room. You require L-shaped pieces to hold the ceiling tiles. After cutting the wall angles, you can secure the wall angles with the help of an electric screwdriver. Make sure you screw the wall angles tightly. 3. Install the grid system: The third step is to install the grid system for the drop ceiling. You also need to install the runners to support the whole weight of the grid system. You also have to use clips at the end of the pieces to attach them.
4. Hang the runner: After that, you need to hang the runner on every third joist. In these joists, you have to dangle wires. These wires will help you hold the runners. 5. Cut the ceiling tiles: Now that your grid installation is complete, you need to cut the ceiling tiles. Make sure the size of the ceiling tiles is equal. You can use a sharp cutter to cut the straight shape of drop ceiling tiles.
6. Set the tiles on the grid: In the last point, you need to lift the ceiling tiles. In this, you need to set the ceiling tiles in your grid. You have to begin fixing the ceiling tiles from the center of the roof.