Download
1 / 13
130 likes | 155 Vues
Undoubtedly, a parking lot sustains harm every day. In Hamilton and Burlington, <br>degradation can also be accelerated by temperature changes alone. Freeze-thaw cycles <br>naturally cause constant expansion and contraction (cracks), which increases the risk of <br>water ingress. When the water freezes, the problem is exacerbated further by the expansion <br>of the fractures.<br>

E N D
GETTING BEAT UP There is no doubt that a parking lot experiences damage every day. Additionally, temperature fluctuations by themselves can exacerbate degradation in Burlington and Hamilton. Constant expansion and contraction (cracks) are naturally brought on by freeze-thaw cycles, which raises the danger of water intrusion. The issue is then made even worse when the water freezes, expanding the fractures even more.
The devastating impact of everyday traffic and the amount of tiny (and huge) fuel and chemical spills and leaks from vehicles, equipment, etc. that occur in the parking lot all contribute to its stress. Even our pleasant and warm sun contributes to the detrimental consequences by continuously dispersing its UV rays, speeding up oxidation and causing the asphalt to dry up and become brittle. The outcome? There is, of course, a higher chance of cracking and increased water infiltration.
The difficult task of maintaining parking lots effectively is made worse by the combination of all those variables. You must unquestionably keep your eye on the ball.
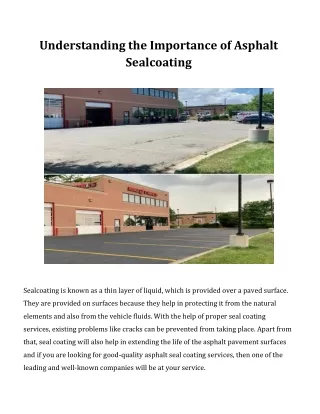
KEEP IT SURFACE-FRONT Keeping such signs of deterioration on the parking lot's real pavement is one method to achieve this. After all, the surface was created to withstand punishment and operate as a shield, preventing the degrading effects from adversely affecting the foundation material. Any parking lot maintenance program must include sealcoating in order to guarantee that the surface, or "shield," will continue to meet requirements for many years to come. Sealcoating, as the name suggests, does exactly what it says on the tin: it seals the top coat of asphalt pavement, enhancing its "shielding ability."
Even though each project will differ based on its surroundings, circumstances, and location, etc., the general procedure is detailed below.
DETERMINE THE ASPHALT'S QUALITY It is crucial to evaluate the condition of your asphalt because this will assist you decide what preparations must be made before applying the sealcoating. In making that decision, it is vital to consider the following three factors: I) Stable and well-drained II) Crack frequency and size III) Surface Free of Oil The degree of those three parameters can significantly improve or impair the performance and quality of the sealcoating application.
Fresh asphalt It often only requires that the surface have had enough time to cure and surface oils to dissolve for new asphalt sealcoating. The Asphalt Sealcoat Companies suggests a cure period of six to twelve months. A gallon of water can be poured on the surface and watched to see if the oils are gone. A reliable sign that the oils have been removed is when the water moves in a uniform sheet. However, if you see "rings" or "breaks" in the sheeting action, this is likely a sign that the paint is not properly cured or that there is a single trouble place that needs a spot primer.
OLD ASPHALT Make a note of any trouble spots throughout the examination, particularly any that would require patching and/or crack sealing. Additionally, it is possible that the asphalt will need to be primed before the protective surface treatment is applied, depending on the age and actual condition of the surface.
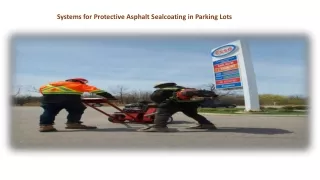
Step 1: Cleaning the Surface The surface must be carefully cleaned in order to remove any loose aggregate, powder, dirt, gravel, silt, etc., regardless of whether the surface may go straight to sealcoating or if priming is necessary. The finest cleaning outcomes are typically obtained by combining blowers, pressure washers, steel-bristle brooms, and other cleaning tools.
Step 2: Surface Preparation Repairs, crack sealing, oil spot priming, and any other special treatments are carried out once the surface has been thoroughly cleaned. Use only products that are compatible with the sealcoat being used.
Step 3: Gathering the Information Choose the product that is best for your application because different sealcoat mix patterns may offer different benefits. Follow the manufacturer's instructions for adding additives, mixing, and other material preparation procedures.
Step 4: Applying the Material The sealcoat material will be applied in accordance with the manufacturer's instructions, just like with other material handling. Much of the time, sealcoat products can be applied manually, mechanically, or both, using brushes and squeegees. Choose the most advantageous strategy based on the region of coverage, any obstructions, or other factors that may affect maneuverability. Parking lots see a lot of traffic, so always use two coats for extra durability and protection.