Download

1 / 10
100 likes | 108 Vues
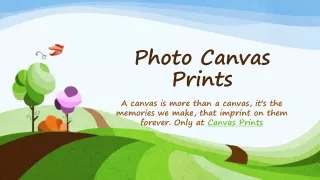
Our canvas prints bring joy, wonder, smiles, color, joy, and love in your life. Our family of highly-trained professionals has joined Canvas Bubble for their mutual love of art. With high regard for excellence and high-quality, more than a 100 Canvas Specialists have strived for more than 20 years to bring beauty and joy into your life with our elegant frames, graceful prints, and canvasses that are nothing short of masterpieces. We create products that will remain a fixture on your walls for years to come. Our products are made with innovative technology, with inventive printing, designing.

E N D
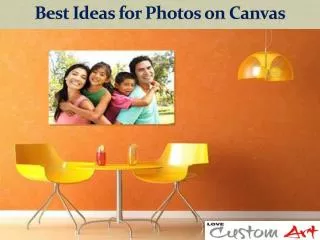
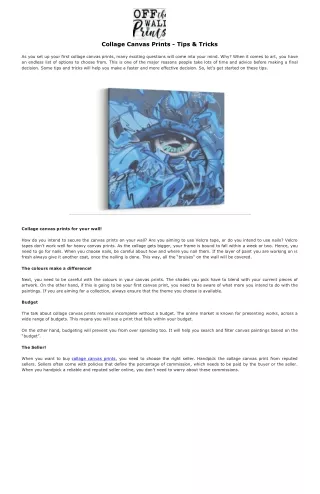
Making Customized Material Prints Material Prints are large business right now, with thousands being sold for gifts in the UK consistently. The new expansion in the ubiquity of specialists, for example, Andy Warhol and road craftsman Banhashave extraordinarily impacted plan and style, with many top inside fashioners utilizing Material Prints in their plans. This expansion in notoriety has prodded numerous to get imaginative and take a stab at making their own customized Material Wall Craftsmanship. This article will direct you through 4 basic advances with the goal that you also can make fabulous material prints.
Stage 1: Pick a Picture Perhaps the main step while making your own special customized Material Print is to pick the right picture. While choosing your photo to change into a Material Print you ought to pose yourself a couple of inquiries. Is the photograph one that you will be glad to see consistently? Will it fit in with your home's stylistic theme? Is it of a sufficiently high quality to legitimize burning through cash on it to change it into a great material print? On the off chance that the solution to these inquiries is all "Yes!" continue on toward stage 2. On the off chance that you are battling with thoughts, however wish to add a material print to your home, then, at that point, well known thoughts incorporate; family photographs, pets, scene photographs, side interests, and interests.
When you have a picture or photo you can additionally customize it by altering and altering it utilizing PC programming like PhotoShop. By being imaginative you can wind up for certain astonishing outcomes, and the best part is, it will be novel!
Stage 2: Print the Picture Your subsequent stage is clearly to have your photograph or picture imprinted onto material. The simplest method for doing this is to bring your picture down to your closest expert printing organization, which will have your picture imprinted onto excellent material inside two or three hours. Nonetheless, contingent upon the size of the material, it is feasible to finish this step at home yet you should possess a printer fit for imprinting onto material. You can actually look at this by alluding to your printer's Fabricates Manual. You will likewise have to buy some material or poly material sheets to print onto. Peruse your printer's manual cautiously and follow the means that guide you through the arrangement for imprinting onto material. When your print is finished you should hang tight for the ink to totally dry prior to proceeding to stage 3.
Stage 3: Stretch and Edge Material Presently for the specialized piece, when your material prints are dry you really want to stretch and approach them. Material Prints are customarily extended over a wooden edge, this keeps the material tight and makes for a smooth and expert looking completion. The way to extending a material is to keep the material tight, you can purchase devices that will aid this. As a benchmark, when appropriately extended a material print ought to seem like a drum when tapped. Again you can take your Material to a be capable expert to do this for you. In any case, in the event that you are feeling imaginative and wish to do this without help from anyone else it is conceivable, yet may take practice.
Perfectly crease the material around your wooden edge, and utilizing a staple firearm secure one side of the material to the casing. Then, at that point, utilizing exceptional material pincers, pull the material tight, and secure it again utilizing the staple weapon. When gotten on all sides, and the material is tight, cover the staples major areas of strength for with tape for a perfect completion. You can then pick to approach your material or leave it for all intents and purposes and hang it up. Outlining looks perfect assuming your picture is imaginative, yet many favor the advanced look of an unframed material print.
Stage 4: Hang Material At long last, the time has come to hang your new material photograph print. Hanging your completed Material Wall Craftsmanship is simple, it is very much like hanging some other work of art or mirror. There are numerous compelling strategies. You can utilize a composition hanging set, reflect plates, or 3M Order Strips, all are promptly accessible at any legitimate D.I.Y shop. The hardest piece of hanging your material print will pick the ideal spot to flaunt your new, fabulous Material Wall Craftsmanship!
Book Your canvas now Custom Canvas Prints With Words Tabletop Canvas Print Custom Panoramic Prints Canvas Prints Panoramic Personalized Photo Collage Canvas
Contact Us Address : Tampa, FL, United States Mobile : +1 (813) 403-6602 Gmail : canvasbubbleusa@gmail.com Website : https://www.canvasbubble.com/