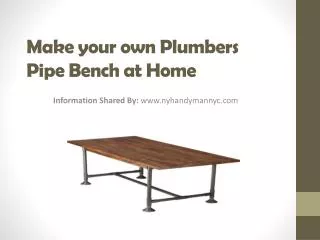
Make your own plumbers pipe bench
Of-course all of them come for a price which depends primarily on the materials used and the time invested by the maker. You can also make your own table or bench by using many techniques and material of choice. One of them is the plumbers pipe bench that can be made using plumbing pipes and can be put in any corner of your house to function as a base for keeping decoration items or other things that come in use frequently.

Make your own plumbers pipe bench
E N D
Presentation Transcript
Make your own Plumbers Pipe Bench at Home Information Shared By: www.nyhandymannyc.com
When we talk about home furniture, the options to choose from are endless. Especially, when it comes to choosing side tables and desks for the home, there are endless number of options - makes and sizes.
If you are fascinated with plumber’s pipes or recycling in general, you should be willing to try making one of these. Let’s go through step by step instruction on how to make a plumbers pipe bench using salvaged gas pipes and a wooden board.
Things you’ll need: In order to get down to make this interesting plumbers pipe bench, you will need 12” pipe, 30” pipe, 3” pipe, 6” pipe, 4 x ½” elbow, black iron T, rubber caps, screws, wrench, pliers and wooden board.
Step 1: First of all connect the 8 x 3” pipes on each side to the 4 x 6” inch pipes using the 6 x black iron T that act as the legs of the bench.
Step 2: After you have connected the 3” pipes to the 6” pipes on each side, you have a solid skeletal base for the table. Now connect the 30” pipe to the black iron T in the middle of the 3” T.
Step 3: Now, attach another set of the 3” inch pipe to the top of 6” pipe with ½” elbow as the connecting link.
Step 4: Make sure all the connections are securely tight using a wrench and if you want extra strength you can apply some industrial adhesive to secure pipes permanently.
Step 5: Now take the wooden board and smoothen out its edges, so that there are no sharp corners that might get caught in the clothing while walking.
Step 6: Now you can choose to keep the wooden board on top of the bench legs without securing them permanently or making a housing for the table to get hinged onto the legs.
Step 7: You can choose to attach wheels to the bench for easy portability or keep it simple by attaching rubber caps.