Download
1 / 8
80 likes | 110 Vues
Have you tried uploading your Laravel project but failed? It can be due to the absence of an SSH. Let us help you in uploading your Laravel project on cPanel.

E N D
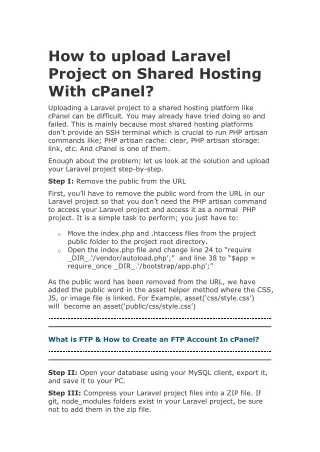
How to upload Laravel Project on Shared Hosting With cPanel? Uploading a Laravel project to a shared hosting platform like cPanel can be difficult. You may already have tried doing so and failed. This is mainly because most shared hosting platforms don’t provide an SSH terminal which is crucial to run PHP artisan commands like; PHP artisan cache: clear, PHP artisan storage: link, etc. And cPanel is one of them. Enough about the problem; let us look at the solution and upload your Laravel project step-by-step. Step I: Remove the public from the URL First, you’ll have to remove the public word from the URL in our Laravel project so that you don’t need the PHP artisan command to access your Laravel project and access it as a normal PHP project. It is a simple task to perform; you just have to: Move the index.php and .htaccess files from the project public folder to the project root directory. Open the index.php file and change line 24 to “require _DIR_.‘/vendor/autoload.php’;” and line 38 to “$app = require_once _DIR_.‘/bootstrap/app.php’;” o o As the public word has been removed from the URL, we have added the public word in the asset helper method where the CSS, JS, or image file is linked. For Example, asset(‘css/style.css’) will become an asset(‘public/css/style.css’) What is FTP & How to Create an FTP Account In cPanel? Step II: Open your database using your MySQL client, export it, and save it to your PC. Step III: Compress your Laravel project files into a ZIP file. If git, node_modules folders exist in your Laravel project, be sure not to add them in the zip file.
How to Add a New Domain To Cpanel? Step IV: Login to your cPanel Create a database & user. (Make sure to save the database name, user, and password into a text file in a safe place.)
Add New User Add User to Database Step V: Go to the phpMyAdmin tab and select the database we have created in ‘Step IV’. Now go to the import tab and import the database file we have exported in ‘Step II’.
How To Install WordPress On VPS Hosting Step VI: Open your File Manager in cPanel and upload the ZIP file of your Laravel project into the public_html directory and extract the ZIP file. The ZIP file should be uploaded and extracted directly in the public_html folder and not inside any subfolder.
Move an email account from one cPanel server to another Step VII: Now update your database details into the config file by opening the database.php file from the config folder and updating your database name, username and password into the database.php file. Now save the file. (Any sensitive credentials should not be uploaded in the env file in shared hosting.)
Copy this & modify the details: 'mysql' => [ 'driver' => 'mysql', 'url' => '', 'host' => '255.255.255.255', 'port' => '123', 'database' => 'yourdatabase', 'username' => 'yourusername', 'password' => 'your_p@$$word', 'unix_socket' => '', 'charset' => 'utf8mb4', 'collation' => 'utf8mb4_unicode_ci', 'prefix' => '', 'prefix_indexes' => true, 'strict' => true, 'engine' => null, 'options' => extension_loaded('pdo_mysql') ? array_filter([ PDO::MYSQL_ATTR_SSL_CA => env('MYSQL_ATTR_SSL_CA'), ]) : [], ], Congratulations, You have successfully uploaded your Laravel project to your cPanel. To make your project secure and protect your .htaccess and .env files, open the .htaccess file from the public_html folder and write the following code to disable direct access and directory browsing:
Copy this: #disable directory browsing Options – Indexes #PROTECT ENV FILE <Files .env> Order allow,deny Deny from all </Files> #PROTECT ENV FILE <Files .htaccess> Order allow,deny Deny from all </Files> You have successfully deployed your Laravel Project to cPanel and secured it from direct access and directory browsing. Conclusion Uploading a Laravel project on a shared hosting platform can be difficult, but it is not impossible. In this article, we have successfully uploaded your first Laravel project to cPanel. Source - https://www.hostitsmart.com/manage/knowledgebase/228/How-to- upload-Laravel-Project-on-Shared-Hosting-With-cPanel.html