Download
1 / 59
640 likes | 975 Vues
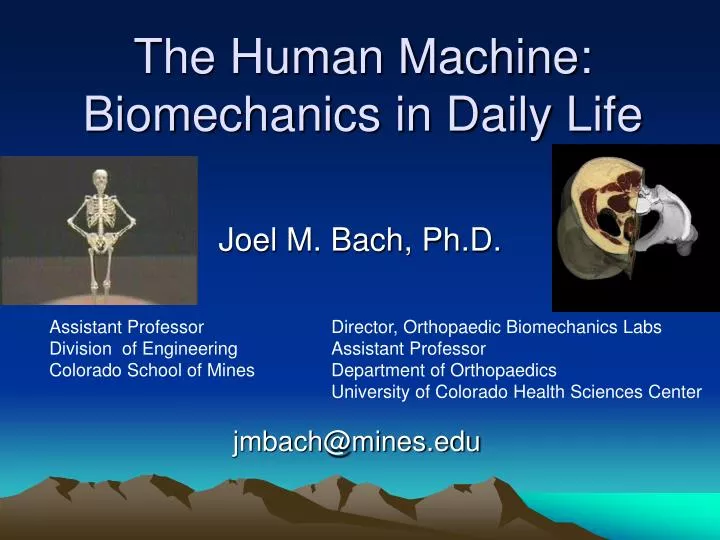
The Human Machine: Biomechanics in Daily Life. Joel M. Bach, Ph.D. Assistant Professor Division of Engineering Colorado School of Mines. Director, Orthopaedic Biomechanics Labs Assistant Professor Department of Orthopaedics University of Colorado Health Sciences Center. jmbach@mines.edu.

E N D
The Human Machine: Biomechanics in Daily Life Joel M. Bach, Ph.D. Assistant Professor Division of Engineering Colorado School of Mines Director, Orthopaedic Biomechanics Labs Assistant Professor Department of Orthopaedics University of Colorado Health Sciences Center jmbach@mines.edu
Biomechanics • The study or application of mechanics to biological systems. • The study of the forces that act on the body and their effects on the body’s movement, size, shape, and structure.
Who uses musculoskeletal biomechanics? • Biomedical and biomechanical engineers • Medical device companies • Orthopaedic, sports medicine, and rehabilitation doctors • Physical and occupational therapists • NASA • Automotive and aircraft companies • Sports and safety equipment designers • Athletic trainers, coaches, and athletes.
Biomedical Engineering • Biomedical Engineer – • Apply engineering principles to understand, modify, or control biologic systems • Must have a good understanding of engineering fundamentals as well as anatomy, physiology, and medicine.
Tasks of biomedical engineers • Research in new materials for artificial organs, tissues, implants, etc. • Develop new diagnostic instruments • Develop computer models of physiologic systems and functions • Design imaging systems, sensors, organs, implants, instruments • Study normal and abnormal function to develop new methodologies of treatment.
The Skeletal System • The skeletal system protects and supports our organs, helps with movement, produces blood cells, stores minerals • The human skeletal system normally • has 206 bones • has over 200 articulations • accounts for 12 to 20% of total body weight.
The Muscular System • Muscles – maintain posture, generate heat, provide driving force for movement • Muscles are the actuators of the musculoskeletal system.
The Muscular System • The human muscular system normally • has approximately 640 skeletal muscles • accounts for 36 to 45% of total body weight.
Muscle Contraction • Muscles are unique compared to other tissues of the body, they can contract • Contracting muscles • Produce or resist forces • Muscles can produce or resist very large forces • the bigger the muscle, the more force it can produce or resist • Change their length • Muscles can shorten by 1/5 to 1/3 of their original length.
Muscles and Tendons • Tendons connect muscles to bone • Some muscle connect directly to bone • Tendons may wrap around pulley-like structures • Tendons are strong elastic bands, like very stiff rubber bands.
Function of Tendons • Allow large cross-section muscles to attach to a smaller area of bone • Reduce the diameter of our joints • Facilitate pulley-like structures.
Functions of Levers • Increase the effect of an applied force • Increase the effective speed of a movement.
Experiment #1 Elbow Flexion – Muscle Forces
Elbow Motion • The elbow is one of the simplest joints in our bodies • It is basically a hinge, just like on a door • One pair of motions is possible • Flexion • Extension.
Upper Arm Muscles • Two muscle groups move the elbow, the flexors (biceps) and the extensors (triceps).
Holding a Ball • If you want to hold a weight in your hand, and flex your elbow, you must contract your biceps muscle • The force in the biceps muscle can be calculated from geometry.
Experiment 1 - Items needed • Wooden arm model (the hinge is the “elbow”, the wooden piece with rings is the “forearm”, the vertical wooden piece is the “upper arm”, the rope is the “biceps” muscle.) • Weighted ball • Fishing scale.
Experiment 1 - What to do • Connect the rope to ring A on the arm • Using the hook on the fishing scale, pull on the other end of the rope to flex the “elbow” until it is almost making a 90˚ angle. • Have someone attach the magnet on the ball to the magnet at the end of the “forearm” • Gently pull on the fishing scale and record the “muscle tension” required to slowly flex the “elbow” further. • Repeat this procedure for rings B, C, and D
Experiment 1 - Discussion • Which ring required the greatest “muscle tension”? • Why do you think each ring location required a different “muscle tension” to flex the elbow? • Can you relate the moment arm ratio values listed in the table to the measured “muscle tensions”? • In our bodies, the biceps muscle is attached at a point similar to A. What effect does this have on the biceps force needed to perform activities (brushing your teeth, eating, etc.)?
Experiment 1 – Additional Info • It is possible to predict the “biceps” muscle force needed to flex the elbow. • The equation to find the BicepsForce is as follows;
Experiment #2 Elbow Flexion – Muscle Shortening
Experiment 2 – Items Needed • Wooden arm model (the hinge is the “elbow,” the wooden piece with rings is the “forearm,” the vertical wooden piece is the “upper arm,” the rope is the “biceps” muscle.) • Measuring stick.
Experiment 2 – What to do • Connect the rope to ring A on the arm • Pull on the other end of the rope until the “elbow” just starts to flex. Mark where the end of the rope is. • Continue to pull on the end of the rope to flex the “elbow” until it is flexed as far as it will go. Mark where the end of the rope is now. • Measure the distance between your two marks. This is the amount that the muscle would have to shorten to flex the elbow completely. • Repeat this procedure for rings B, C, and D.
Experiment 2 - Discussion • Which ring required the greatest “muscle shortening” to completely flex the elbow? Which required the least? • Why do you think each ring location required a different “muscle shortening” to fully flex the elbow? • In our bodies, the biceps muscle is attached at a point similar to A. What effect does this have on the biceps shortening needed to perform activities (brushing your teeth, eating, etc.)?
Experiment 2 – Additional Info • Our muscles can only shorten by 1/5 to 1/3 (20% to 33%) of their length. • If we assume that the biceps muscle has a tendon that is 6 centimeters long (and tendons don’t shorten) then it is possible to determine the muscle length for each “Biceps” attachment point. • We can then calculate the maximum amount that a “Biceps” muscle could shorten for each “Biceps” attachment point.
Experiment #3 Tendons as Springs
Stretch-Shortening Cycle • Examples • Shoulder flexors and adductors • wind-up of baseball pitchers and football quarterbacks • Trunk and shoulder muscles • backswing of golf shot or baseball bat swing • Calf muscles (Gastrocnemius) • running and jumping.
Experiment 3 – Items Needed • Yourself • Piece of colored chalk (a different color for each member of your group) • Measuring stick
Experiment 3 – What to Do • Hold the chalk in one hand. Stand sideways, with your shoulder next to the wall (the side holding the chalk). • Squat down, pause 5 seconds, then jump as high as you can and mark your high point on the paper with the chalk • Now repeat this but don’t pause at the bottom. At the lowest point of the squat immediately reverse your direction and jump. • Record the height of your two marks
Experiment 3 - Discussion • Which jump was the highest? Which was the lowest? • Why do you think that you were able to jump higher in one case than the other?